22
12.08
Strapex STB 63
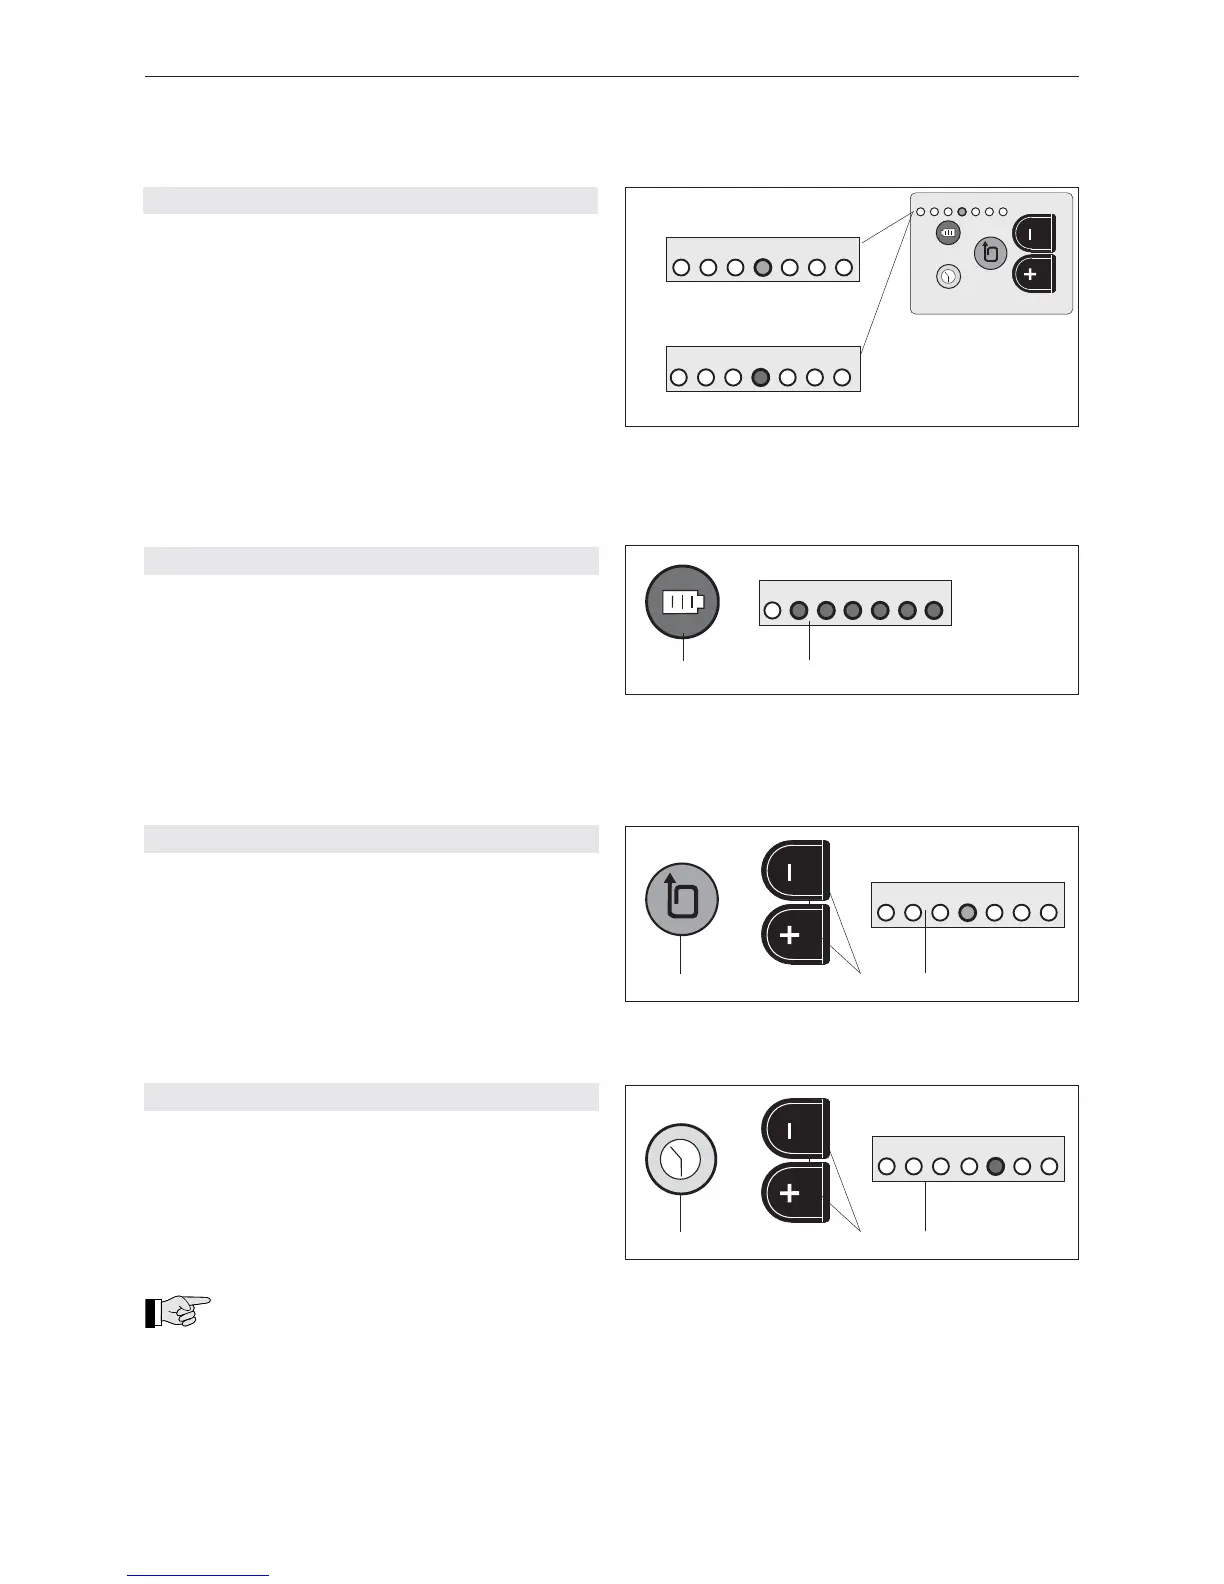
6.3 OPERATING PANEL
a) Standard indication (green)
The current strap tension setting is monitored with
inserted and charged battery.
1 = minimum strap tension (approx. 400 N)
7 = maximum strap tension (approx. 1200/2000 N*)
* depending on strap tension range, refer to chap-
ter 6.3.4.
– For adjustment of strap tension, refer to chapter
6.3.2.
b) Battery empty indication (red)
If the inserted battery is empty, the LED switches to
red and the battery must be charged, refer to chapter
5.3.
Fig. 13
7
6
5
4
3
2
1
a) Standard indication
green
red
b) Battery empty indication
max. min.
7
6
5
4
3
2
1
7
6
5
4
3
2
1
6.3.2 SETTING STRAP TENSION
– Depress strap tension push button (15/1) briefl y
until LED indicator (15/3) fl ashes.
– Depress – or + push button (15/2) until fl ashing
LED indicator shows required strap tension (wait
two seconds until new setting is saved).
1 = minimum strap tension (ca. 400 N)
7 = maximum strap tension (ca. 1200/2000 N*)
* refer to Chapter 6.3.4.
6.3.3 SETTING WELDING TIME
– Depress welding time push button (16/1) briefl y
until LED indicator (16/3) fl ashes.
– Depress – or + push button (16/2) until fl ashing
LED indicator shows required welding time (wait
two seconds until new setting is saved).
1 = minimum welding time
7 = maximum welding time
Cutting:
The cutting of the strap is infl uenced by the
welding time. If the tool cuts badly, extend the welding
time by one interval.
Fig. 14
7
6
5
4
3
2
1
max. min.
red
1
2
Fig. 15
1
2
7
6
5
4
3
2
1
green
max. min.
3
Fig. 16
1
2
red
max. min.
3
7
6
5
4
3
2
1
6.3.1 CHECKING BATTERY CHARGE
– Depress battery push button (14/1) briefl y. Read off
battery charge on LED indicator (14/2).
1 = empty battery
1–3 = minimum charge (battery must be charged
soon)
1–5 = decreasing charge (charging possible)
1–6 = good charge (charging would damage the
battery)
1–7 = maximum battery charge (charging would
damage the battery)