8 | English
GRILLE PANEL
Remove the bottom grille frame by extracting the two
lower corner screws from each side of the grille assembly.
Refer to the illustration below.
With the bottom section removed, slide the custom grille
panel into the frame. If the panel is thinner than 6 mm, a
filler material will need to be installed to achieve a proper
fit. Once the panel is installed, reattach the bottom grille
frame by sliding the corner brackets back into position,
then reinstall the four corner screws.
BOTTOM
GRILLE
FRAME
Grille frame assembly
Panel Installation
Custom Panels
For overlay and flush inset applications, custom door and
grille panels must be installed. The panel size is critical for
a proper fit. To verify panel requirements and dimensions,
refer to the Sub-Zero Design Guide at subzero.com/specs.
IMPORTANT NOTE: Flush inset applications require a mini-
mum 13 mm reveal on all sides.
Finish all sides of the custom panels. They may be visible
when the door is open or through the glass door.
CAUTION
A solid panel cannot be installed over the glass door.
Panel assembly (rear view)
6
mm
3
mm
CUSTOM
PANEL
SPACER
PANEL
BACKER
PANEL
19
mm
typical
Panel Installation
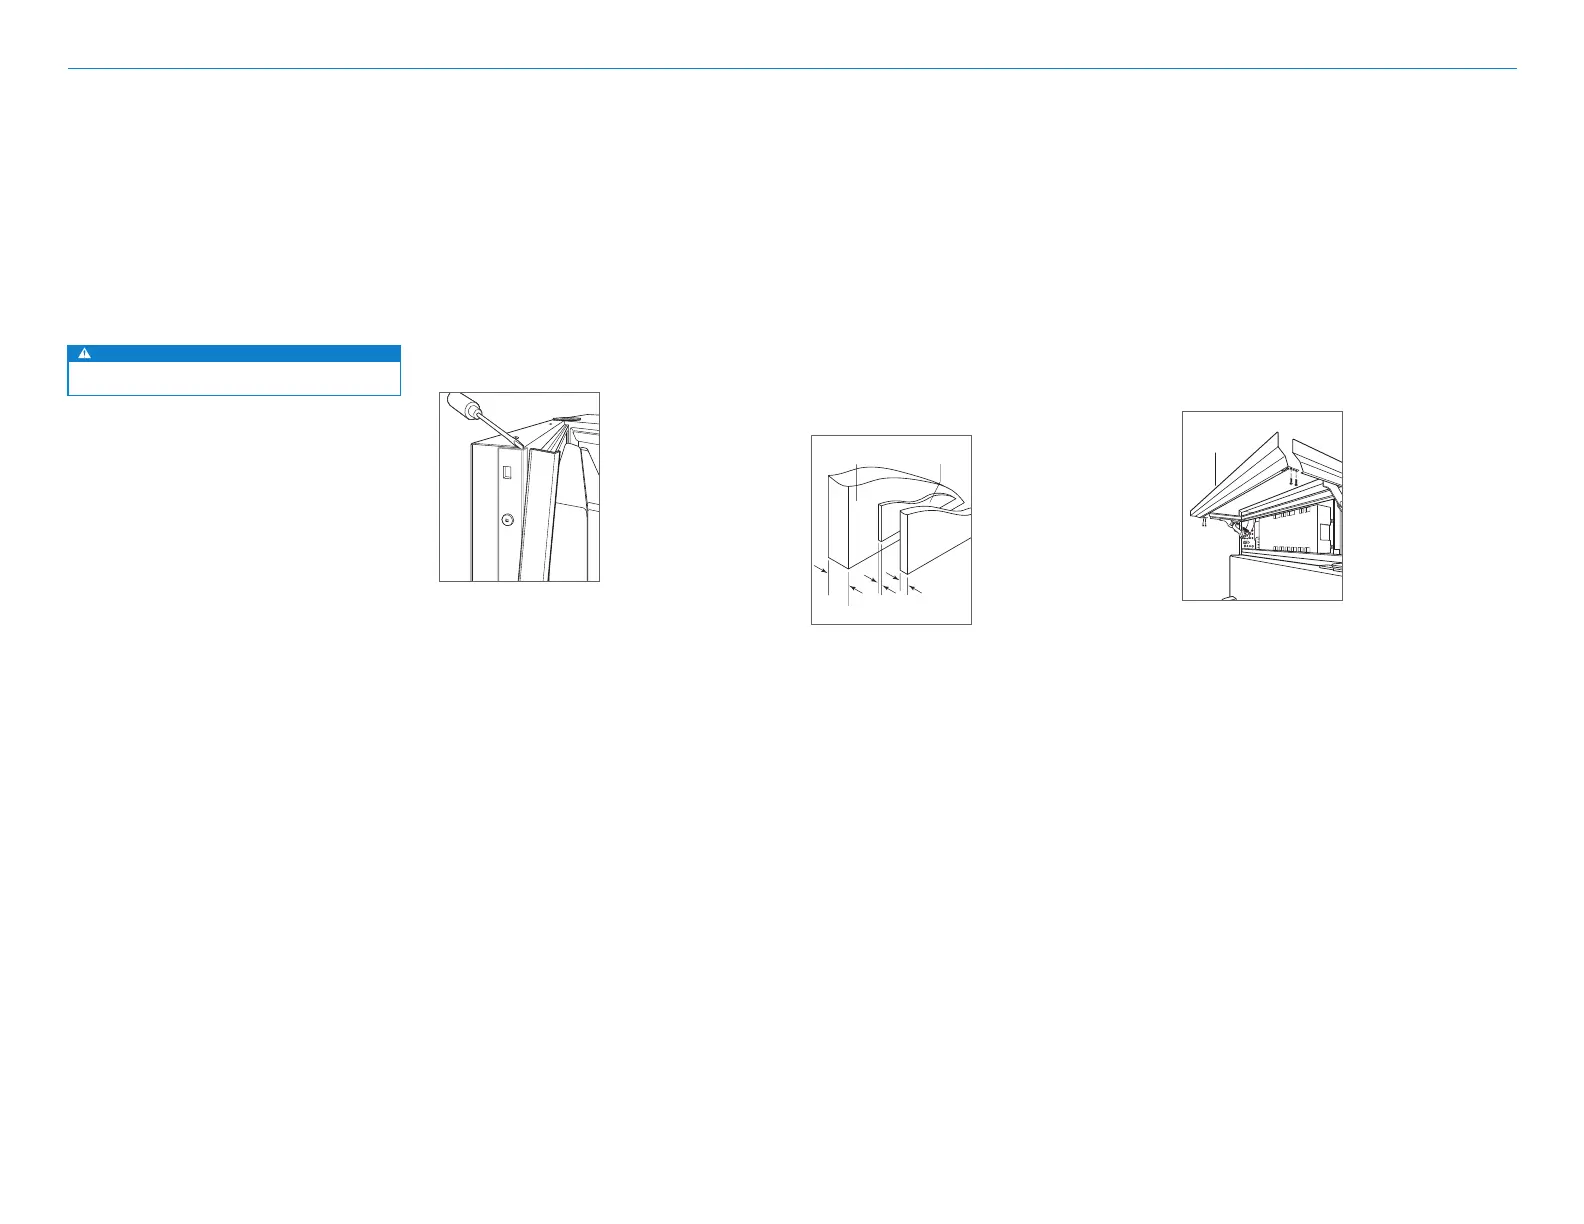
DOOR PANEL
To install the custom door panel, remove the handle side
trim molding. Insert a screwdriver tip into the top corner
slot on the handle side and pop out the trim. Remove the
screws and frame. Refer to the illustration below.
The door has a 6 mm frame for the custom panel to slide
into. If the panel is thicker than 6 mm, rout an edge around
the panel or mount the panel on a sheet of 6 mm thick
material, then insert into the frame.
A 3 mm space is required between the backer panel
and the custom panel to allow the panel to slide into the
door frame. Refer to the illustration below for critical
dimensions.
Install handle hardware before inserting the panel. Large
D-style handles are recommended rather than knobs.
Screw heads must be countersunk into the panel.
Slide the panel into the frame.
To reinstall the door trim molding, insert the top of the trim
into grooves at the top of the door and work downward,
snapping the trim into clips on the door frame.
Door side trim