Section 6
MAINTENANCE
23
5.Continue tightening element byhand anaddition-
al 1/2 to 3/4 turn.
6. Restart compressor and check for leaks.
CAUTION
!
To minimize the possibility of filter element rup-
ture, it is important that ONLY replacement ele-
ments identified with the Sullair name, logo and
appropriate part number be used and that substi-
tuted elements not be used, due to the fact that
such filters may have inadequate or questionable
working pressure ratings.
AIR FILTER MAINTENANCE
Ref er to Figur e 6 --- 2 . A ir f il ter maintenanc e shoul d
be performed when the maintenance gauge shows
red or once ayear, whichever comes first. If the filter
needs tobereplaced, order element kit no.040899.
Followingyouwillfindprocedures onhowtoreplace
the air filter element.
AIR FILTER ELEMENT REPLACEMENT
1. Clean exterior of air filter housing.
2. Remove the air filter cover byloosening the wing-
nut securing the cover.
3. Remove element andclean interiorofhousing us-
ing a damp cloth.
DO NOT
blow dirt out with
compressed air.
4. At this time replace the element.
5. Reassemble in the reverse orderof thedisassem-
bly.
ELEMENT INSPECTION
1. Place a bright light inside the element to inspect
for damage or leak holes. Concentrated light will
shine through the element and disclose any
holes.
2. Inspect all gaskets and gasket contact surfaces
ofthe housing. Should faulty gaskets be evident,
correct the condition immediately.
3. If the clean element is to be stored for later use, it
must be stored in a clean container.
4. After the element has been installed, inspect and
tighten all air inlet connections prior to resuming
operation.
HEAVY DUTY AIR FILTER MAINTENANCE
R e f e r t o F i g u r e s 6 --- 3 a n d 6 --- 4 . A i r f i l t e r m a i n t e -
nance should be performed when the maintenance
gauge shows red or once a year, whichever comes
first.Followingyouwillfindprocedures onhowtore-
place the heavy duty air filter element(s).
CAUTION
!
Donot strikethe elementagainst anyhard surfaceto
dislodge dust. This will damage the sealing sur-
faces and possibly rupture the element.
AIR F ILTER ELEMENT REPLAC EMENT --- LS --- 12
1. Clean exterior of air filter housing.
2. Release tension on cover clamp assembly.
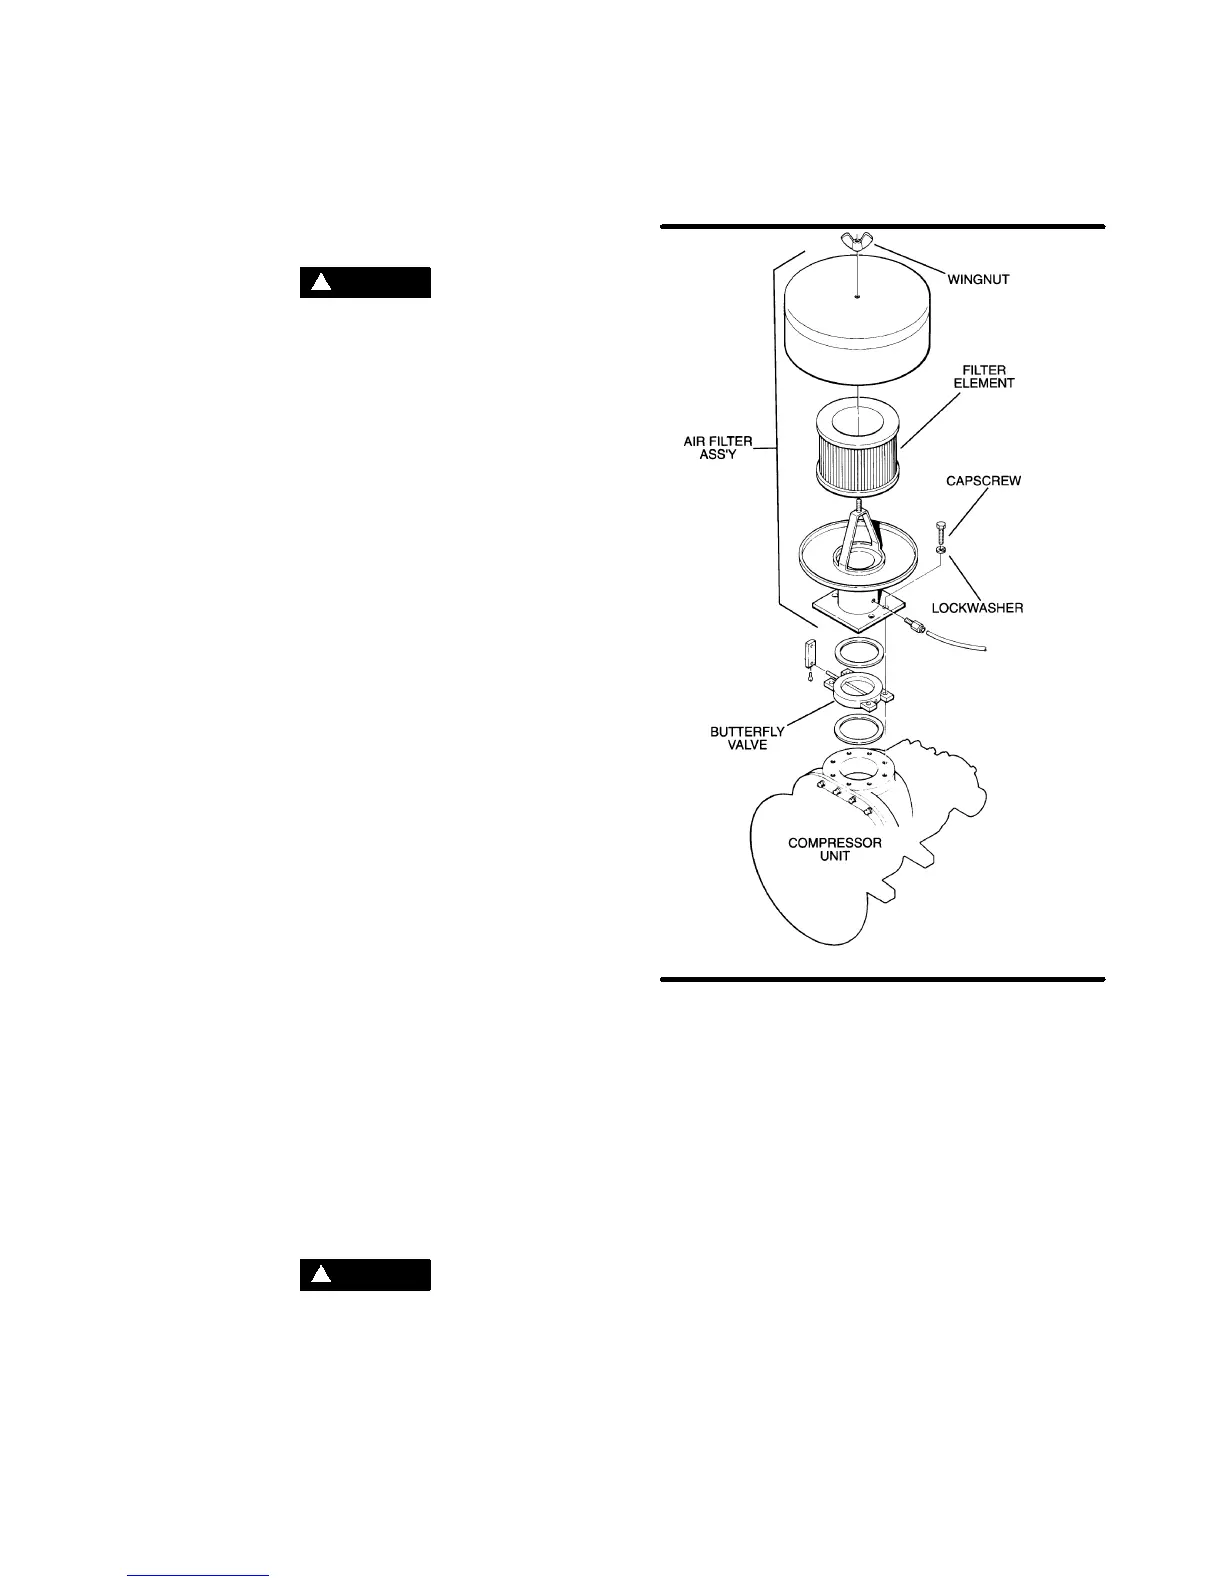
Figure 6---2 Air Filter Replacement
* Replacement Element Kit P/N 040899
(P/N 250020---315)
*
3. Remove air filter element (P/N 049301) by loos-
ening the wingnut securing the element.
4. Remove element and clean interior of housing
using a damp cloth.
DO NOT
blow dirt out with
compressed air.
5. At this time replace the element.
6. Reassemble in the reverse order of the disas-
sembly.
AIR F ILTER ELEMENT REPLAC EMENT --- LS --- 16
60---75HP
1. Clean exterior of air filter housing.
2. Remove wingnut and cover.
3. Remove primary element (P/N 047542) and sec-
ondary element (P/N 047543).
4. Clean interior ofhousing using a damp cloth.
DO
NOT
blow dirt out with compressed air.
5. Replace elements and reassemble in reverse or-
der of disassembly.
AIR F ILTER ELEMENT REPLAC EMENT --- LS --- 16
100HP
R e f e r t o F i g u r e 6 --- 4 .

 Loading...
