User’s Manual - 19
Copyright(c) 2005, Sun Microsystems, Inc. All rights reserved.
On-Screen Display
OSD How to adjust
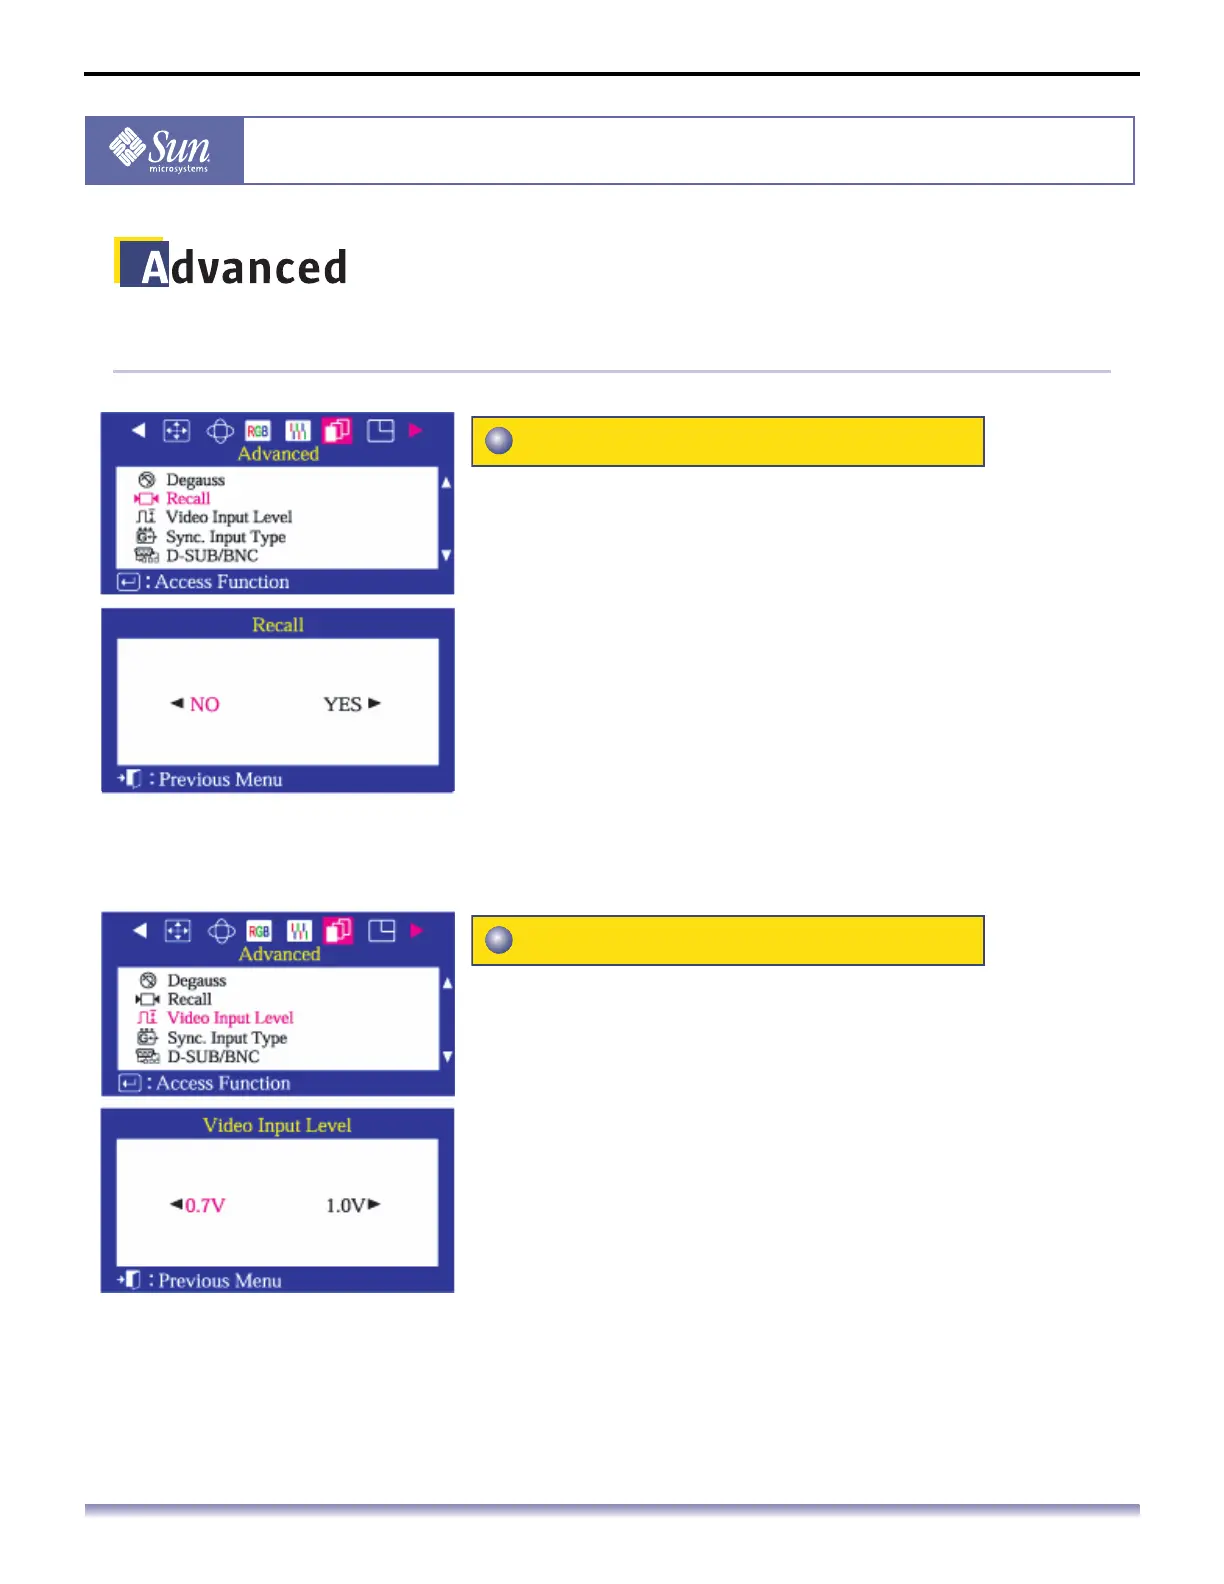
Use the recall feature to reset these monitor settings to
their original levels: Position, Size, Pincushion, Trapezoid,
Parallelogram, Pinbalance, Rotation, Clear Moire.
Note: If you have selected "Yes", all settings listed above will be
reset. All other settings will remain the same.
1. Push the Menu button.
2. Push the button or button until the Advanced screen is
displayed.
3. Push the button or button to select Recall.
4. Push the Menu button to open the Recall adjustment screen.
5. Push the button to select Yes. If you don't want to reset
the monitor, use the button to select No.
Note: Push and hold the Exit button for about 5 seconds to reset the
monitor to full factory default settings.
Some video cards use video signals higher than 1.0V
which causes the display to be very bright.
For those video cards, use this feature to select the 1.0 V
Level.
1. Push the Menu button.
2. Push the button or button until the Advanced screen is
displayed.
3. Push the button or button to select Video Input Level.
4. Push the Menu button to open the Video Input Level
adjustment screen.
5. Use the button or buttons to select 0.7 V or 1.0 V.
Recall
Video Input Level