User’s Manual - 20
Copyright(c) 2005, Sun Microsystems, Inc. All rights reserved.
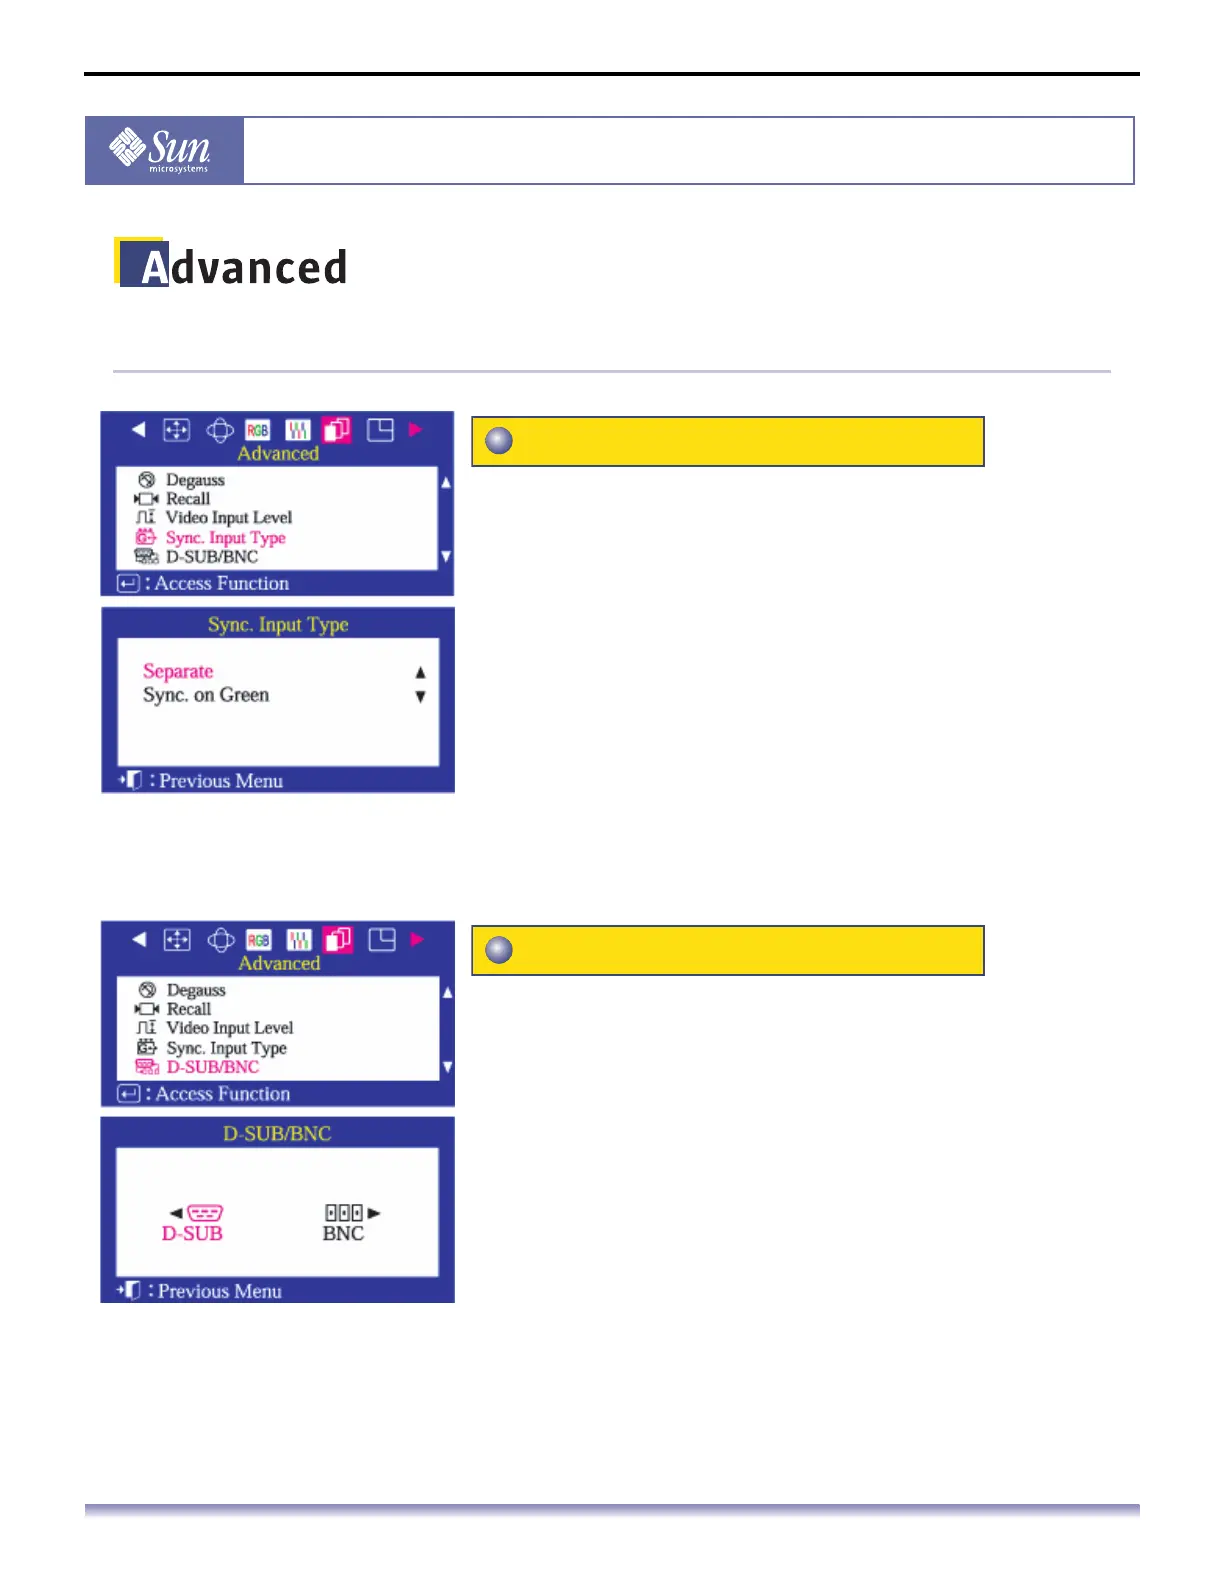
On-Screen Display
OSD How to adjust
Use this menu to set your monitor to the correct type of
synchronization. Select 'Separate' if the computer is
sending a separate synchronization signal. Select 'Sync.
on Green' if the computer expects the monitor to
synchronize with the green signal it sends. Refer to your
computer or video card user's manual to determine the
correct setting.
1. Push the Menu button.
2. Push the button or button until the Advanced screen is
displayed.
3. Push the button or button to select Sync. Input Type.
4. Push the Menu button to open the Sync. Input Type
adjustment screen.
5. Use the button or button to select Separate or Sync.
on Green.
Use this menu to choose between the signal source
connected to the BNC connector input and the signal
source connected to the D-SUB connector input. Note:
When you are finished, wait for a few seconds and the
screen will blank then display the image from the new
signal source(other computer). A cable must be
connected to both inputs to use this function.
1. Push the Menu button.
2. Push the button or button until the Advanced screen is
displayed.
3. Push the button or button to select D-SUB/BNC.
4. Push the Menu button to open the D-SUB/BNC selection
screen.
5. Use the button or button to select D-SUB or BNC.
Sync. Input Type
D-SUB/BNC