56
step 5 Strip off the insulation cover of the cable end with a stripped length of 5mm longer than the
depth of the cable lug. It is advisable to use DT×××-12 (xxx is the cross-sectional area of the
cable selected) copper lug according to the cable specification.
step 6 Crimp the cable lug.
1 Put the stripped cables inside the cable lug.
2 Tighten the cable lug with proper tools at least twice.
step 7 Install the heat-shrinkable tubing.
1 A tubing with a length of 2cm longer than the cable lug is recommended;
2 Insert the heat-shrinkable tubing into the cable lug;
3 Shrink the tubing with hot air blower.
Cable protectors are advisable in the cable crosses if the multi-core cables are
used.
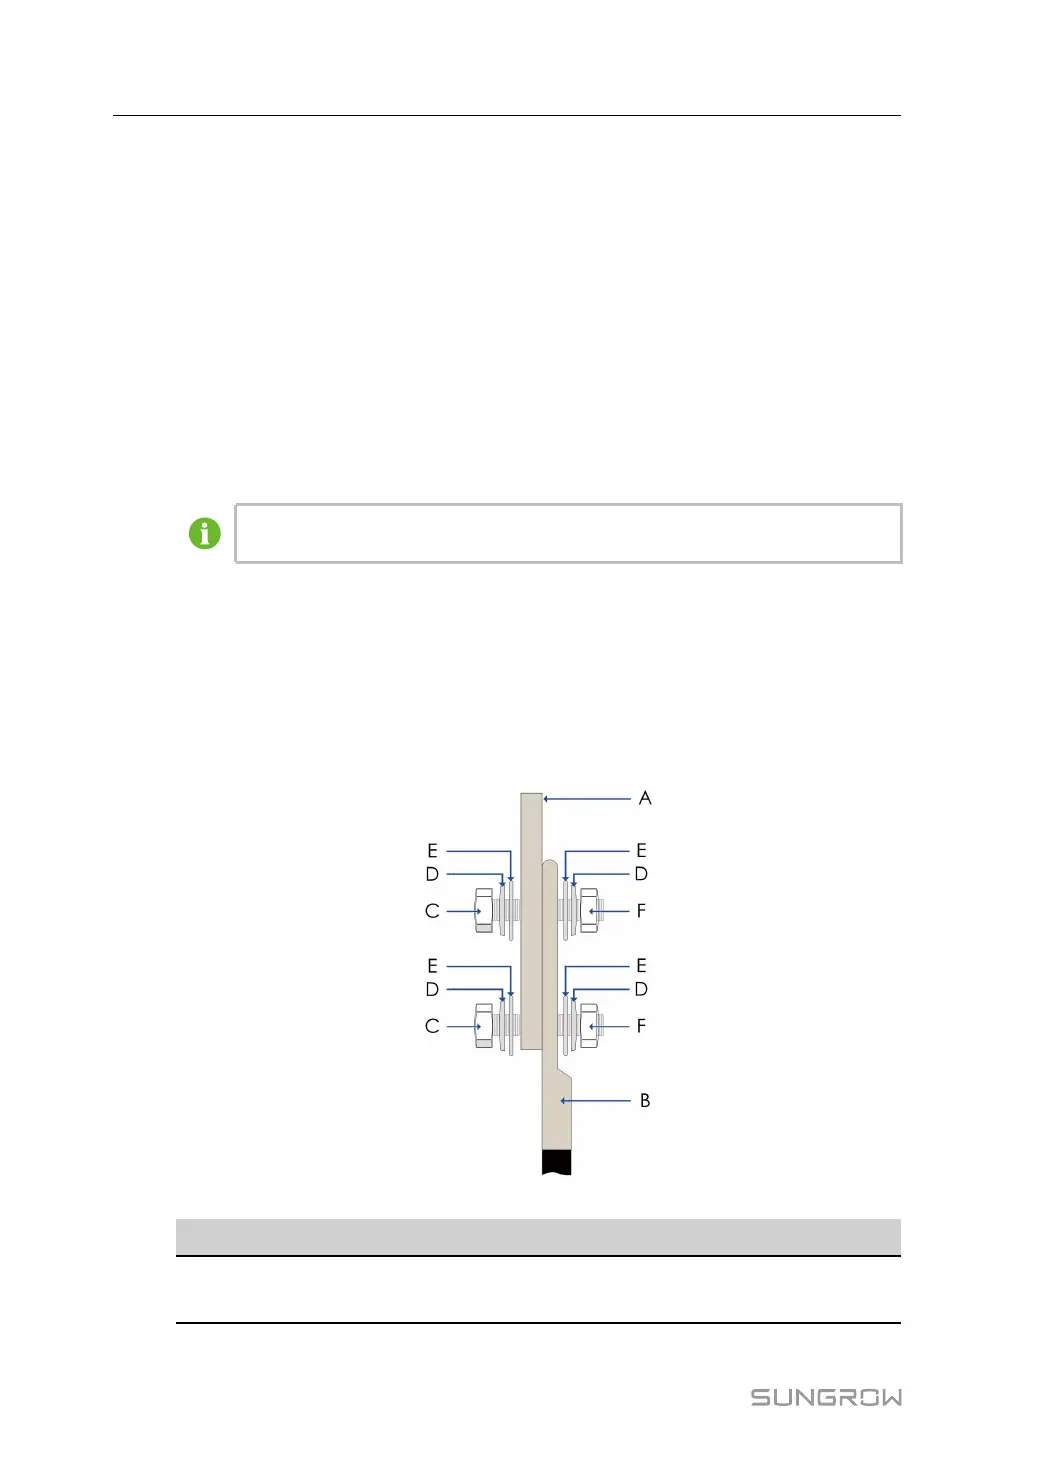
step 8 Connect cable L1 to the L1, i.e. phase A(U) in the transformer low-voltage side winding.
1 Select proper bolt to connect the cable lug to the copper bar (if it is the standard PCS,
the M12 bolt is within the scope of delivery).
2 Crimp the cable lug on the AC copper bar following the connection sequence shown in
the figure below.
3 Fasten the bolt with screwdriver or wrench with a torque of 89 N·m.
figure 6-12 Connection sequence
A B C D E F
Copper Bus Cable lug Bolt Disc spring
washer
Flat washer Nut
6 Electrical Connection User Manual
 Loading...