TD_20210219_SG30-50-110CX Commissioning Guide_V1.1 Page 17 of 21
© SUNGROW AUSTRALIA GROUP PTY LTD All rights reserved.
As we continuously improving our products, changes to this document may occur without notice.
3.6 Internet Connection
3.6.1 Connect via Ethernet Cable (Logger1000 only)
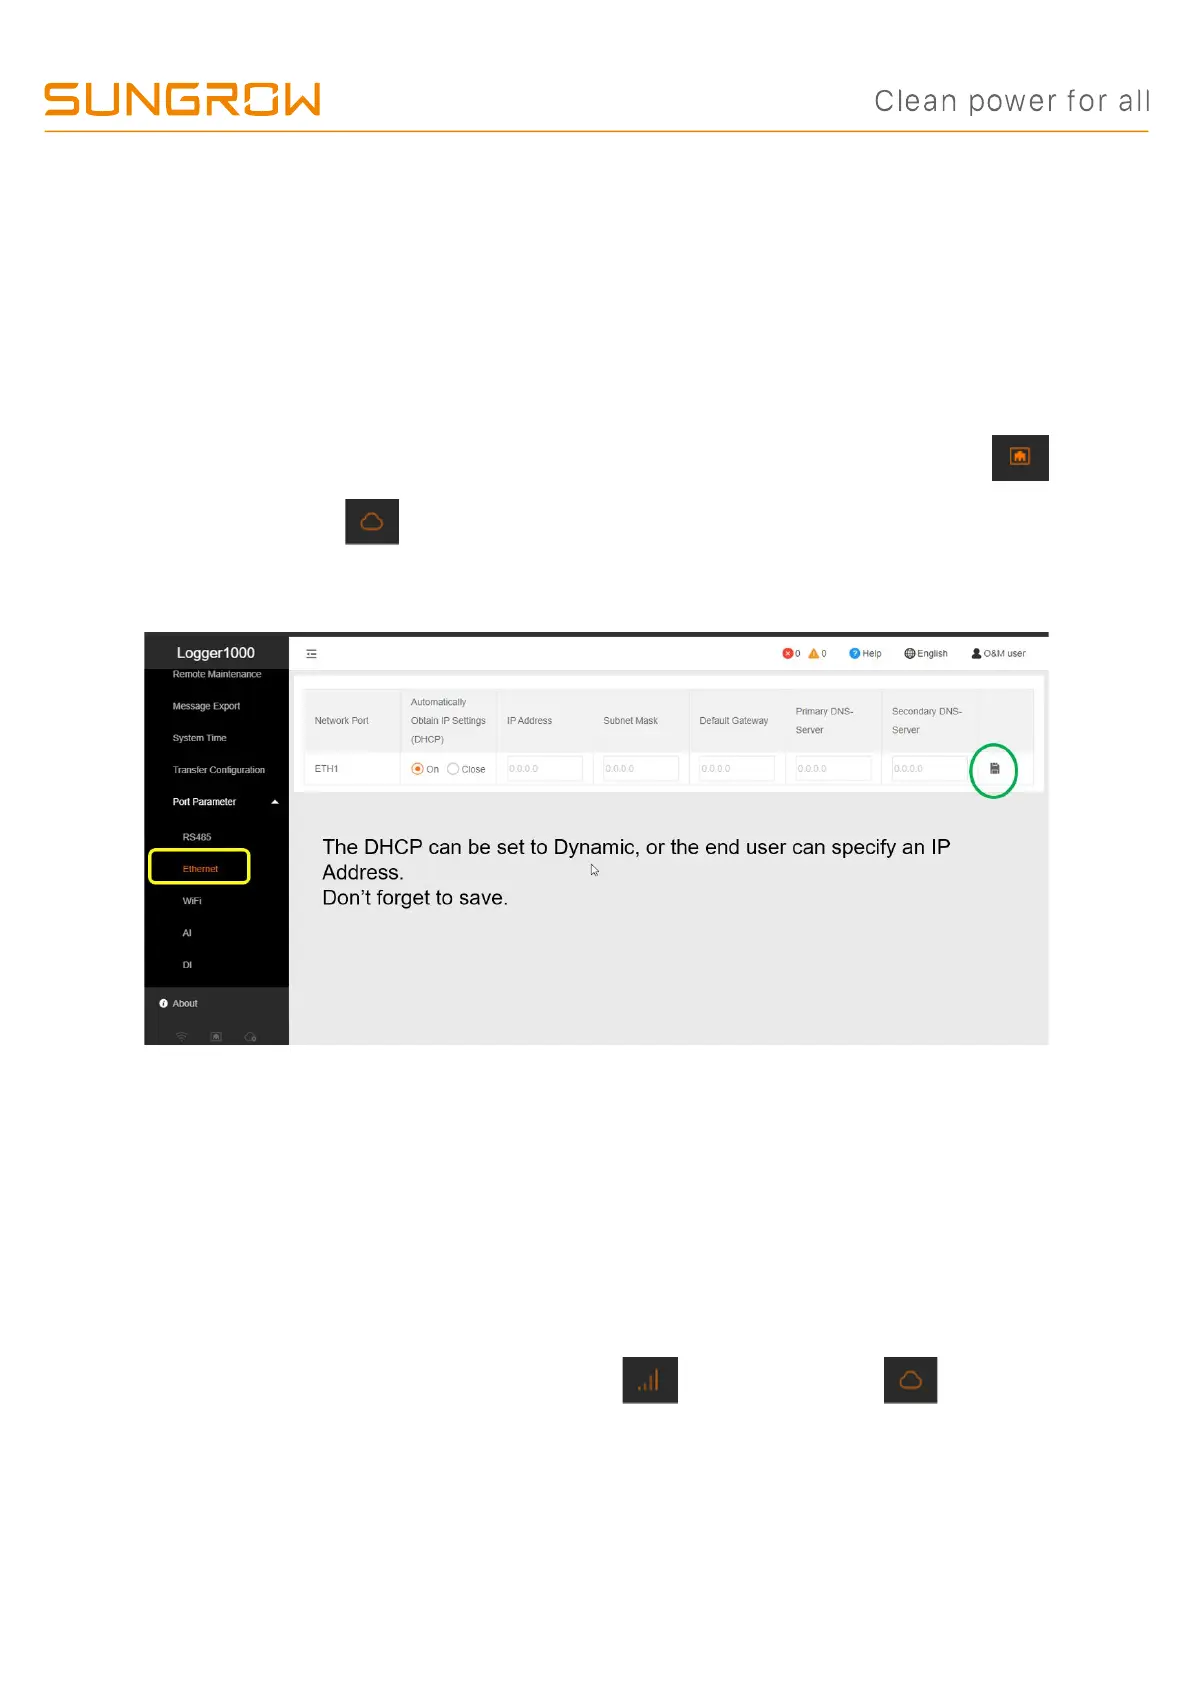
Select System -> Port Parameter -> Ethernet.
Select ON for the DHCP setting and the home router could allocate a random
IP address to Logger1000. When Logger1000 is successfully connected to internet
via Ethernet cable and communicate with iSolarCloud, the Ethernet port icon
and the cloud icon on the left column (at the bottom) will be on.
3.6.2 Connect via WiFi (Logger1000 and EyeM4C)
Select System -> Port Parameter -> WiFi.
Turn on the WiFi switch. Choose the customer network and enter the password, it will
display as Available WLAN Networks when it is connected successfully. When The
Logger1000 or EyeM4C is successfully connected to internet via WiFi and
communicate with iSolarCloud, the WiFi icon and the cloud icon on the left
column (at the bottom) will be on.
 Loading...