26
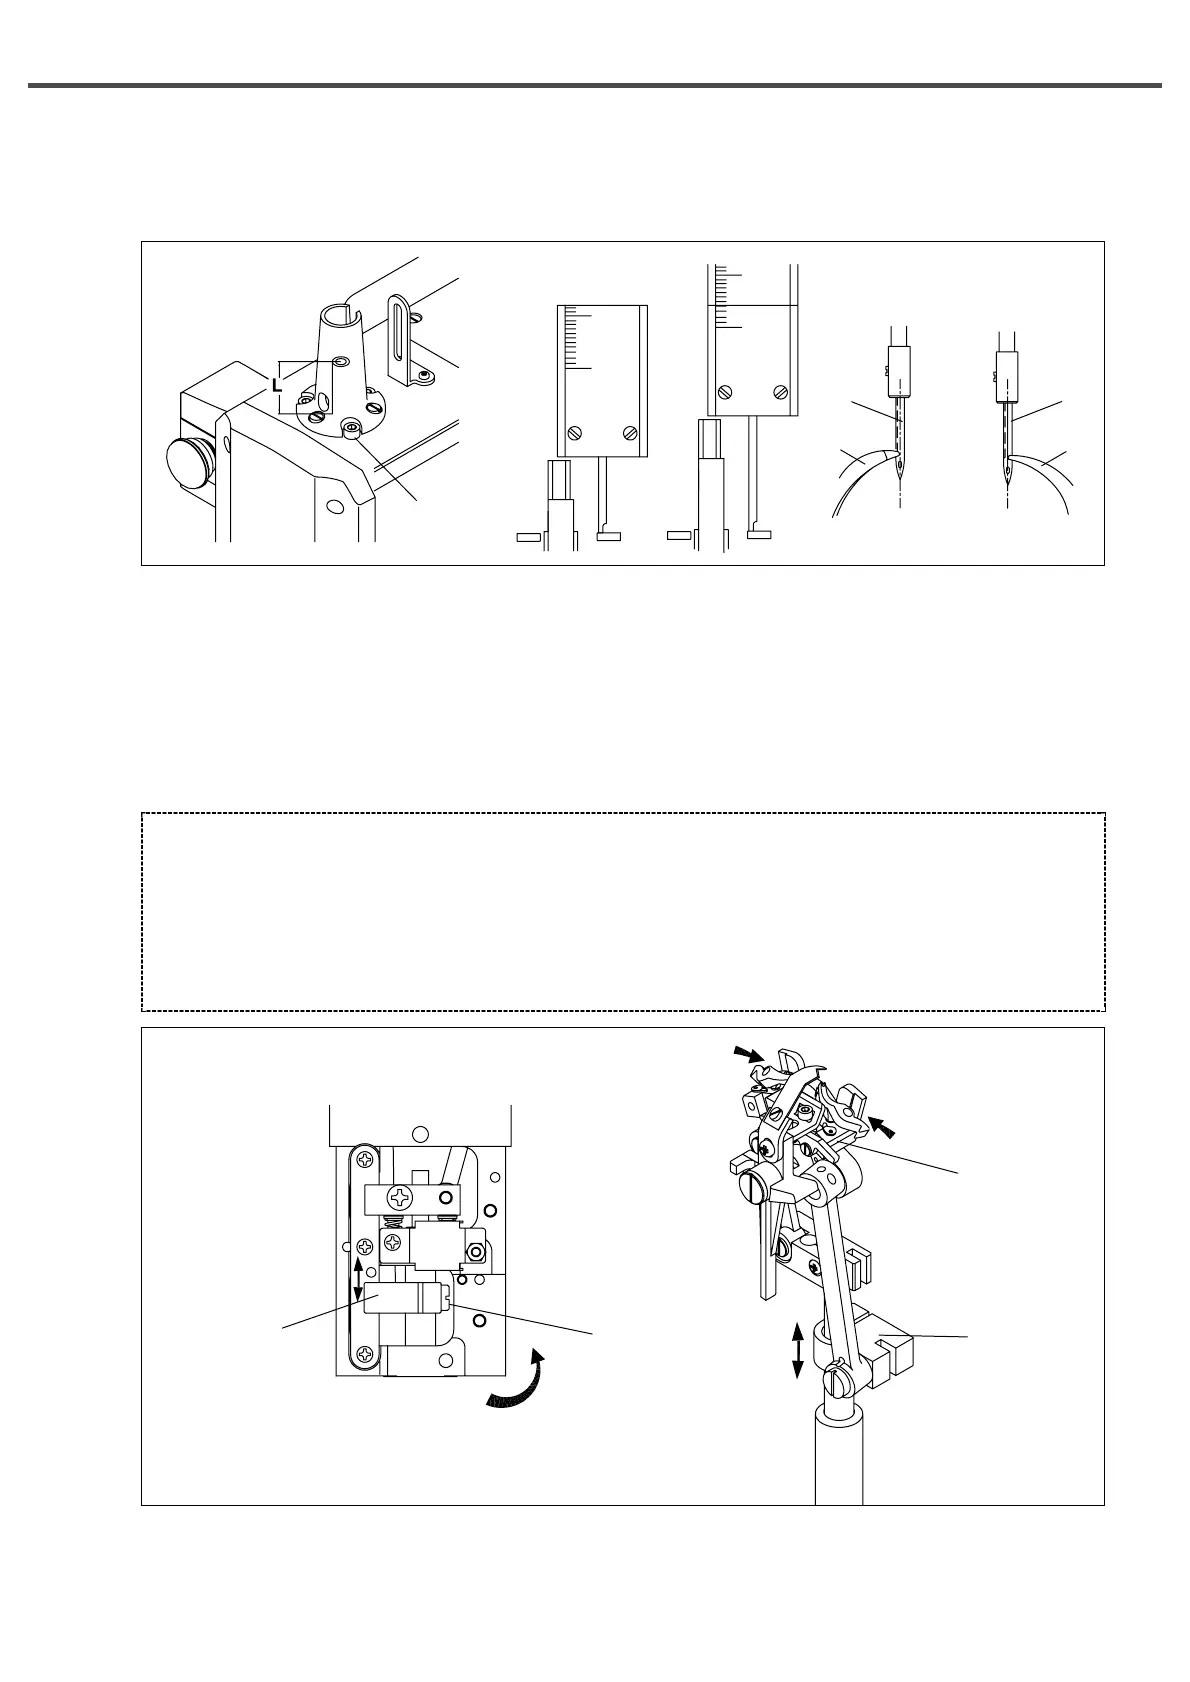
2) Adjust the timing of needle and looper
A. Move the needle bar to the lowest position.
B. When the needle is at the lowest position, use calipers to measure the distance(L) from the tip of the needle bar to the
upper side of the needle bracket.
C. When the needle① is at the left side, spin the upper axis until the end of looper(left)② is pointed at the center of the
needle. Use calipers to measure the distance from the tip of the needle bar to the upper side of the needle bracket as in B.
Calculate the difference between the measured values of B and C.
D. When the needle① is at the right side, calculate the difference between the two measurements as in C.
E.
When adjustment is needed, turn the looper base in the direction of the arrow as in the picture. Then loosen the screw④ and
move the looper link clamp⑤ up and down to move the LS holder bracket⑥ left and right (in the direction of the arrow).
[ Fig. 27 ]
[ Fig. 28 ]
[ CAUTION ]
If the needle① is at the left side, the end of the looper (left)② shall be set at the center of the needle①. If the needle
① is at the right side, the end of the looper (right)③ shall be set at the center of the needle①.
The distance from the end of the needle bar to the upper side of the needle bar bracket shall be same when the
needle① is at the left side and when it is at the right side(as well).
Do not unloosen the needle bar bracket screwⓐ(yellow paint mark) of one’s own accord after completion origin point
setting. In such a case, reset needle bar origin point.
③
①
①
ⓐ
②
⑤
④
⑥
⑤
 Loading...

