29
Chapter 3: Maintenance and Component Installation
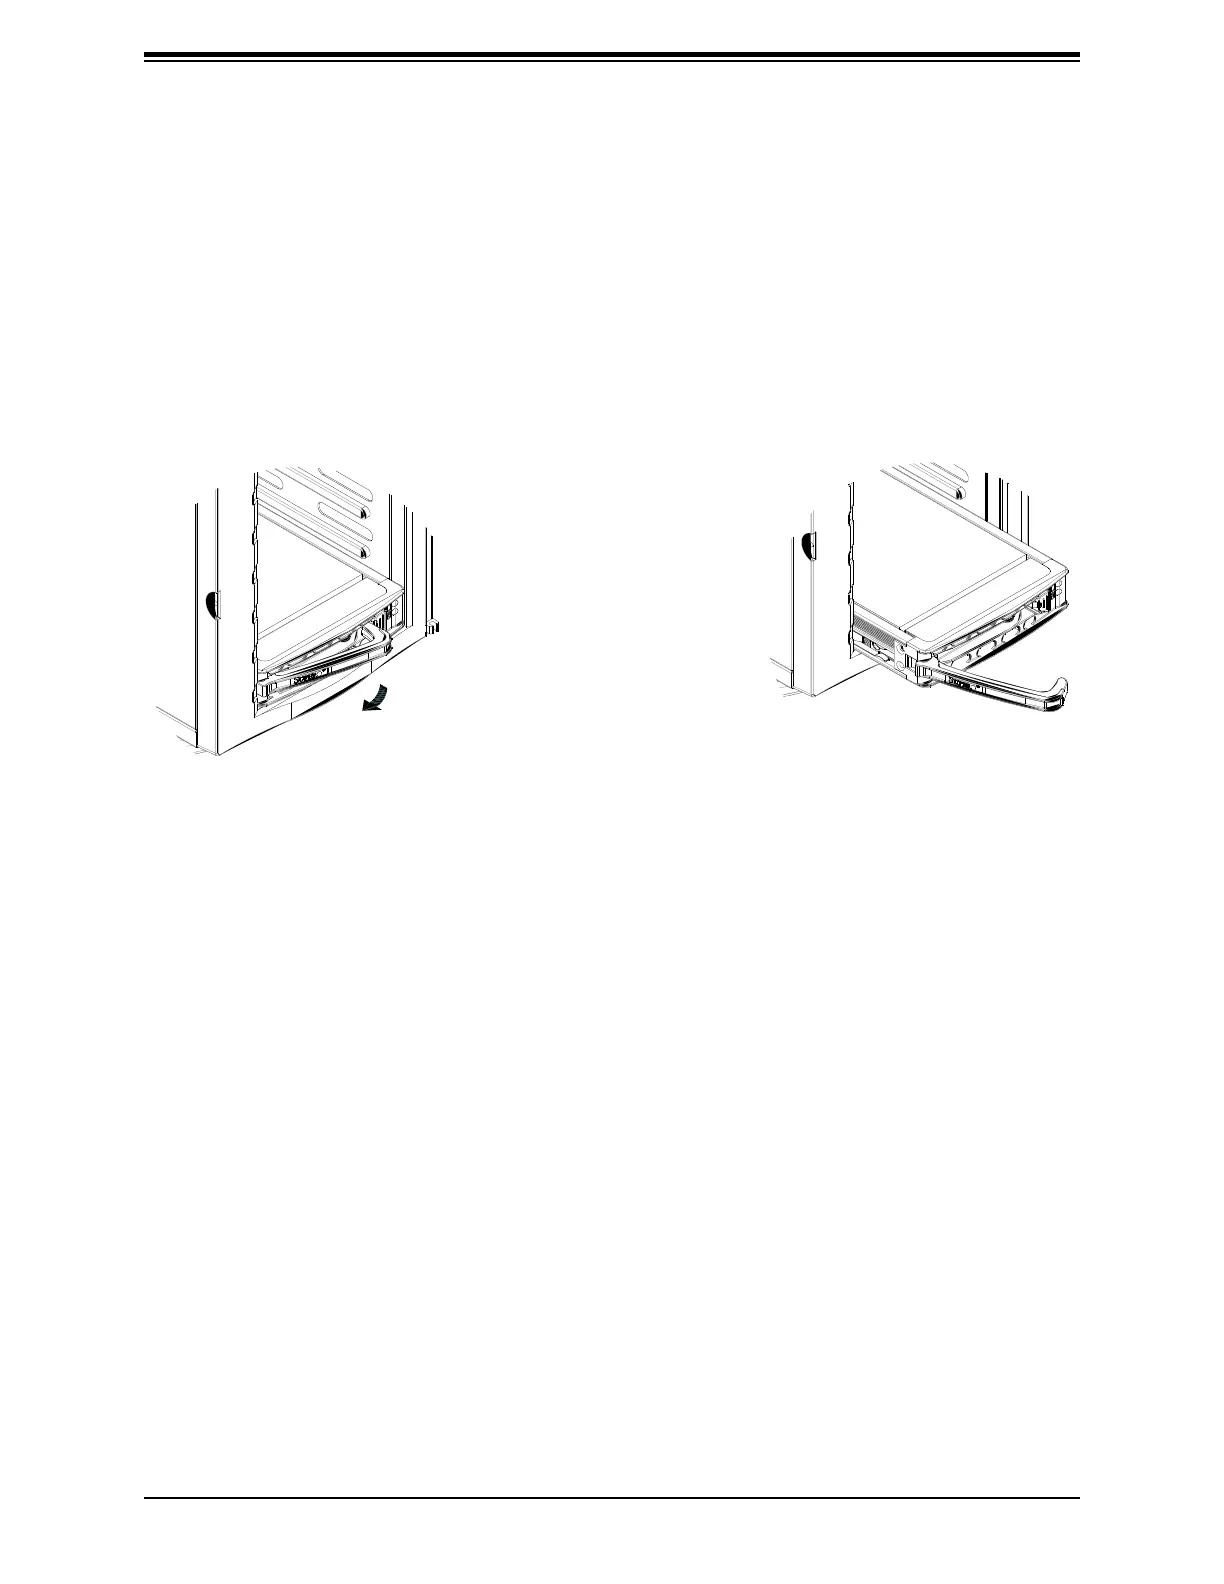
Figure 3-2. Removing a Drive Carrier
Mounting a Drive in a Drive Carrier
The SATA drive carriers help to promote proper airow for the system. For this reason, even
carriers without SATA drives must remain in the chassis.
1. To add a new drive, install it into the carrier with the printed circuit board side facing down
so that the mounting holes align with those in the carrier.
2. Secure the drive to the carrier with the screws provided, then push the carrier completely
into the drive bay. You should hear a *click* when the drive is fully inserted. This indicates
that the carrier has been fully seated and connected to the midplane, which automatically
makes the power and logic connections to the hard drive.
Installing the Internal Drives
Removing a Hot-Swap Drive Carrier
1. Open the front bezel then push the release button located beside the drive LEDs.
2. Press the release button on the drive carrier, then swing the handle fully out and then use
it to pull the drive straight out.
Note: Your operating system must have RAID support to enable the hot-swap capability of
the SATA drives.
 Loading...