7-26
REPAIR
7
Installation
See Figures 7-65 through 7-67.
IMPORTANT
Make sure cylinder head and cylinder block are free
of oil and debris.
Make sure cylinder head bolt holes are free of oil,
water, or debris.
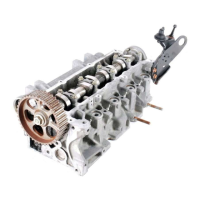
Figure 7-65
1. Clean cylinder head and cylinder block mating
surfaces. Place head gasket on cylinder block with
forked end toward the front of the engine (arrow).
2. Install cylinder head using care to align dowel pins.
3. Apply oil to cylinder head cap screw threads and
seating faces and install. Do not tighten at this time.
IMPORTANT
If the cylinder head, cylinder block, or the cylinder
head cap screw have been replaced, go to step 4.
If installing previously removed parts, go to step 5.
Figure 7-66
4. Torque the cap screws in sequence to 22 lb-ft (30
N•m).
• Set torque wrench to 35 lb-ft (47 N•m) and repeat
torque sequence.
• Reverse the torque sequence and loosen all cap
screws.
• Re-torque cap screws in sequence to 35 lb-ft
(47 N•m).
• Torque cap screws (1 through 8) in sequence to final
specification.
Cylinder Head Cap Screw Torque: 43.5 lb-ft (59 N•m)
Figure 7-67
5. Tighten cap screws (1 through 8) in sequence, to
specification.
Cylinder Head Cap Screw Torque: 43.5 lb-ft (59 N•m)
TN0413
TN0403
1
2
3
4
5
6
7
8
TN0403
1
2
3
4
5
6
7
8
 Loading...