3-1. INTRODUCTION
Model 8020 operation is divided into two general cate-
gories: basic bench operation, and IEEE-488 operation.
Basic bench operation, which is covered in this section,
explains how to use the model 8020 for generating the
required waveform characteristics. IEEE programming
(with option 1 installed) can also be used to greatly en-
hance the capability of the instrument in applications
such as automatic test equipment. This aspect is covered
in details in Section 4.
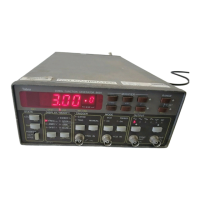
3-2. FRONT PANEL FAMILIARIZATION
The front panel layout of the Model 8020 is shown in Fig-
ure 3-1. The front panel is generally divided into three
sections: controls, connectors, display and indicators.
The following paragraphs describe the purpose of each
of these items in details.
3-2-1. Controls
All front panel controls except POWER are momentary
contact switches. Most controls include an annunciator
light for indication of the selected parameter and operat-
ing mode. Some controls do not have an annunciator
light. Exercising these controls generates an immediate
response on the display.
Front panel controls may be divided into functional
groups: Status, Display/Modify, Trigger Mode, Operat-
ing mode, Output and Modifiers.
3-2-1-1. Status
Three push-button are included in the status group. The
function of each of these buttons is described in the fol-
lowing.
POWER
- The POWER switch controls the AC power to
the instrument. Pressing and releasing the switch once
turns the power on. Pressing and releasing the switch a
second time turns the power off.
2nd/EXE - Several push-buttons were assigned a second
function which are only accessible after the [2nd] button
was depressed. These functions are market below the
buttons in yellow script. Some second functions require
that the [2nd] push-button be pressed again before the
function is executed.
LCL
- The LOCAL push-button when pressed, and the
instrument is in its remote mode (but not in remote lock-
out condition LLO), restores the instrument to its local
operating mode. When the generator is in local operating
mode, pressing this push-button generates no response.
A 2nd function is assigned to this switch. Depressing this
push-button after the [2nd] button modifies the numeric
read-out to display the programmed GPIB address.
3-2-1-2. Display/Modify
There are two DISPLAY/MODIFY push-buttons which
are use for modifying the displayed reading. Each time a
button is depressed a different parameter is displayed.
The selected parameter is indicated by an LED. The di-
mensions which are associated with each parameter are
located below the numeric display. The following pa-
rameters may be displayed and modified:
FREQ - Frequency of the selected output waveform.
Frequency is defined for repetitive signals only. When
the function generator is set to operate in triggered mode,
the programmed frequency value has no effect on the
output. In gated mode, the frequency defines the repeti-
tion rate within the gating signal. In sweep mode, the pro-
grammed value defines the sweep start point. The pro-
grammed frequency retains its value at both SYNC and
the main output connectors.
AMPL
- Amplitude of the selected waveform at the main
output connector. The output signal is driven from a 50
ohms source therefore, the value of the amplitude pa-
rameter is specified and accurately controlled only when
the output is terminated with 50 ohms. If the signal from
the output connector is connected to an high impedance
circuit, the actual amplitude level at the output connector
SECTION 3
OPERATING INSTRUCTIONS
Model 8020 Operating Instructions
Page 3-1