available in Section 4 of this manual. If purchased with the
Model 8020, the option will be factory installed; however
the instrument may easily be upgraded in the field by
installing the option as described in the following proce-
dure.
5-4-1. Option 1 Installation Procedure
1. Remove the top cover of the instrument as described in
the disassembly instructions in paragraph 5-5.
WARNING
Disconnect the line cord and test leads from
the instrument before removing the top
cover.
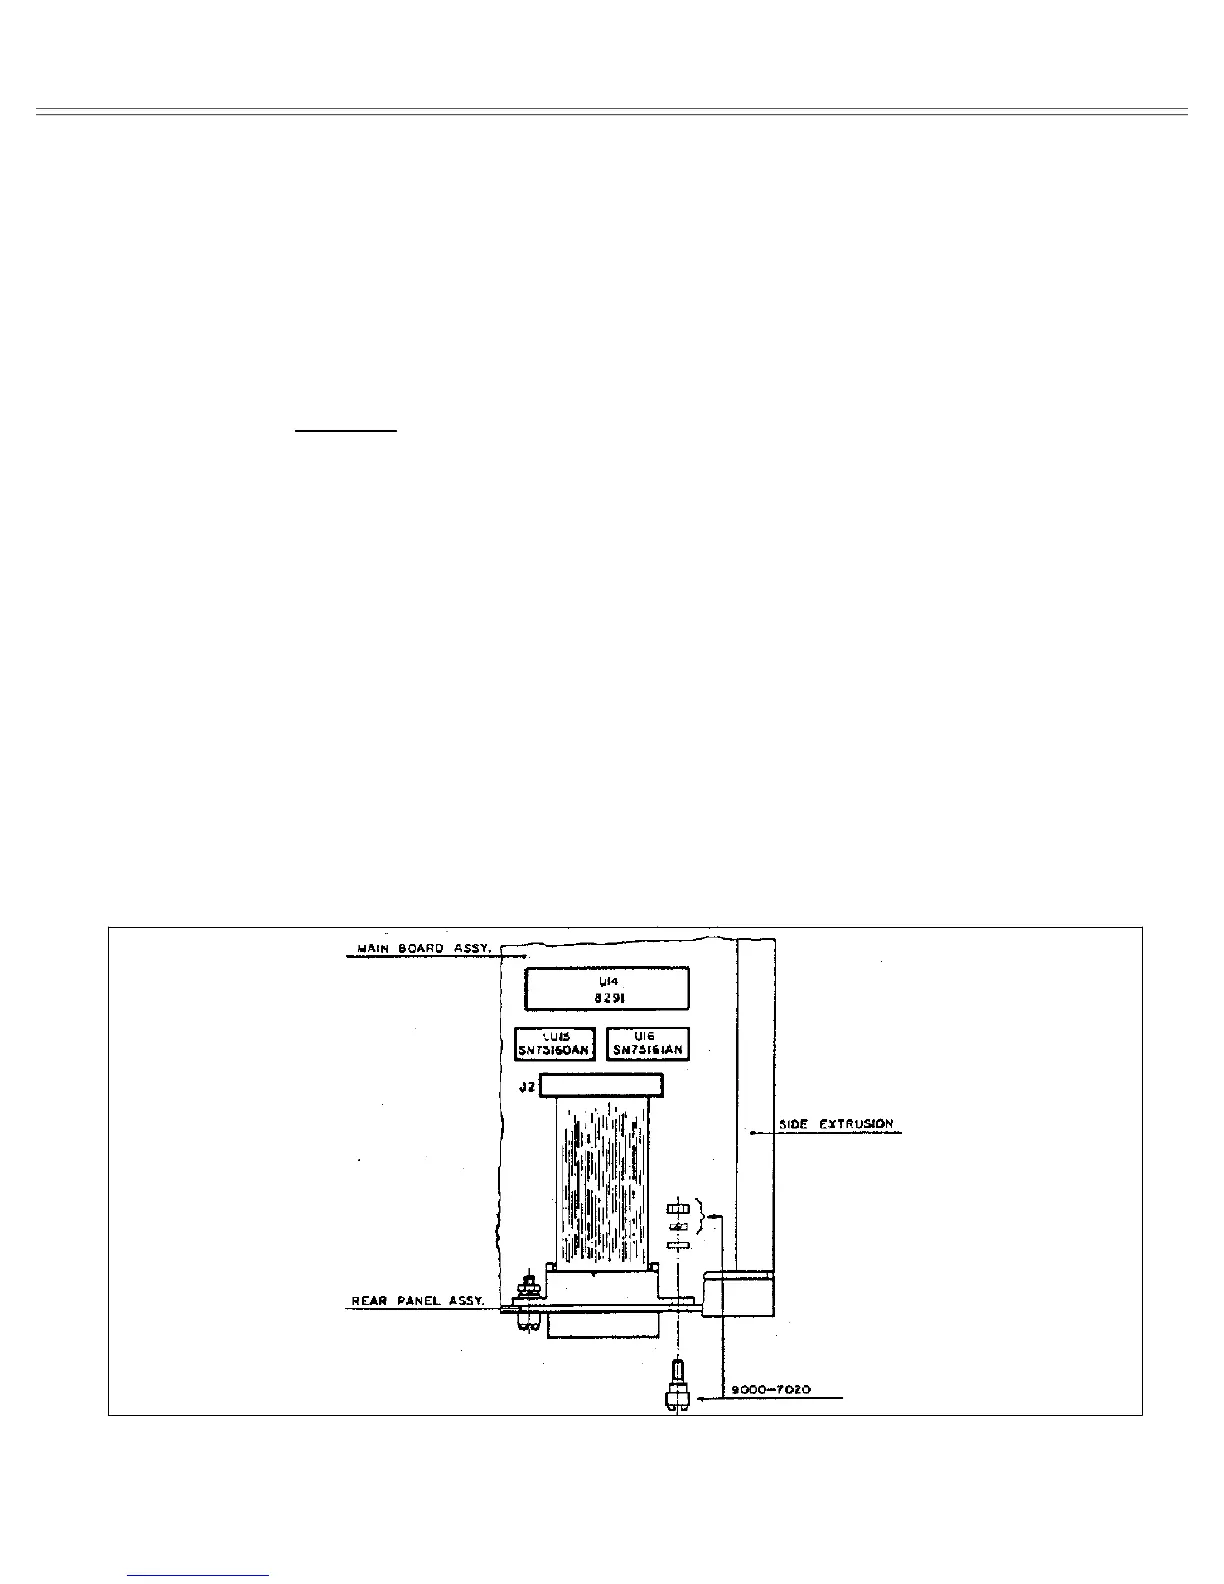
2. Assemble U47 (8291), U48 (75160) and U49 (75161)
as shown in Figure 5-1.
3. Remove the small plate that covers the rear panel GPIB
opening.
4. Place the GPIB connector onto the rear panel and bolt
the special spacers which are provided with this option, to
the rear panel. It is important to position the GPIB connec-
tor exactly in the center of the opening otherwise the
mating connector will not fit. Also only use the special
spacing screws that are supplied with this option. Use
lock-washers to prevent the option from loosening during
transit.
5. Plug the loose end of the flat cable to J2 and press the
connector to secure it to its place. Make sure that the cable
is positioned properly, that pin 1 is connected to pin 1 on
the main board and that no pin on the main board is left
free.
6. Replace the top cover.
7. Turn on the power and observe the power up procedure.
The instrument will display the following as part of its
power-up procedure:
OPt.1
This reading indicates that the instrument accepted the
installed option and is now ready to operate on a bus
controlled system.
5-5. DIASSEMBLY INSTRUCTIONS
If it is necessary to troubleshoot the instrument or replace
a component, use the following disassembly procedure to
remove the top cover:
1. Remove the two screws that secure the top cover to the
rear panel.
2. Grasp the top cover at the rear and carefully lift it off the
instrument. When the tabs at the front of the cover clear
the front panel, the cover may be pulled completely clear.
3. When replacing the top cover, reverse the above proce-
dure; be sure to install the tabs at the front panel before
completely installing the cover.
Figure 5-1. GPIB Interface Option Installation
Maintenance And Performance Tests Model 8020
Page 5-2