3-2-3. Display And Indicators
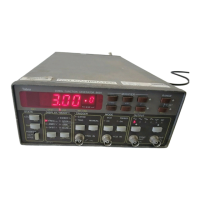
1. DISPLAY - The function of the numeric display is to
indicate the value of the various parameters. The display
consists of a 4 digit mantissa and a single digit exponent.
The exponent uses a leading minus indicating negative
values. The sign on the exponent changes to + for zero or
positive values. The display is also used for indicating
other information such as messages.
2. DIMENSIONS - Parameter dimensions are located
below the numeric display. there are 3 indicators which,
together with the exponent, are used for determining the
correct value of the displayed parameter.
3. INDICATORS - 24 indicators are located on the front
panel. These indicators are used as pointers to a selected
parameter such as frequency, amplitude and offset or
modes such as gated, triggered and VCO.
3-3. REAR PANEL FAMILIARIZATION
3-3-1. Connectors And Switches
1. AC RECEPTACLE - Power is applied through the
supplied power cord to the 3-terminal AC receptacle.
Note that the selected ac mains voltage is marked on the
line voltage selector switch.
2. LINE SWITCH - The LINE VOLTAGE SELECTOR
switch selects one of the primary voltage which are
marked on both sides of the switch.
3. LINE FUSE - The line fuse provides protection for the
AC power line input. For information on replacing this
fuse, refer to Section 5.
4. IEEE-488 CONNECTOR - This connector is used
for connecting the instrument to the IEEE-488 bus.
5. SWEEP OUT CONNECTOR - This connector is
used for connecting the instrument the X input on the os-
cilloscope. Its output is either fixed, in linear sweep
mode, or proportional to the sweep time per decade, in
logarithmic sweep mode.
6. MARKER OUTPUT CONNECTOR - This connec-
tor is used for connecting the function generator to the Z
input on the oscilloscope. This output is only active
when sweep mode is on.
3-4. POWER-UP PROCEDURE
The basic procedure of powering up the Model 8020 is
described below.
1. Connect the female end of the power cord to the AC
mains receptacle on the rear panel. Connect the other end
of the power cord to a grounded AC outlet.
WARNING
Be sure the power line voltage agrees with
the indicated value on the rear panel of the
instrument. Failure to heed this warning
may result in instrument damage.
The instrument is equipped with a 3-wire
power cord designed to be used with
grounded outlets. When the proper connec-
tions are made, the instrument chassis is
connected to the power line ground. Failure
to use a properly grounded outlet may result
in personal shock hazard.
2. Turn on the mains power by pressing and releasing the
POWER switch on the front panel.
3. The instrument will then begin operation by perform-
ing a display and indicator test which takes approxi-
mately one second. All front panel indicators will turn on
and the display will appear as follows:
8.8.8.8. 8
4. To verify that all display segments are operating, com-
pare the instrument’s display with the above during the
test.
5. Following the display test, the instrument proceeds by
displaying its model number similar to the following:
8020
6. Once the model number is displayed, the instrument
performs ROM and RAM tests. Successful execution of
these tests is followed by a one second read-out of the
installed software revision similar to the example below:
So 1.0
7. Following the displayed software revision, the instru-
ment proceeds with displaying the installed options.
When no option is installed, the instrument skips this
message. If option 1 (GPIB) is installed, the instrument
displays the following message:
OPt.1
Operating Instructions Model 8020
Page 3-4