52 TMAA02-06 Support Kit for Concealed & Dynamic Microphones TM8000 Mobile Radio Accessories Manual
March 2004 © Tait Electronics Limited
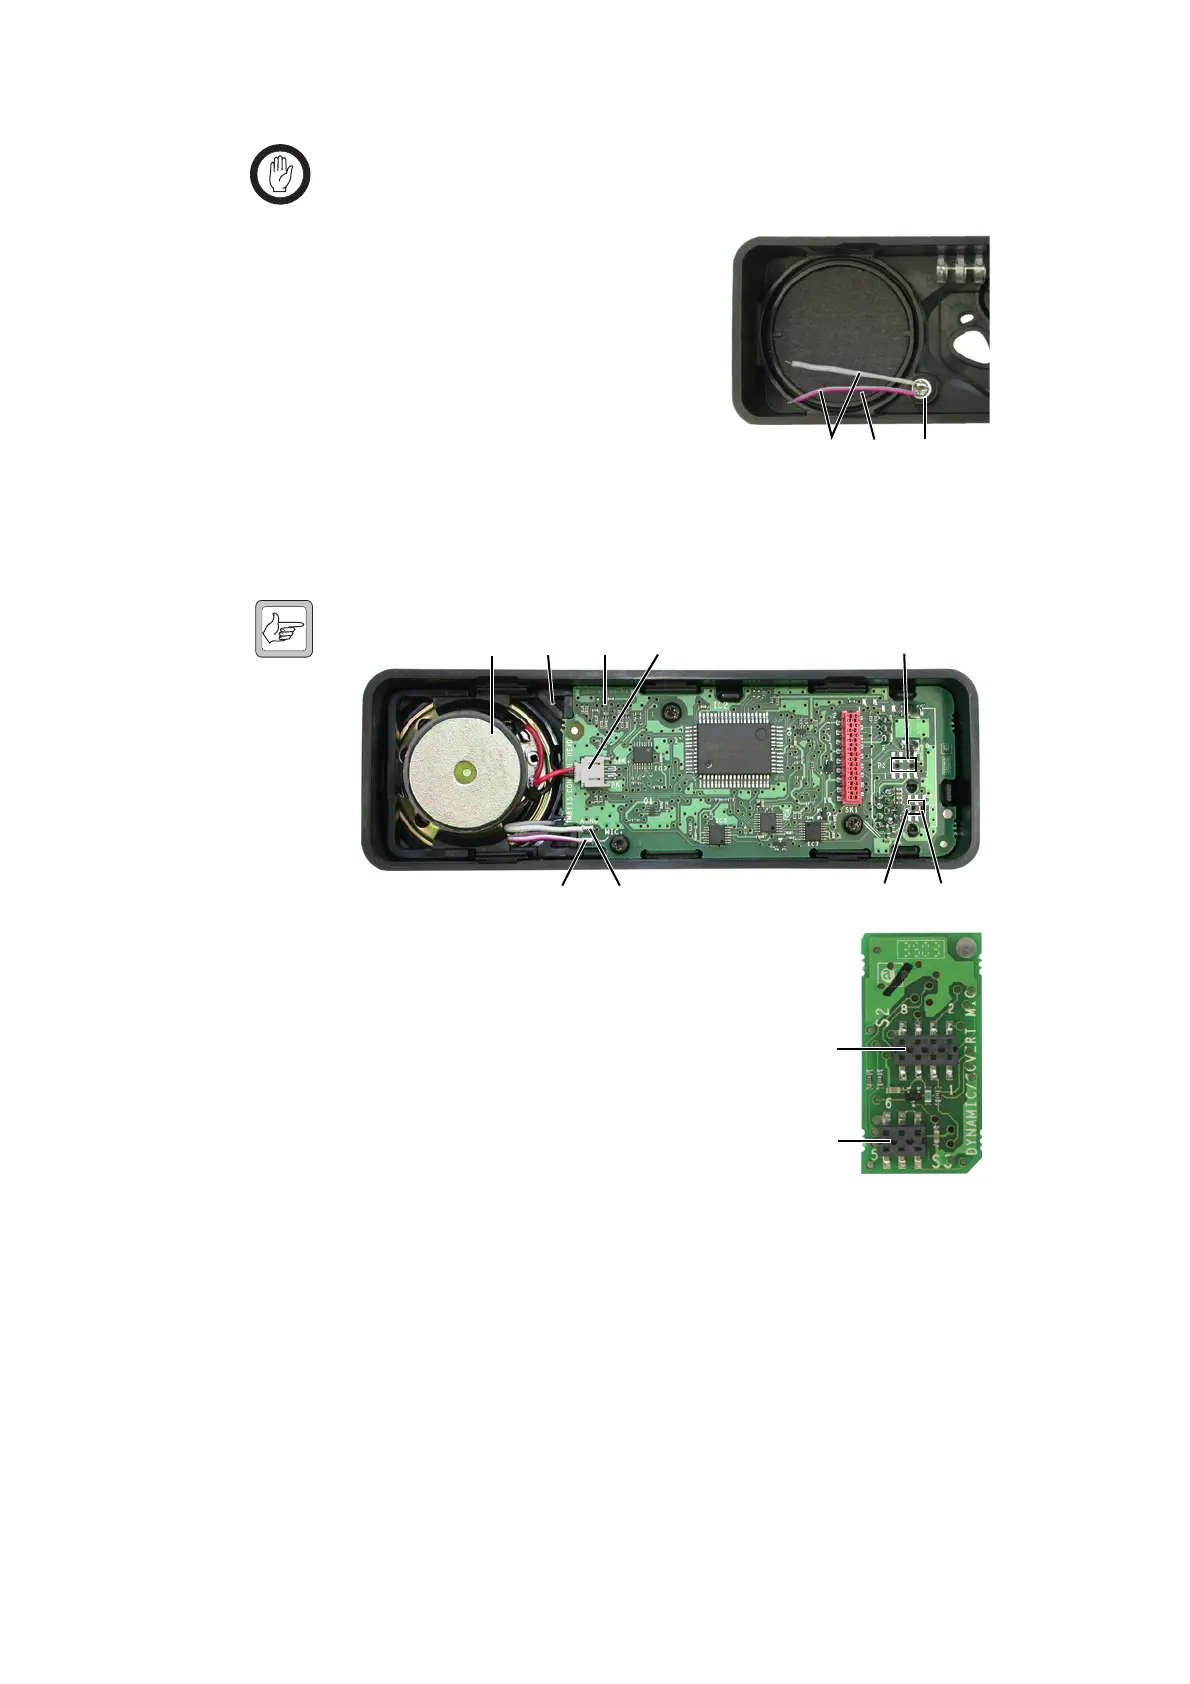
Important To maintain the IP54 protection class, great care must be
taken when installing the microphone capsule and seal
d
into the concealed-microphone cavity.
3. Push the microphone capsule and seal
into the concealed-microphone
cavity, with the capsule wires
e
towards the speaker grille
f
.
4. Reassemble the control head. This
includes reinstalling the speaker
g
,
the space frame
h
and the control
head PCB
i
.
Plug the speaker lead into the speaker
connector
j
.
5. On the control head PCB, solder the positive concealed-microphone
wire to the MIC+ pad
1)
and the negative wire to AGND
1!
.
Note
The positive wire on the microphone capsule is identified by a red stripe.
6. On the control head PCB, remove R11
1@
and
solder P2
1#
and P3
1$
in the positions shown.
7. Plug S2
1%
and S3
1^
on the concealed and
dynamic microphone support board onto P2
and P3 on the control head PCB.
8. Re-install the control head on the radio body.
5.2 Radio Programming
When the support kit for concealed and dynamic microphones is installed
in a radio, two fields in the UI Preferences form of the TM8000
Programming Application may need to be selected.
■ Dynamic Mic Support: select this field if a dynamic microphone is
installed. An example of an accessory that uses a dynamic microphone is
the TMAA10-02 handset.
■ Covert Mic Fitted: select this field if a concealed microphone is installed.
Refer to the online help of the programming application for more information.
e fd
1!
h
g
ij
1#
1@
1$
1)
1%
1^
 Loading...


