7 1 2
7 2 0
0 0 5
3 6 7
7 1 2
7 2 0
0 0 2
0 0 1
3 6 7
0 0 6
C a b l e t ie
RX7
14
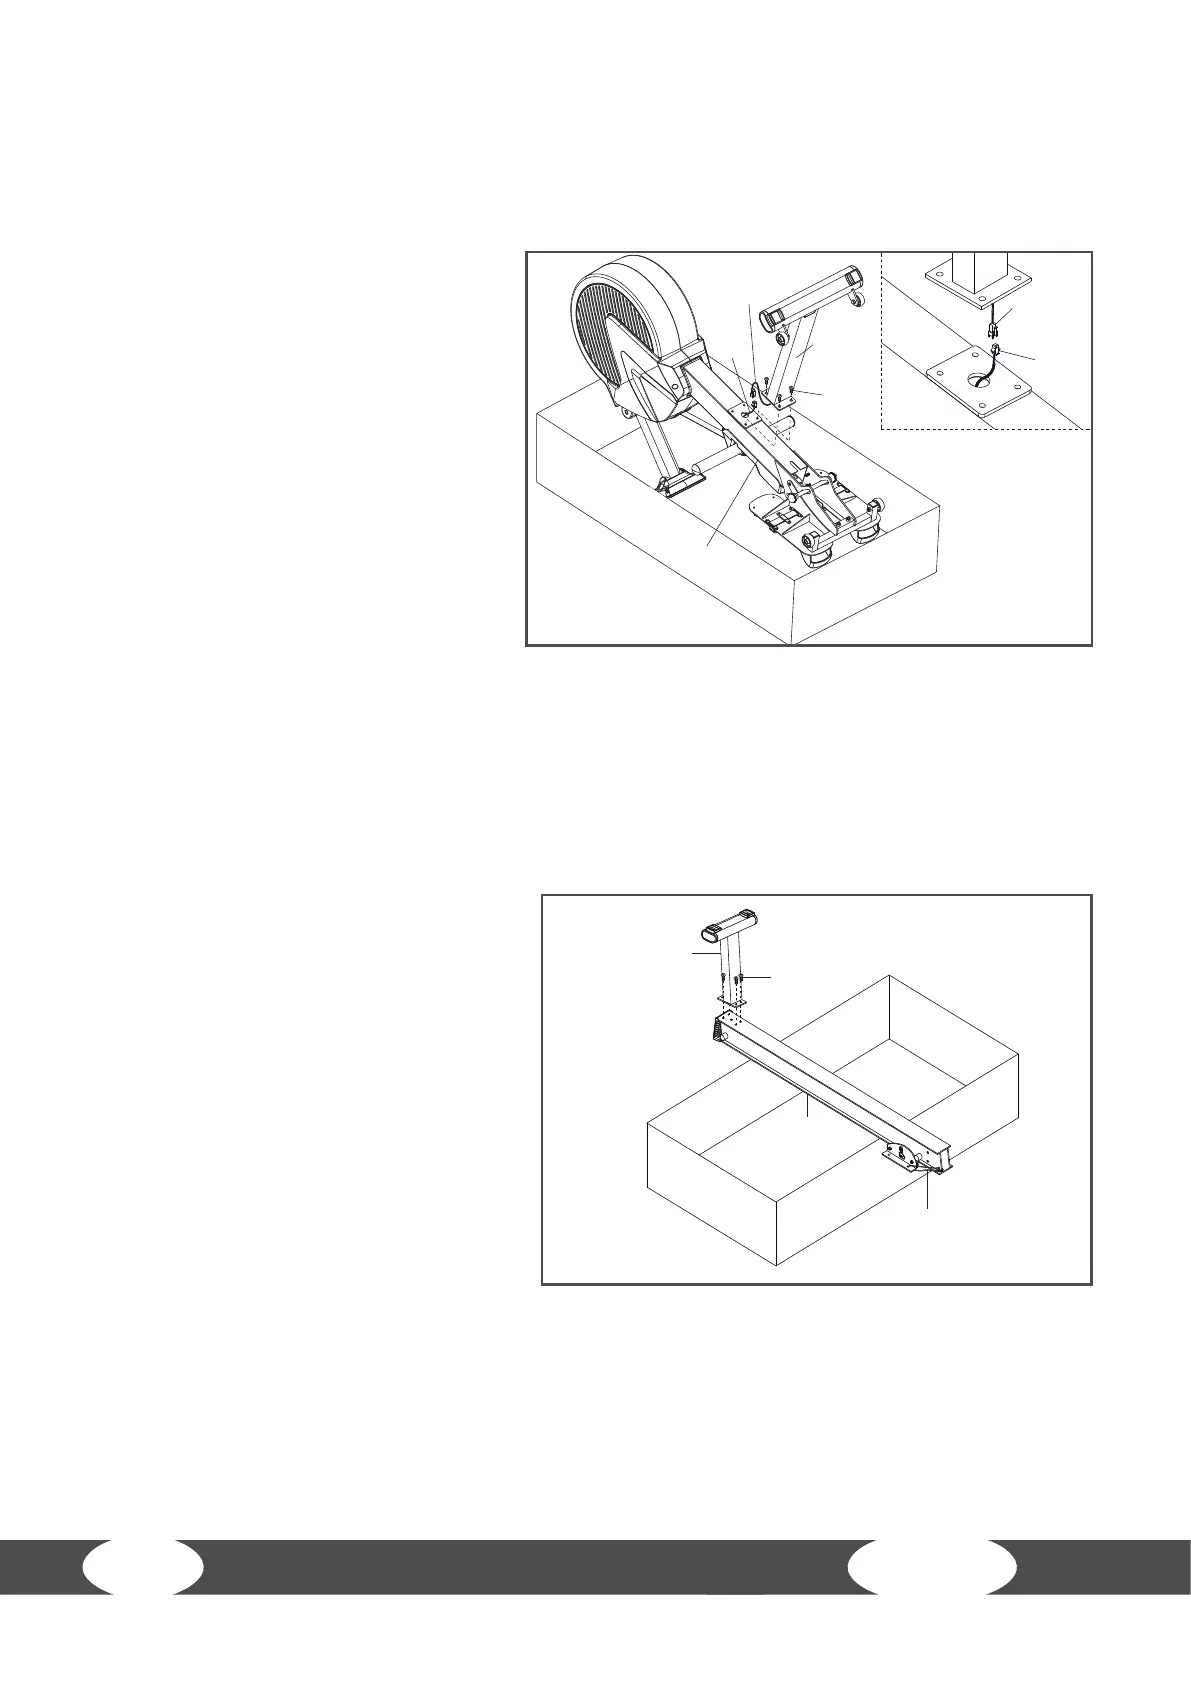
Step 3: Assembly front base
1. Turn the main frame (2) upside down in the box, see illustration below.
2. Remove the four pre-mounted screws (367) from the main frame (2).
3. Connect the AC adapter cable
(712) with the AC cable (720).
4. Mount the front base (5) with four
screws (319) back to the main
frame. Tighten the screws. Before
the assembly make sure that the
front base does not pinch the
cables.
Step 4: Assembly rear base
1. Take the aluminium rail (001) out of
the box and put it on the box, see
illustration below.
2. Remove the four pre-mounted
screws (367) from the rail (1).
3. Mount the rear base (6) with the
four screws (367). Tighten the
screws.
4. Remove and dispose of the cable
ties.