6-8
OPERATING PROCEDURES
Model 336, 338, 339
Operating Procedures
6
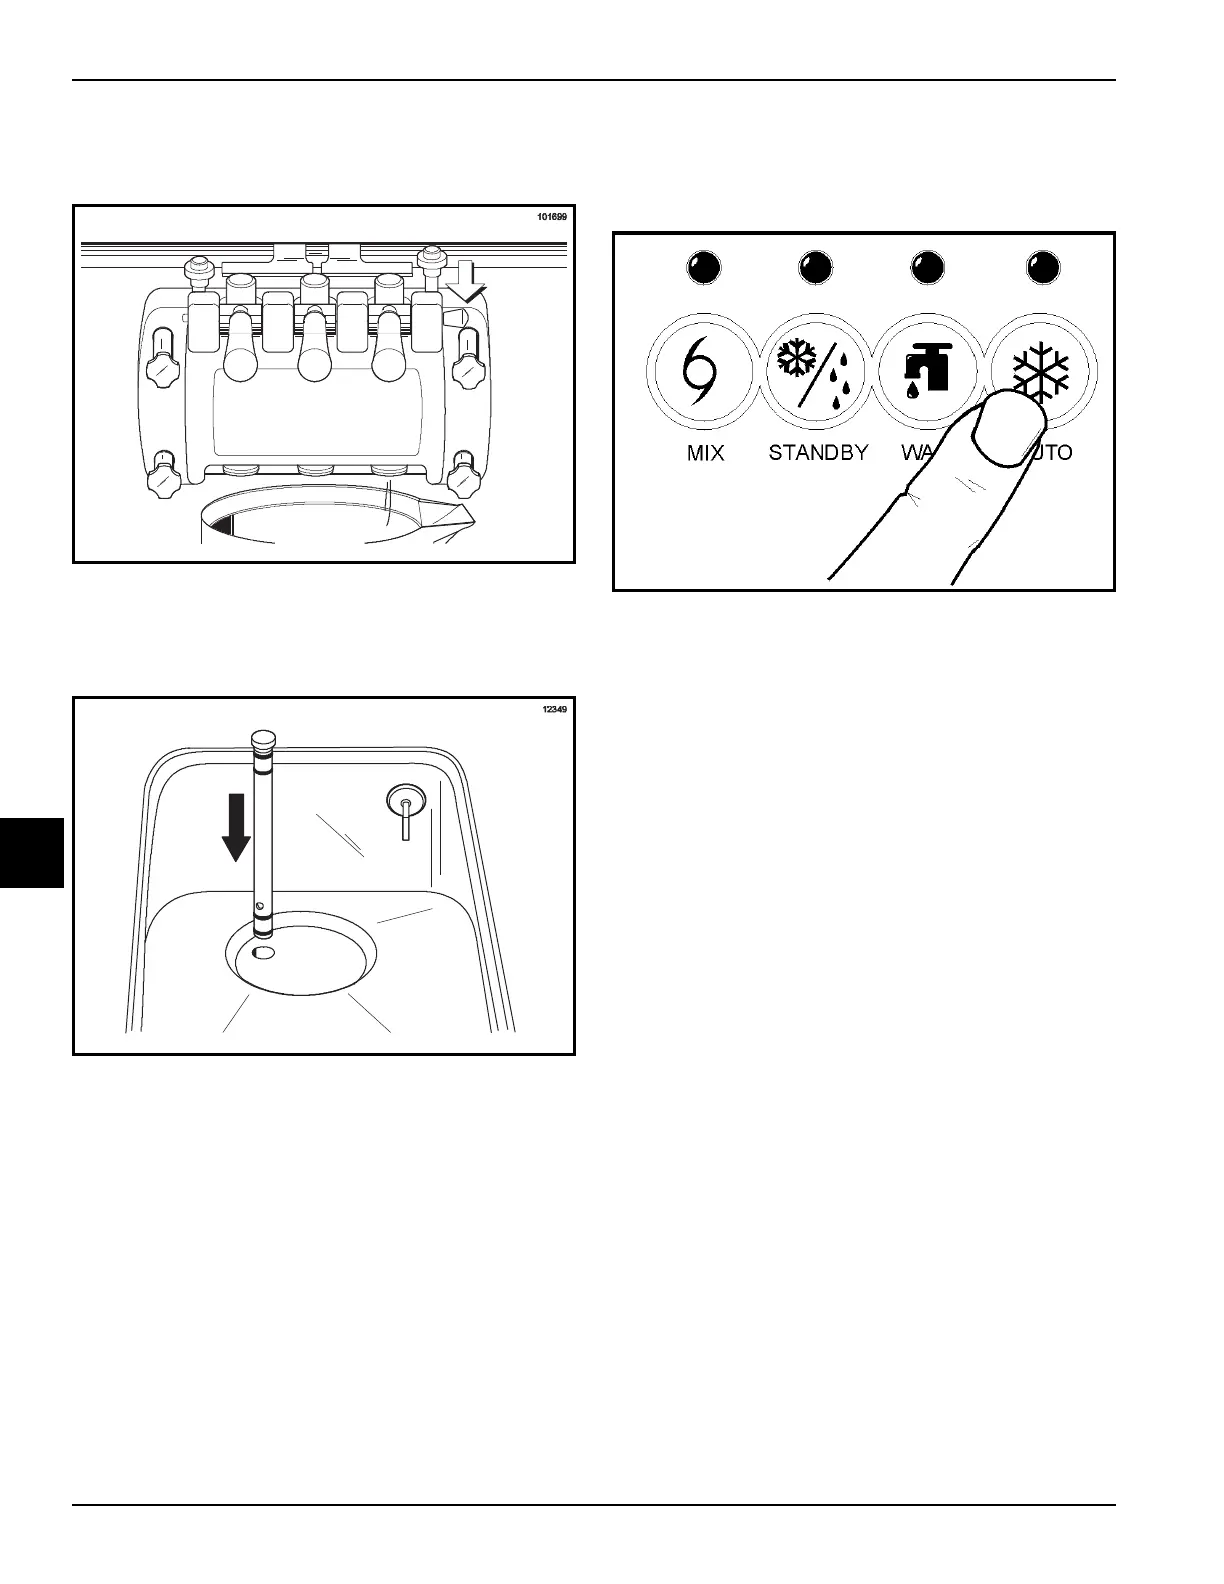
2. Once a steady stream of mix starts to flow from the
prime plug opening in the bottom of the freezer door,
push down the prime plug.
Figure 6-28
3. Lubricate the O-rings on the air tube on the end with
the small hole on the side.
4. Install the air tube in the AUTO position.
Figure 6-29
5. Press the AUTO button. The AUTO light will come
on, indicating the main refrigeration system is
operating. When the unit cycles off, the product will
be at serving viscosity.
Figure 6-30
Note: The mix refrigeration light will come on,
indicating the mix refrigeration system is operating to
maintain the mix in the mix hopper.
6. Fill the hopper with mix. As the mix level comes in
contact with the mix level sensing probe on the rear
wall of the hopper, the MIX LOW light will shut off.
7. Place the mix hopper cover in position over the mix
hopper.
8. Repeat step 1 through step 7 for the other side of the
freezer.
Closing Procedure
To disassemble your unit, the following items will be
needed:
• Two cleaning pails
• Sanitized stainless steel rerun can with lid
• Necessary brushes (provided with freezer)
• Cleaner
• Single-service towels
 Loading...