14
Model 390 Tim HortonsOperating Procedures
110503
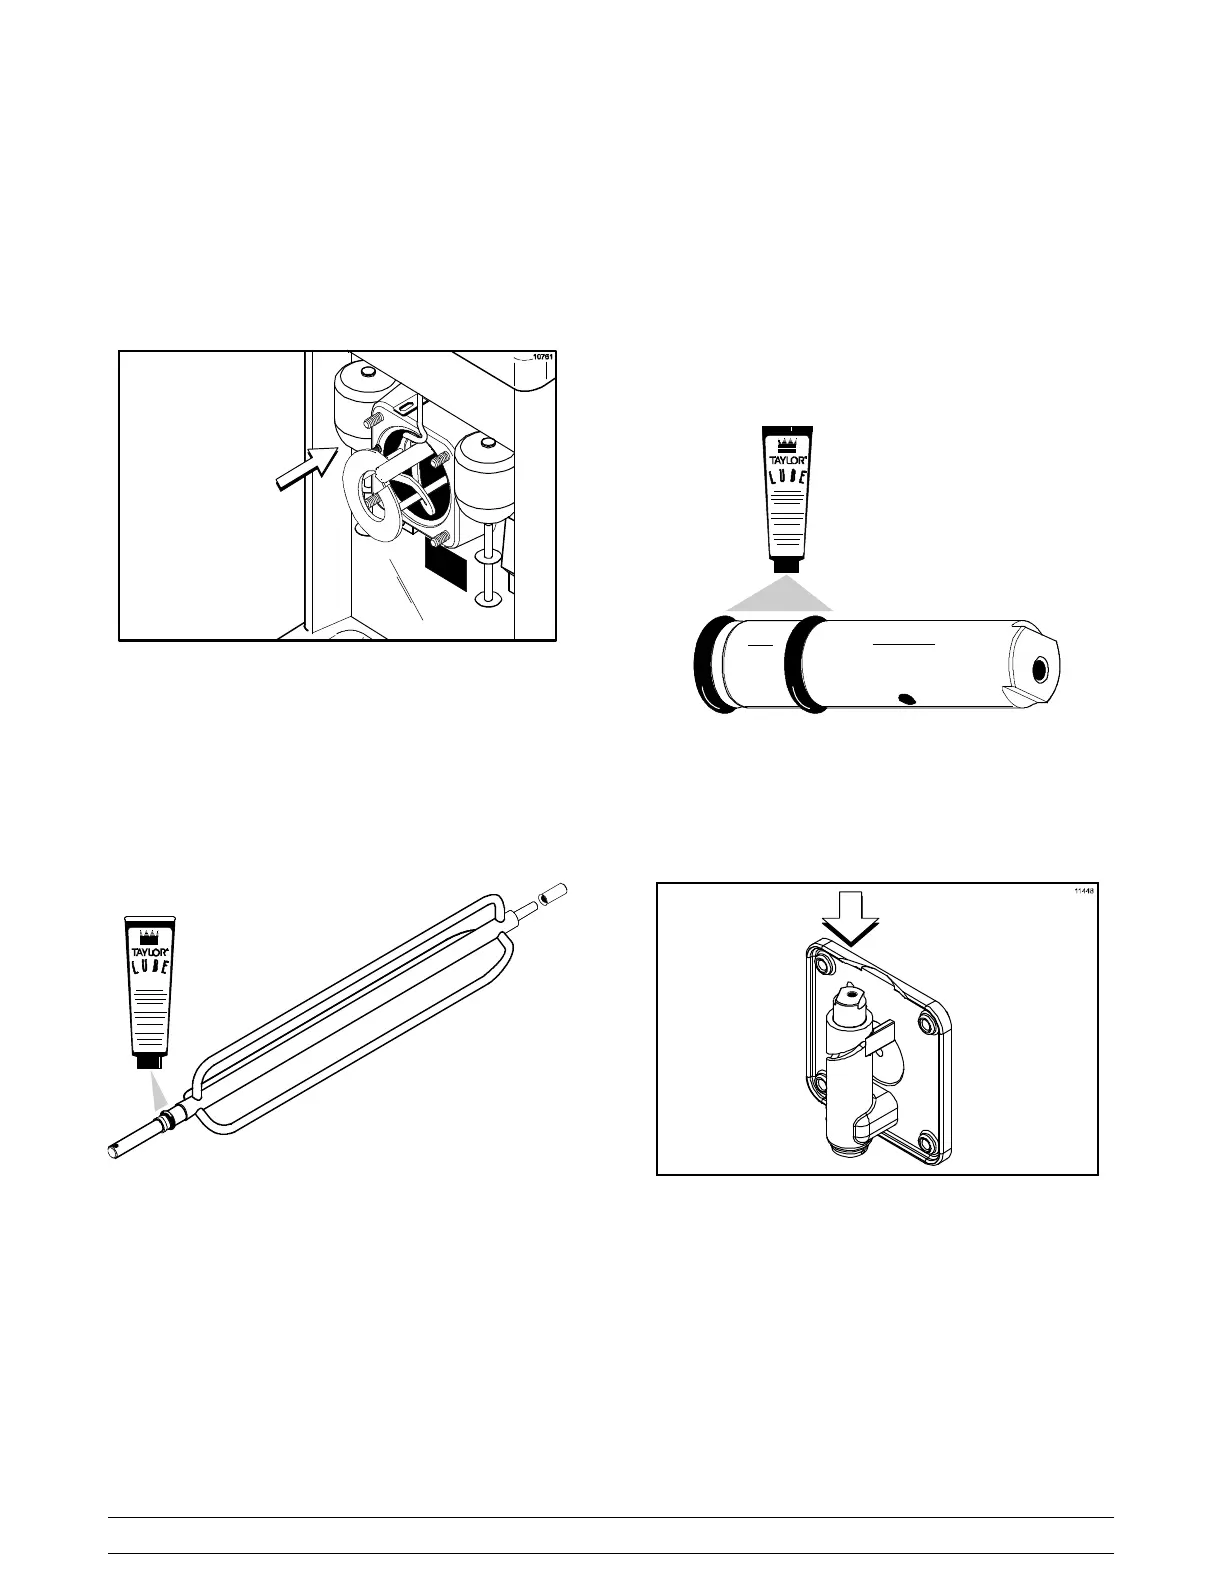
Step 5
Holding the blades in position, insert the beater
assembly into the freezing cylinder and slide it into
position over the drive shaft. Turn the beater slightly
to be certain that the beater is properly seated.
When it is in position, the beater will not protrude
beyond the front of the freezing cylinder.
Figure 8
Step 6
Install the white plastic guide bearing on the short
end of the torque rotor. Slide the o-ring into the
groove on the long end of the torque rotor and
lubricate the o-ring. Do not lubricate the guide
bearing.
Figure 9
Step 7
Insert the torque rotor end with the guide bearing
into the pilot hole in the center of the drive shaft. The
hole in the torque rotor shaft should be rotated to the
12 o'clock position.
Step 8
Assemble the freezer door with the “Ice Buster”
(door spout clearing device). To assemble the door
with the ice buster, install the o-rings on the draw
valve and lubricate.
Figure 10
Step 9
Insert the draw valve into the door, leaving
approximately 1/2” of the valve sticking out the top
of the door.
Figure 11
 Loading...


