Note!
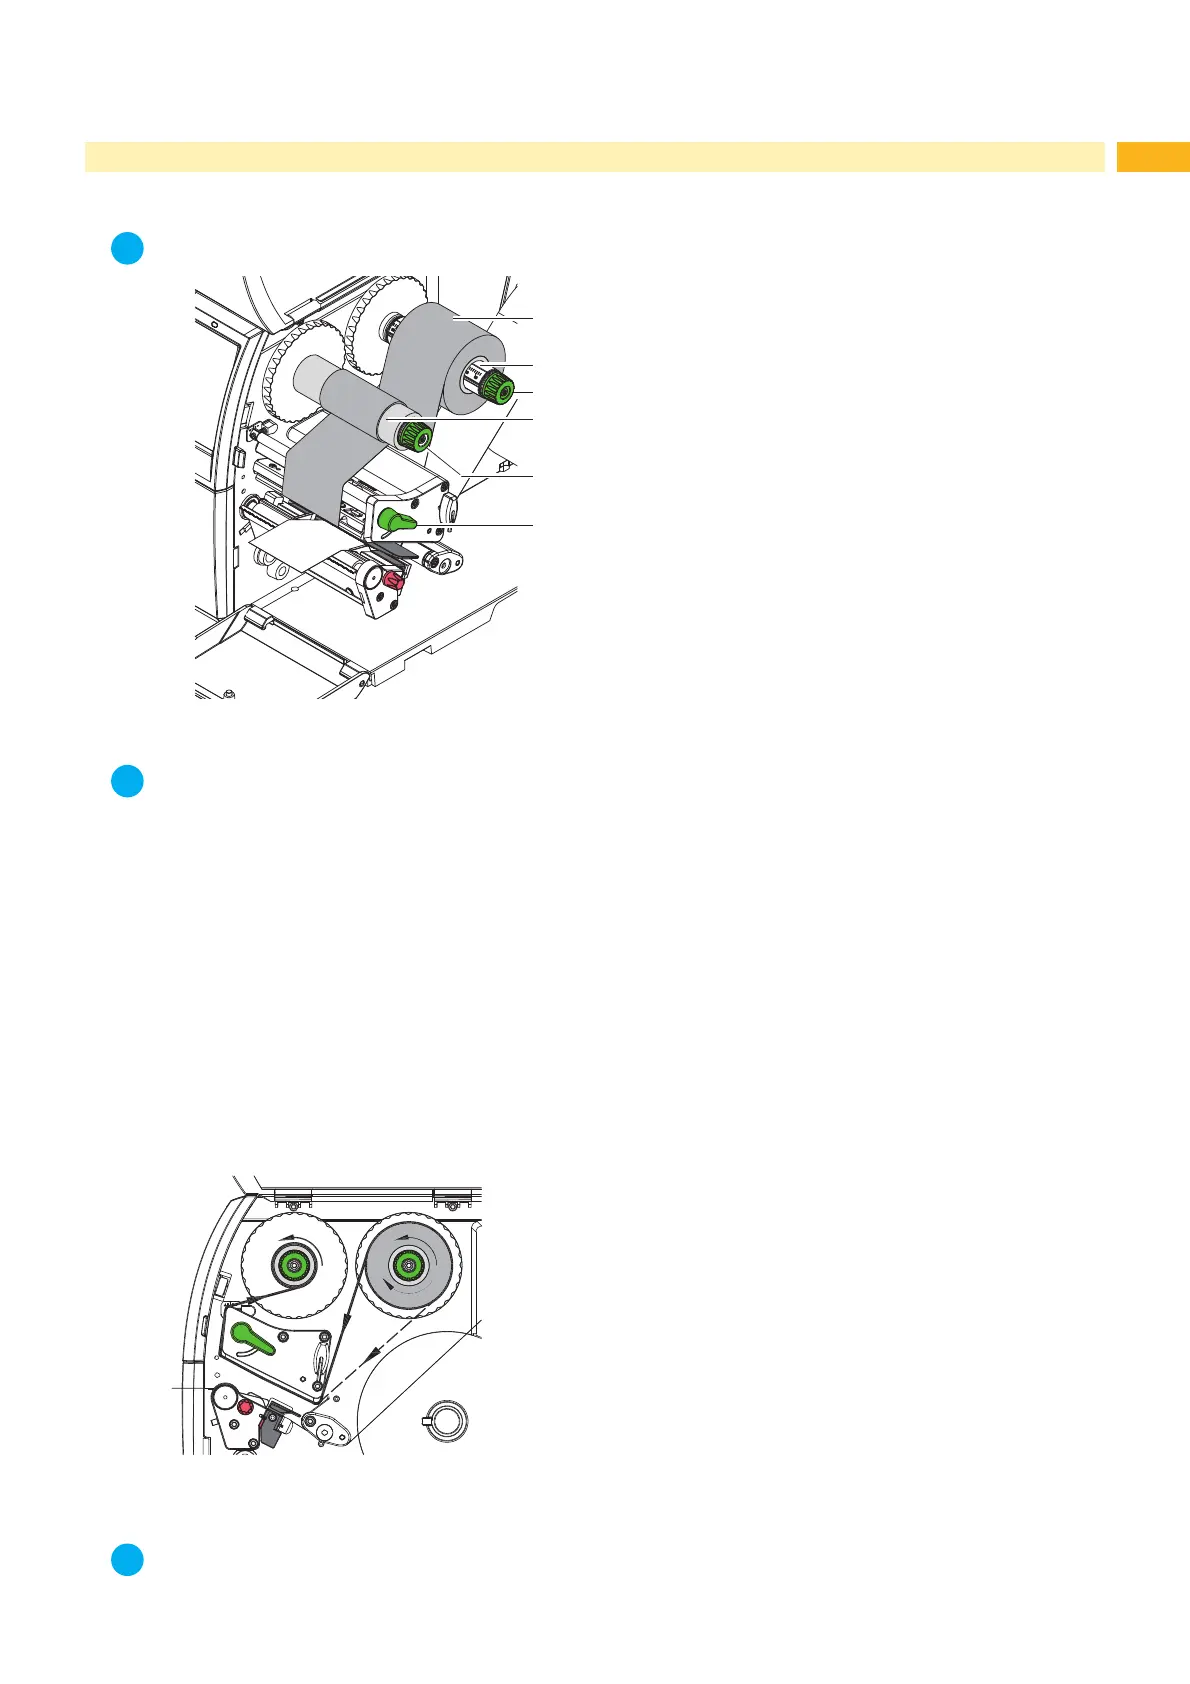
7KHLOOXVWUDWLRQLQ)LJVKRZVDULEERQORDGHGXVLQJWKH,QNVLGHLQFRQ¿JXUDWLRQ
1. Clean the printhead before loading the transfer ribbon (Z 6.3 on page 20).
2. Turn lever (6) counterclockwise to lift the printhead.
3. Slide transfer ribbon roll (1) onto the ribbon supply hub (2) so that the ink of the ribbon faces downward when
being unwound.
4. Position the roll in such a way that both ends of the roll show identical scale values.
5. +ROGWUDQVIHUULEERQUROO¿UPO\DQGWXUQNQRERIULEERQVXSSO\KXEFRXQWHUFORFNZLVHXQWLOWKHWUDQVIHUULEERQ
roll is secured.
6. Firmly turn knob of ribbon supply hub (5) counter clockwise until transfer ribbon core (4) is secure.
7. Guide transfer ribbon through the print unit as shown in Fig. 15.
8. Secure starting end of transfer ribbon to the transfer ribbon core (4) with adhesive tape. Ensure counterclockwise
rotation direction of the transfer ribbon take-up hub here.
9. Turn transfer ribbon take-up hub (5) counterclockwise to smooth out the feed path of the transfer ribbon.
10. Turn lever (6) clockwise to lock the printhead.
Fig. 15 Transfer ribbon feed path