5
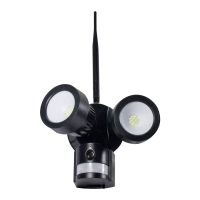
1. Device Structure
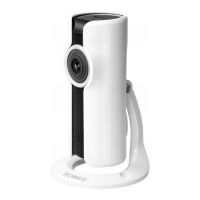
Front view Side view
No.
Name Description
1 White light source The camera will use these in low-light conditions to generate a
black and white image, even in total darkness.
2 Fixed hole The camera can be fixed on a wall with screw through this hole.
3 Microphone Allows the camera to pick up nearby sounds, and stream them
with the video.
4 Lens The business end of the camera. For a reliable and clear
image, ensure that the lens stays clean and unobstructed. To
clean, use a dedicated lens cleaning solution and cloth,
available from all good photography stores.
5 PIR sensor This is an electronic sensor that measures infrared light
radiating from objects in its field of view.
6 Antenna Used to transmit the wireless signal to the router. For the best
results, the antenna should be as unobstructed as possible -
ideally having a clear line of sight to the receiver.
7 Mounting bracket The supplied mounting bracket can be screwed onto any flat
surface.
8 RJ45
Ethernet connector
For a wired connection, connect this to a spare port on your
home router. So you can use the Security Advanced App on
your mobile device.
9 Reset button Long press and hold it longer then 15 seconds when the power
is disconnected and reconnected. Attention: all settings will
revert to the factory defaults.
10 Power socket Connect the power adapter here.(DC12V/2A)
11 MicroSD card slot Insert a MicroSD card (up to 64GB) for allowing you to capture
a series of snapshots and video files.