35
Call: 1-631-648-7481 or Visit: support.technocnc.com
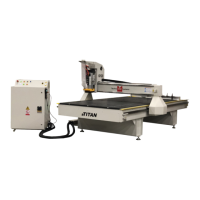
Titan Series WinCNC Manual
WinCNC
IV. Advanced Tutorials
4.1 Tool Changers
About Using The Automatic Tool Changer
When using the Automatic Tool changer, the operator may choose to drop off one tool and pick up
another tool.
Thisisusefulforlearningtoollengths,settingorigins,andoptimizingjobles.
Performing a Tool Change is a simple procedure, but one that must be done cautiously.
Before A Tool Change
Before performing a Tool Change, the operator must ensure that the current tool in the machine
hasanempty“toolpocket”inthelinearrack.
From Left to Right, the tool numbers are from 1 to 8.
So if the machine has tool number 4, as indicated in the lower
righthandcornerofthe“ToolChangeControlArea”,thenthe
4th white clip, or pocket, from the left must be empty.
Next, the operator needs to be sure that the tool he/she wants
to pick up is in the correct pocket. If the operator wants to pick
up tool 2, then the 2nd pocket from the left must have a tool in
it.
Performing A Tool Change
Once the operator has performed the proper checks, a tool change can easily be initiated by
clickingthe“T”buttonofthetooltheoperatorwouldliketopickup.
Topickuptoolnumber1,theoperatorcanpress“T1”
The machine will drop off the current tool and then pick up Tool 1
Iftheoperatorpresses“T0”,themachinewilldropoffthecurrenttoolandthenstop.
Changing Tool Number
Ifthe“ToolChangeControlArea”says“NoTool”oryouneedtoidentifythetoolinthespindle,
gototheCommandLineandtypein“L110T#”forthetoolthatyouhaveinthespindle.Press
ENTERandthe“ToolChangeControlArea”willchangetothecorrectedtoolnumber.