Do you have a question about the Technogym Glidex 600 XTPRO and is the answer not in the manual?
Document is for Technogym Service technicians for repairs and maintenance.
Steps for planning repair procedures: evaluate, diagnose, plan, access component.
Rules for repair: mark parts, use original spares, use special tools, consult newsletters.
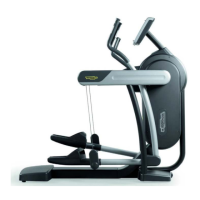
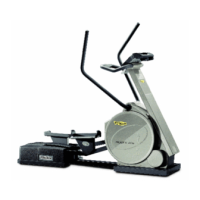
Width, length, height, and weight of the machine.
Mains voltage, frequency, consumption, and fuses.
Operating and storage temperature and humidity conditions.
Machine conformity to European and USA directives.
Diagram showing connections for non-coded receiver.
Details of connectors for patch cables, CPU board, RJ45-RS232, power supply, etc.
Wiring details for internal connecting cables and power supply cables.
Diagram showing connections for coded receiver.
Overall block diagram of the machine's components and their interactions.
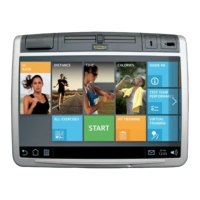
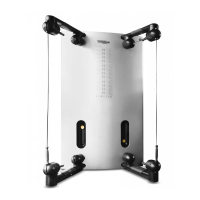
Description of the display unit and its components.
Function and types (non-coded, coded) of the cardio receiver.
Function and types (non-coded, coded) of the cardio transmitter.
Function of the HS interface board for hand sensors.
Function of the RJ45-RS232 board for external connections.
Function of the power supply unit.
Function of the alternator interface board.
Function of the alternator for resistance and RPM signal generation.
Function of the power resistor for dissipating energy.
How the machine controls workout difficulty via the alternator.
Description of excitation signal (PFM, Ve) and voltage across resistor (Vr).
How to connect the machine to the Technogym System via TGS reader.
How to connect the machine to the Cardio Theater unit.
Requirements for correct machine installation: surface, environment, power.
Step-by-step procedure for installing the machine.
Procedure for turning on the machine for the first time and performing checks.
Troubleshooting flowchart for display not illuminating.
Troubleshooting for lack of resistance: speed signal, excitation circuit, overheating.
Troubleshooting for incorrect resistance: excitation signal or power resistor issues.
Troubleshooting for incorrect SPM value, related to RPM signal from alternator.
Troubleshooting for no heart rate signal: telemetric receiver or hand sensor issues.
Troubleshooting for incorrect telemetric heart rate signal due to noise.
Procedure to remove the display unit from the machine.
Procedure to remove and reassemble the EPROM chip from the display.
Procedure to remove and reassemble the CPU board from the display.
Procedure to detach and attach the keyboard from the display unit.
Procedure to remove and reassemble the cardio receiver unit.
Procedure to remove and reassemble the levers.
Procedure to remove and reassemble the upright guard.
Procedure to remove and reassemble the frame guards.
Procedure to remove and reassemble the handlebar.
Procedure to disassemble power supply and alternator interface boards.
Procedure to remove and reassemble the HS interface board.
Procedure to remove and disconnect the hand sensors.
Procedure to remove and reassemble the alternator.
Procedure to remove and reassemble the drive belt.
Procedure to remove and reassemble the rear cover.
Procedure to disassemble the pedal lever group.
Procedure to disassemble the pedals group.
Procedure to remove and reinstall the pedal wheel track.
Procedure to remove and reinstall the pedal wheels.
Procedure to disassemble and reassemble the flywheels.
Procedure to disassemble and reassemble the alternator brushes.
Procedure for adjusting the belt alignment.
Procedure for adjusting the belt tension.
Inspection and maintenance for alternator brush wear.
Changing user settings like language, measurement system, and time.
Procedure to select the display language.
Procedure to select the measurement system (metric or imperial).
Setting the maximum exercise time.
Enabling/disabling +/- keys for heart rate modification in CPR mode.
Disabling function keys for TGS portable memory use.
Enabling the ENTER key for increasing exercise time.
Setting priority for chest band or hand sensor heart rate input.
Changing technical settings like lever system type and sensor usage.
Procedure to set the type of lever system (fixed or movable).
Enabling or disabling the hand sensor for heart rate acquisition.
Enabling or disabling the automatic scrolling display mode.
Accessing and viewing equipment operating hours.
Viewing the number of hours the machine has been turned on.
Viewing the number of hours the machine has been operating.
Procedure to set maintenance information like hours on and hours of use.
External cleaning procedures for machine hygiene.
Steps to prepare for external cleaning.
Instructions for cleaning the machine's exterior.
Internal cleaning procedures for machine maintenance.
Steps to prepare for internal cleaning.
Instructions for vacuuming the interior and cleaning guideways.
Advanced maintenance by qualified technicians: checks and procedures.
Steps to prepare for special maintenance.
Checking power connection, cascade limits, and earth connection.
Checking cable condition, continuity, isolation, and fuses.
Checking keyboard keys, LEDs, and buzzer operation.
Checking and replacing worn handlebar and lever covers.
Checking belt wear, tension, and alignment.
Lubricating lever group bearings, joints, and checking shock absorbers.
Checking cardio receiver operation with a separate monitor and simulator.
Checking hand sensor operation with a separate meter.
Checking resistance variation with difficulty level changes.
Checking alternator brushes for noise and wear.
Information on Technogym's use of Polar technology for heart rate measurement.
Details on different ASIC models (MAS, FTC, HRRE) and their reception ranges.
Impact of electromagnetic fields on receiver operation and potential solutions.
Techniques to reduce receiver sensitivity to mitigate interference.
How mechanical vibrations can affect the receiver and how to mitigate them.
Guidelines for optimal positioning of the receiver for accurate reception.
Importance of proper cable routing to prevent interference.
Information on the Personal Coded Device (PCD) technology for heart rate receivers.
Explanation of operating modes with coded and standard straps/receivers.
| Brand | Technogym |
|---|---|
| Model | Glidex 600 XTPRO |
| Category | Fitness Equipment |
| Language | English |