Drive Pressure Check
This procedure should only be performed if you suspect
a drive pump or drive motor is faulty. The procedure is
difficult and in performing it, you risk contaminating
your hydraulic system if your equipment and working
environment is not clean.
Make certain all couplers, fittings and hoses used during
this process are clean and free of contaminants that may
potentially cause damage to the hydraulic pump and or
system components!
Drive pressure is used to turn the drive motors that
power your tracks. Low pressure can cause decreased
drive motor performance resulting in sluggish maneu-
vering, decreased speed and or uneven forward or
reverse motion.
1. Remove the plug from the port you would like to
test and insert a quick coupler similar to port A.
2. Attach the hydraulic gauge to the port(s) you are
trying to test and route the gauge so you or an
assistant can read the gauge during testing.
3. Position the machine so that the lift arms are rest-
ing against the chassis stops and the front edge of
the bucket is facing, centered on and in contact
with an IMMOVABLE object.
4. Move the drive control fully forward in an attempt
to drive the machine forward. This will force oil
over the relief valve and give you a reading for the
circuit you are tapped into.
5. Attach a heavy-duty chain capable of restraining
the machine securely to the bucket and an
IMMOVABLE object.
6. Move the drive control fully rearward in an attempt
to drive the machine in reverse. This will force oil
over the relief valve and give you a reading for the
circuit you are tapped into.
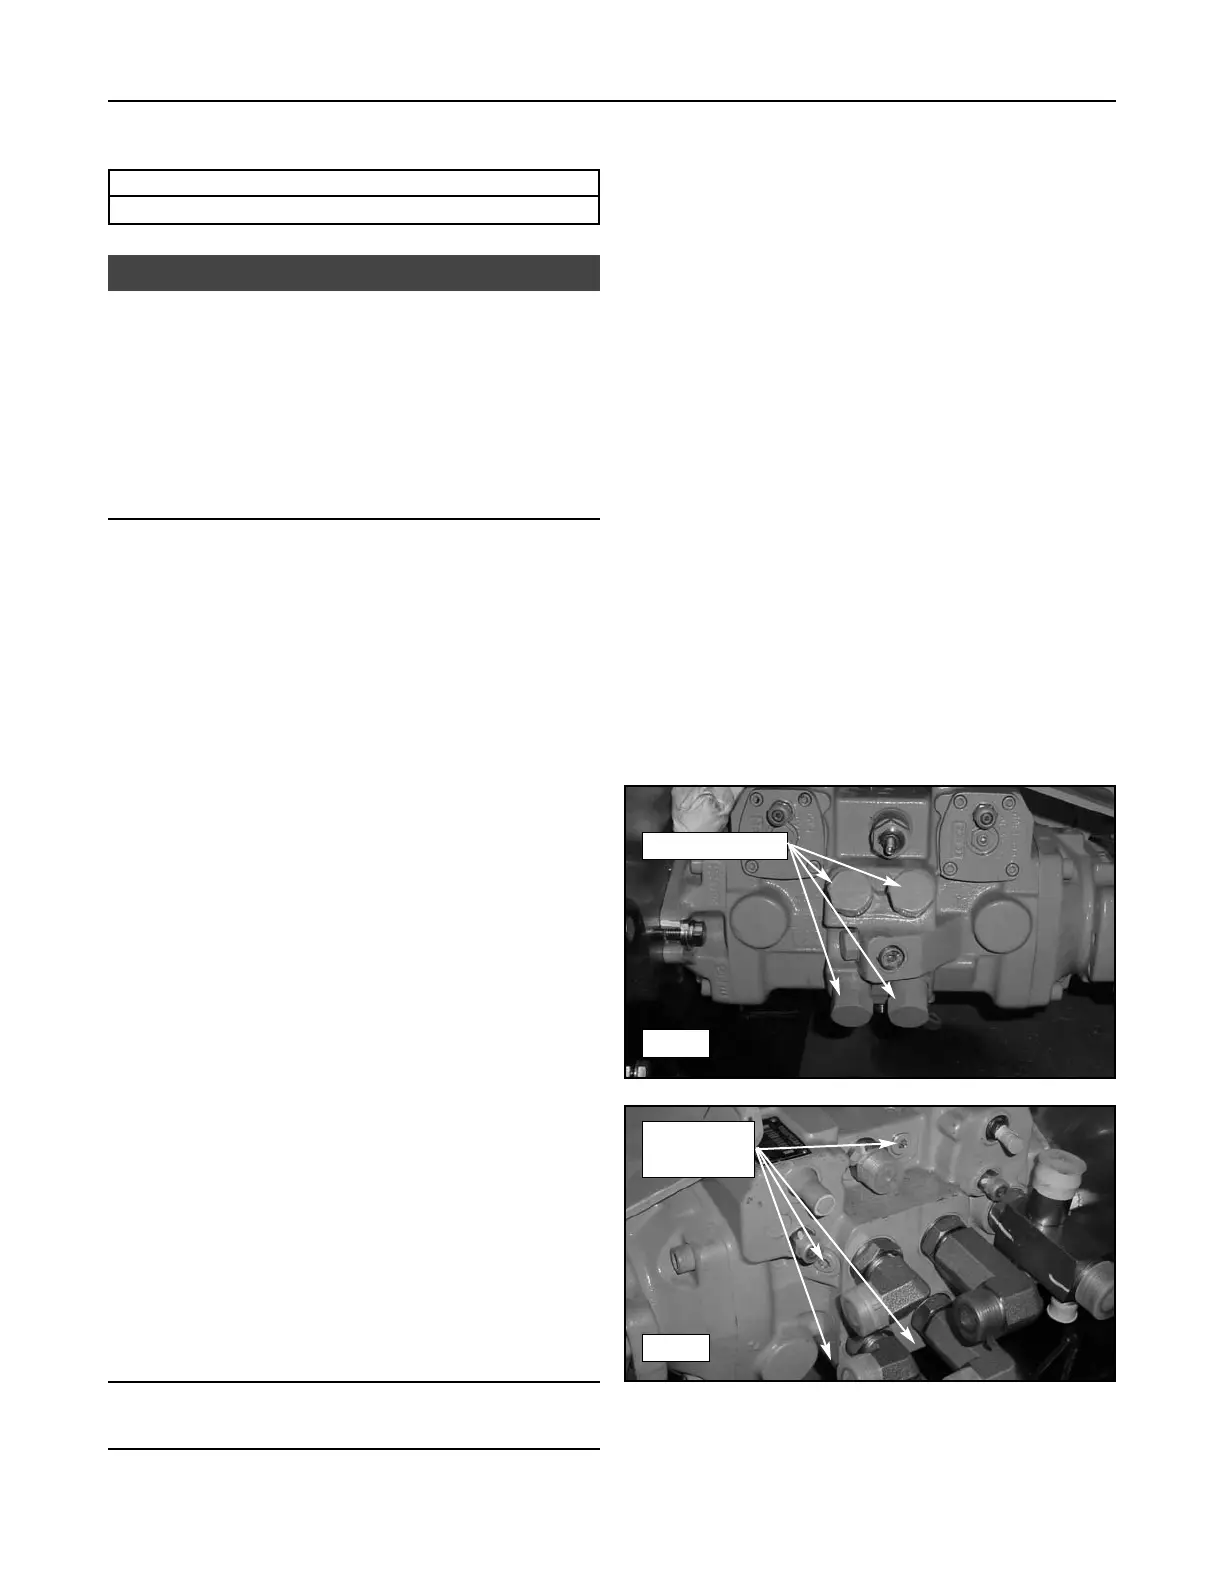
7. Check all four ports in this same manner and
record your readings.
Note: There are 4 drive pump test ports. The upper ports are
shown in figure 14-11 and the lower ports are located on the
bottom of the pump directly beneath the drive ports they test.
Check your readings against that stated below. If your
readings differ, relief replacement and or component
repair may be required.
Pressures should read:
• 5500 psi (37,920 kPa) when the relief is reached in
attempted forward or reverse motion.
Drive pressure troubleshooting:
8. If one reading is low, swap the relief valve with a
similar one and recheck. If the reading improves,
replace the faulty relief valve.
9. If two readings are low, but on different circuits
(pumps), perform step 8 for both.
10. If both readings are low on one pump, disconnect
the drive hoses from the suspected ports and plug
them at the pump. Cap the hoses to prevent con-
tamination and then recheck the pressures at
those ports. If the reading improves, the drive
motor is at fault. If the reading does not improve,
one pump (in the tandem assembly) is at fault.
11. If all four readings are low, it is unlikely that all four
relief valves are faulty. The tandem pumps are
most likely not working properly.
14-5
Compact Track Loader
14. Hydraulic Pressure
Required Tools
Pressure Gauge 0-6000 p.s.i. (41,370 kPa)
NOTICE
14-11
14-10
Test Ports
(see note)
Relief Valves
 Loading...