- 22 -
EasyWeather PC Software User Manual
1.0 General Information
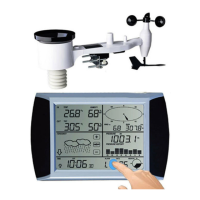
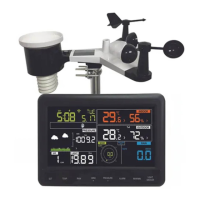
This Weather Station is a high quality, easy to use weather monitoring system
that reads, displays and records the weather data from internal as well as
external sensors. Along with the internally measured values for indoor
temperature, indoor humidity and air pressure the outdoor sensor will take data
for temperature, humidity, wind and rainfall. Operation of these units is by
wireless transmission to the Base Station.
After installing the “EasyWeather” program, your PC can display all indoor data
as well as the weather data from the Base Station that has been received from
the external sensors. Simply use the supplied USB cable and connect the Base
Station to the PC. You will then be able to track your current and historical
weather data.
2.0 System Requirements
To install the "EasyWeather" software onto your PC, the minimum requirements
are as follows:
Operating System: Windows NT4 (Service Pack >= 6a), Windows 2000,
Windows XP, Windows Vista. Windows 7/8/10,
MAC OS
Internet Explorer 6.0 or above
Processor: Pentium III 500 MHz or above
Memory: at least 128MB, 256MB recommended
Base Station and PC must be connected by USB cable
3.0 Installation of the “EasyWeather” Software
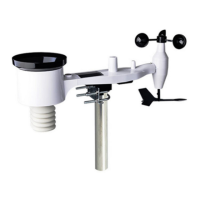
Firstly, the Base Station and the Outdoor Sensors should be connected and
checked for correct function (see Operation Manual for WS1080 Touch
Screen Weather Station for setting up the Weather Station). After successfully
checking, install the “EasyWeather” software as follows:
1. Switch on your PC, Download the EasyWeather software from.
http://download.ecowitt.net/down/softwave?n=Easyweather
2. Double click ““Easyweather.exe””
3. Select the installation process language option and click ok
4. Click next and select the destination folder (change directory when
needed)
5. Click next and select the shortcut folder (change directory when needed)