Operation 4-2 Manual 0-4688
4.02 Preparations For Operating
At the start of each operating session:
WARNING
Disconnect primary power at the source before
assembling or disassembling power supply, torch
parts, or torch and leads assemblies.
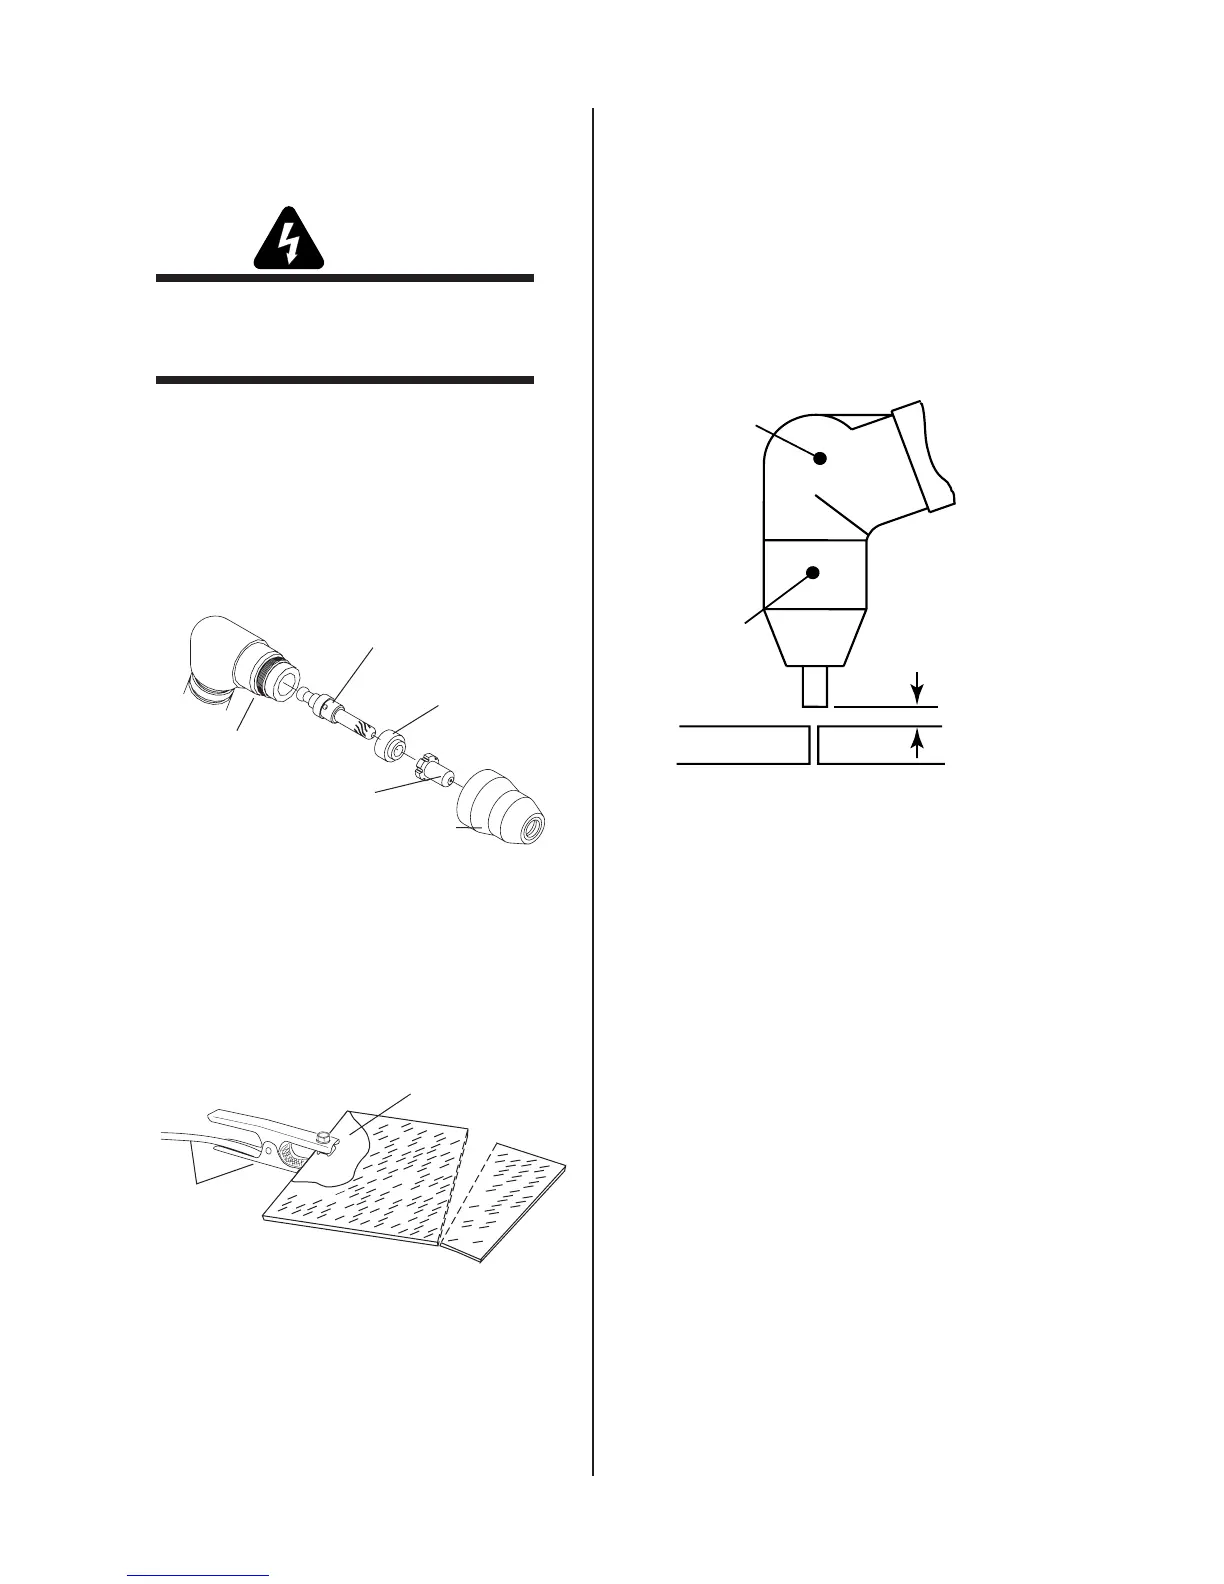
A. Torch Parts Selection
Check the torch for proper assembly and appro-
priate torch parts. The torch parts must correspond
with the type of operation, and with the amperage
output of this Power Supply (35 amps maximum).
Use only genuine manufacturer’s parts with this
torch.
Torch Head Assembly
Shield Cup, No. 9-6003
Gas Distributor,
No. 9-6507
Tip, No. 9-6501
Electrode, No. 9-6542
rt # A-04655
B. Torch Connection
Check that the torch is properly connected.
C. Connect Work Cable
connection to the work-
piece or cutting table
ork Cable
nd Clamp
D. Torch Operation
• Wear gloves and protective goggles.
• Do not place bare hand on work piece.
1. For drag cutting, keep the torch in contact with
the workpiece.
2. For standoff cutting, hold the torch 1/8 - 3/8
in (3-9 mm) from the workpiece as shown be-
low.
A-00024
hield Cup
Torch
Standoff
Distance 1/8" - 3/
3. With the torch in starting position, press and
hold the Torch Trigger. After an initial two sec-
ond pre-flow, the pilot arc will come on and
remain on until the cutting arc starts.
4. Once on, the cutting arc remains on as long as
the Torch Trigger is held down, unless the torch
is withdrawn from the work or torch motion is
too slow.
5. To shut off the torch simply release the Torch
Trigger. When the trigger is released a gas post-
flow will occur. If the Torch Trigger is pushed
during the post-flow, the cutting arc will restart
immediately when the torch is brought within
range of the workpiece.

 Loading...