Engine Maintenance
98
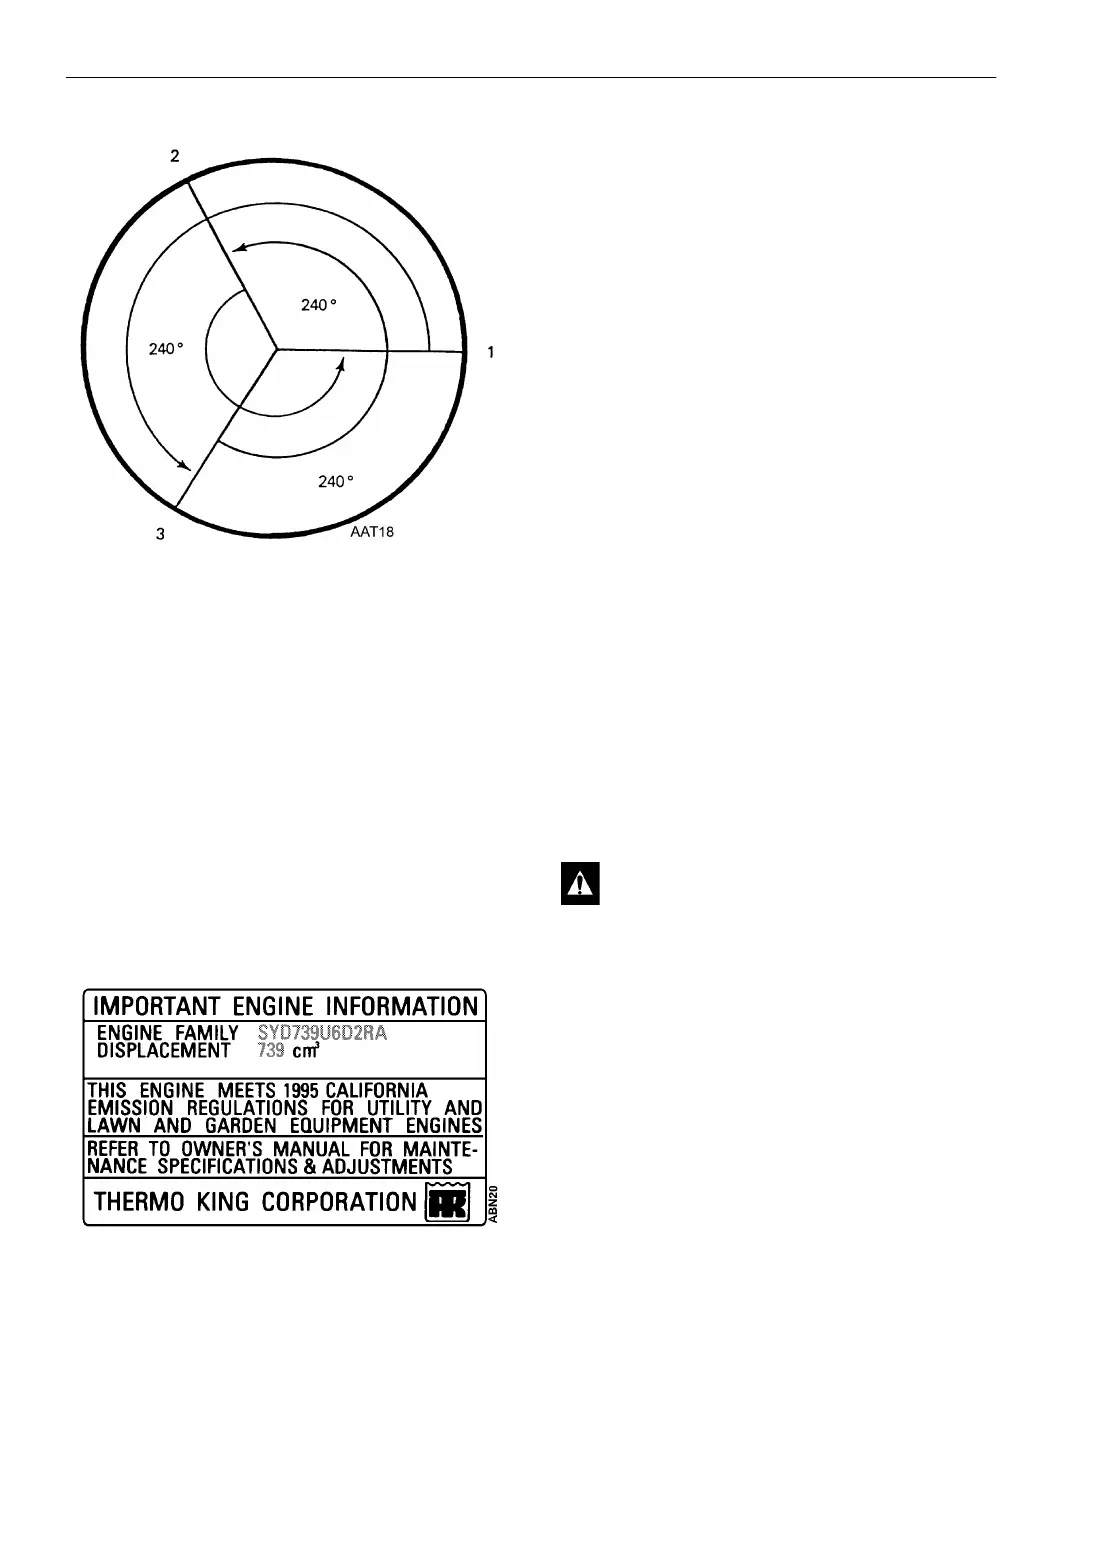
Figure 50: Individual Cylinder Timing and Firing
Order
Fuel Limit Screw
The fuel limit screw is not adjustable. It is
equipped with an anti-tamper cap to fulfill
requirements for CARB (California Air Resources
Board) emission regulations. Service technicians
must be CARB certified to perform service on
fuel limit screw for equipment operating in
California. All other equipment can be serviced
per recent service bulletins with special tools and
procedures. California service technicians should
see your local Thermo King dealer for recent
bulletins.
Figure 51: CARB California Air Resources Board
Tag
Engine Valve Clearance
Adjustment
1. Remove the valve cover. Torque 18 mm
diameter head bolts prior to adjusting the
valves: 26.8 ft-lb (36.3 N•m). Valve clearance
should be checked after the first 500 hours of
engine operation and after every 2000
operating hours, maximum. It is very
important that valves be adjusted to the correct
specifications for satisfactory engine
operation. Insufficient valve clearance will
result in compression loss and misfiring of
cylinders resulting in burned valves and seats.
Excessive valve clearance will result in noisy
valve operation and abnormal wear of the
valves and rocker arms. The intake and
exhaust valves are adjusted with the valve in
the closed position.
2. The intake valve and exhaust valve are
adjusted to 0.0079 in. (0.20 mm) with the
temperature at 70 F (21 C).
Turn the engine by using the belt on the
crankshaft pulley. Rotate the engine in the
direction of rotation (clockwise as viewed
next to the flywheel) from the water pump
end.
a. Turn the engine so number 1 cylinder is on
compression with piston to TDC. Both
push rods should turn freely. Adjust both
valves on number 1 cylinder.
b. Revolve the crankshaft 240 degrees to
TDC mark on number 3 cylinder, and
adjust both valves.
c. Turn the crankshaft 240 degrees to align
TDC mark of number 2 cylinder, and
adjust both valves.
d. Be sure to tighten locking nut while
holding the ball head screw in position.
3. Install the valve cover making sure that the
gasket in position.
CAUTION: Make sure the fuel rack is off
to prevent the engine from starting.