TW 230VTR
20 / 65
SERVICE INSTRUCTIONS
C190-0113 01.07.2019 Rev: 4.0
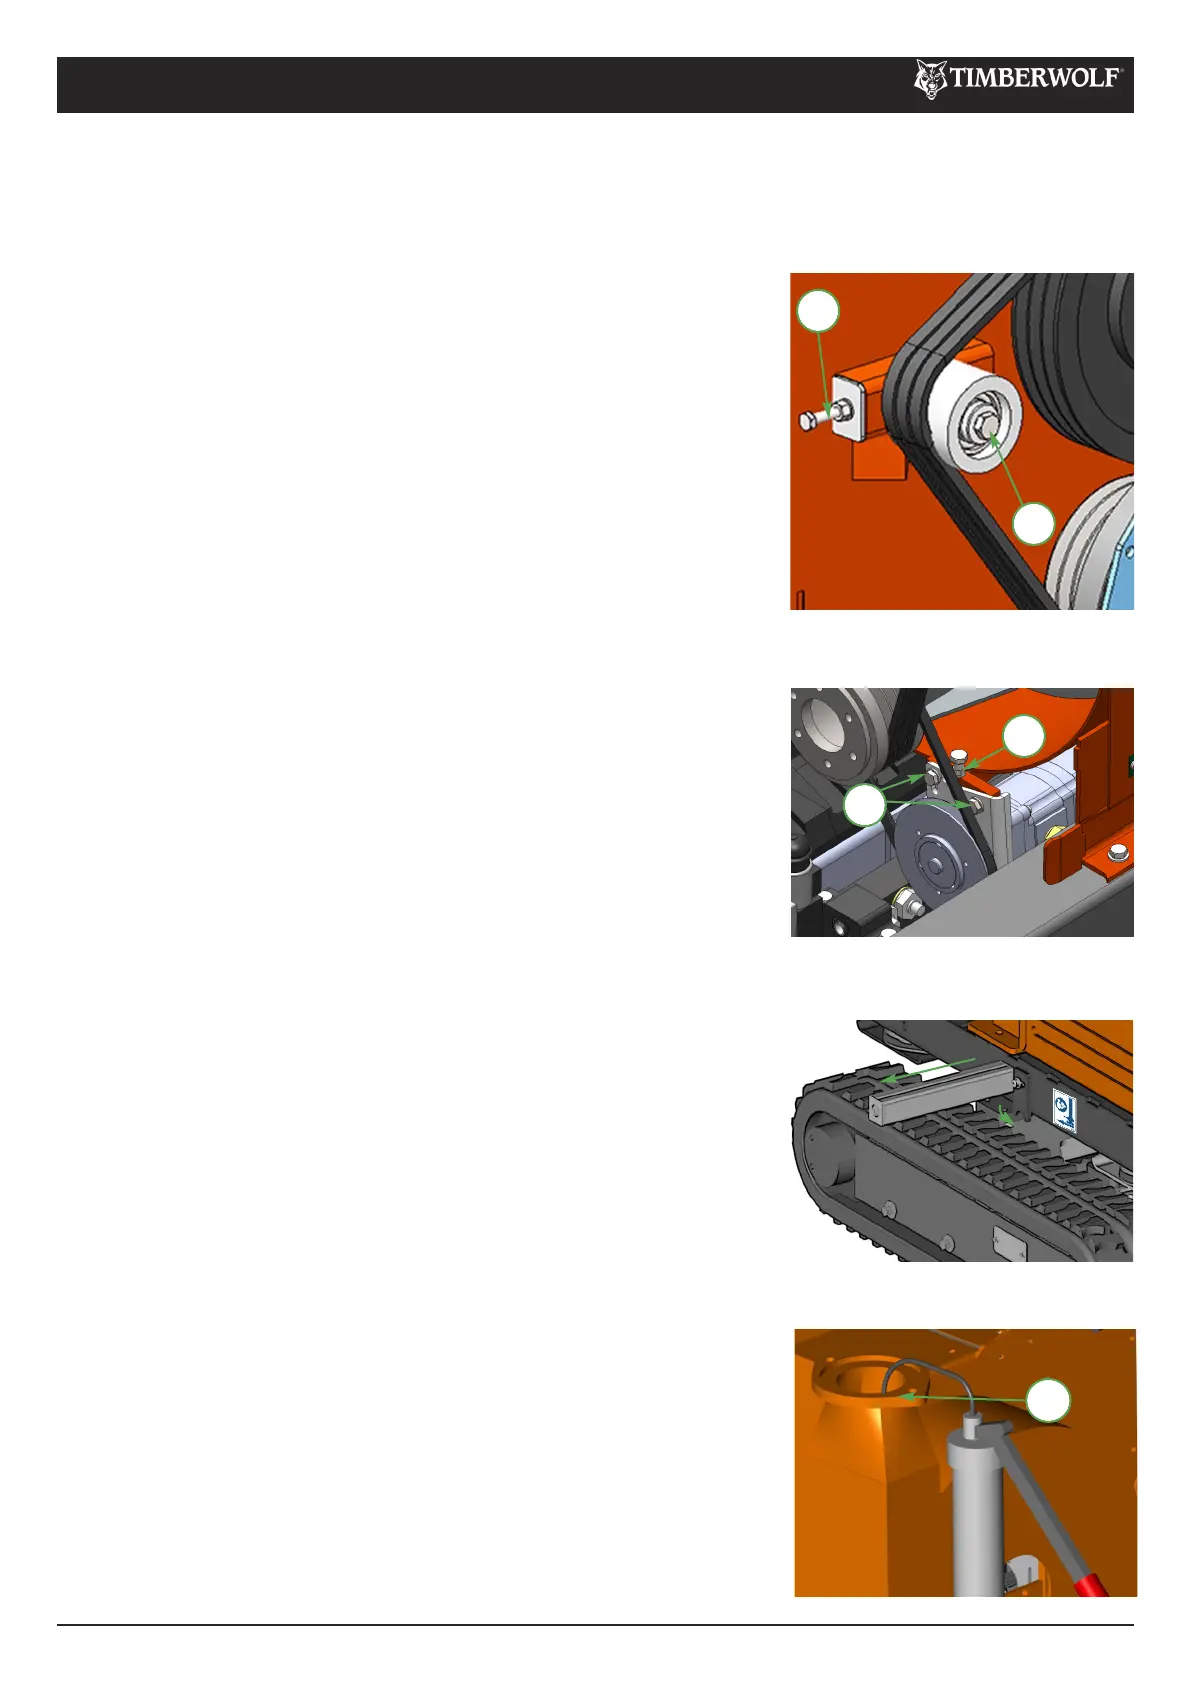
TENSION DRIVE BELTS
Remove engine bay side panel. 1
Loosen bolt in centre of tensioner pulley with a 19 mm 2
spanner so that pulley is able to slide with minimal wobble.
Turn nut in end of tensioner pulley slider until correct belt 3
tension is achieved. For instructions on checking belt
tension & correct belt tension values, please refer to the
Timberwolf V-Belt Tensioning Data Table (page 34).
Re-tighten bolt in centre of tensioner pulley. 4
Run machine and test, recheck belt tension. 5
NOTE: Slack drive belts will cause poor performance and excess
belt and pulley wear.
NOTE: There will normally be a rapid drop in tension during run-in period for new belts. When new belts are fitted,
check the tension every 2 - 3 hours and adjust until the tension remains constant. Belt failures due to lack of correct
tensioning will not be covered under your Timberwolf warranty.
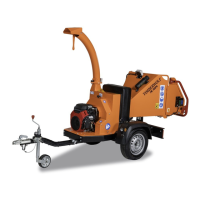
Remove the discharge tube. 1
Apply multipurpose grease to surface shown. 2
Refit discharge tube.3
GREASE THE DISCHARGE FLANGE
3
2
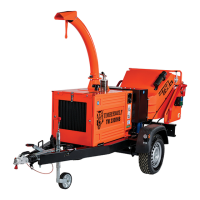
TENSION HYDRAULIC PUMP BELT
Loosen the cover plate bolt on the appropriate side of the chipper. 1
Rotate cover plate, allowing it to remain attached to the chassis. 2
Pull the jacking beam from the access hole to its fullest extent (approx 3
300 mm).
After use, push beam back into access hole and secure cover plate.4
Loosen the 2 M10 bolts on the mounting pad. 1
Loosen the M8 lock nut. 2
Adjust M8 bolt to tension/slacken drive belt. For instructions on 3
checking belt tension & correct belt tension values, please refer to the
Timberwolf V-Belt Tensioning Data Table (page 34).
Re-tighten lock nut and M10 bolts.4
2
1
2
CHASSIS JACKING POINT