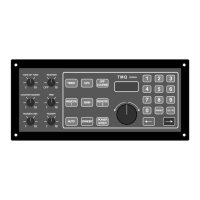
TMQ AP9 Autopilot (V6.0 - 965) Page 25 of 51 31/1/2017
· Attach the rudder feedback to the bracket. (For RFUS - arm is uppermost. For
RFUH - shaft is lowermost)
· Drill a hole in the tiller arm for the linkage arm connection block (1/4” diameter)
· Attach the linkage swivel block to the tiller
· Attach the linkage ball joint to the rudder feedback arm
· Fit the linkage arm through the swive block and attach the other end to the ball
joint
· Remove the top of the feedback (RFUH only)
· Connect 3 core cable to the RFU terminal strip (RFUH only)
· Route the rudder feedback cable to the AP9 position
· Connect the RFU cable to the internal terminal strip T1 marked RFU of the AP9
Installation Checks
· Turn the helm slowly from hard over to hard over and observe the movement of
the rudder feedback arm
· Ensure the feedback arm or linkage does not foul in any position
· Ensure there is no strain on the feedback arm or linkage
· Check the rectangular correlation between the feedback arm, the tiller and the
linkage with rudder amidships
· Check direction of feedback arm movement (port and starboard) corresponds
with the markings on the feedback body and the feedback arm direction matches
the tiller movement direction for port and starboard
Selection Switch- Standard or Heavy Duty Feedback
The AP9 is normally dispatched from the factory as ordered. However, when installation
of the feedback is completed on the boat the RFUS / RFUH selection switch in the AP9
control unit should be checked for correct selection.
If RFUS is used, slide DIP 1to RFUS
If RFUH is used, slide DIP 1 to RFUH.