28
11.3 Using the WP-700 remote controller
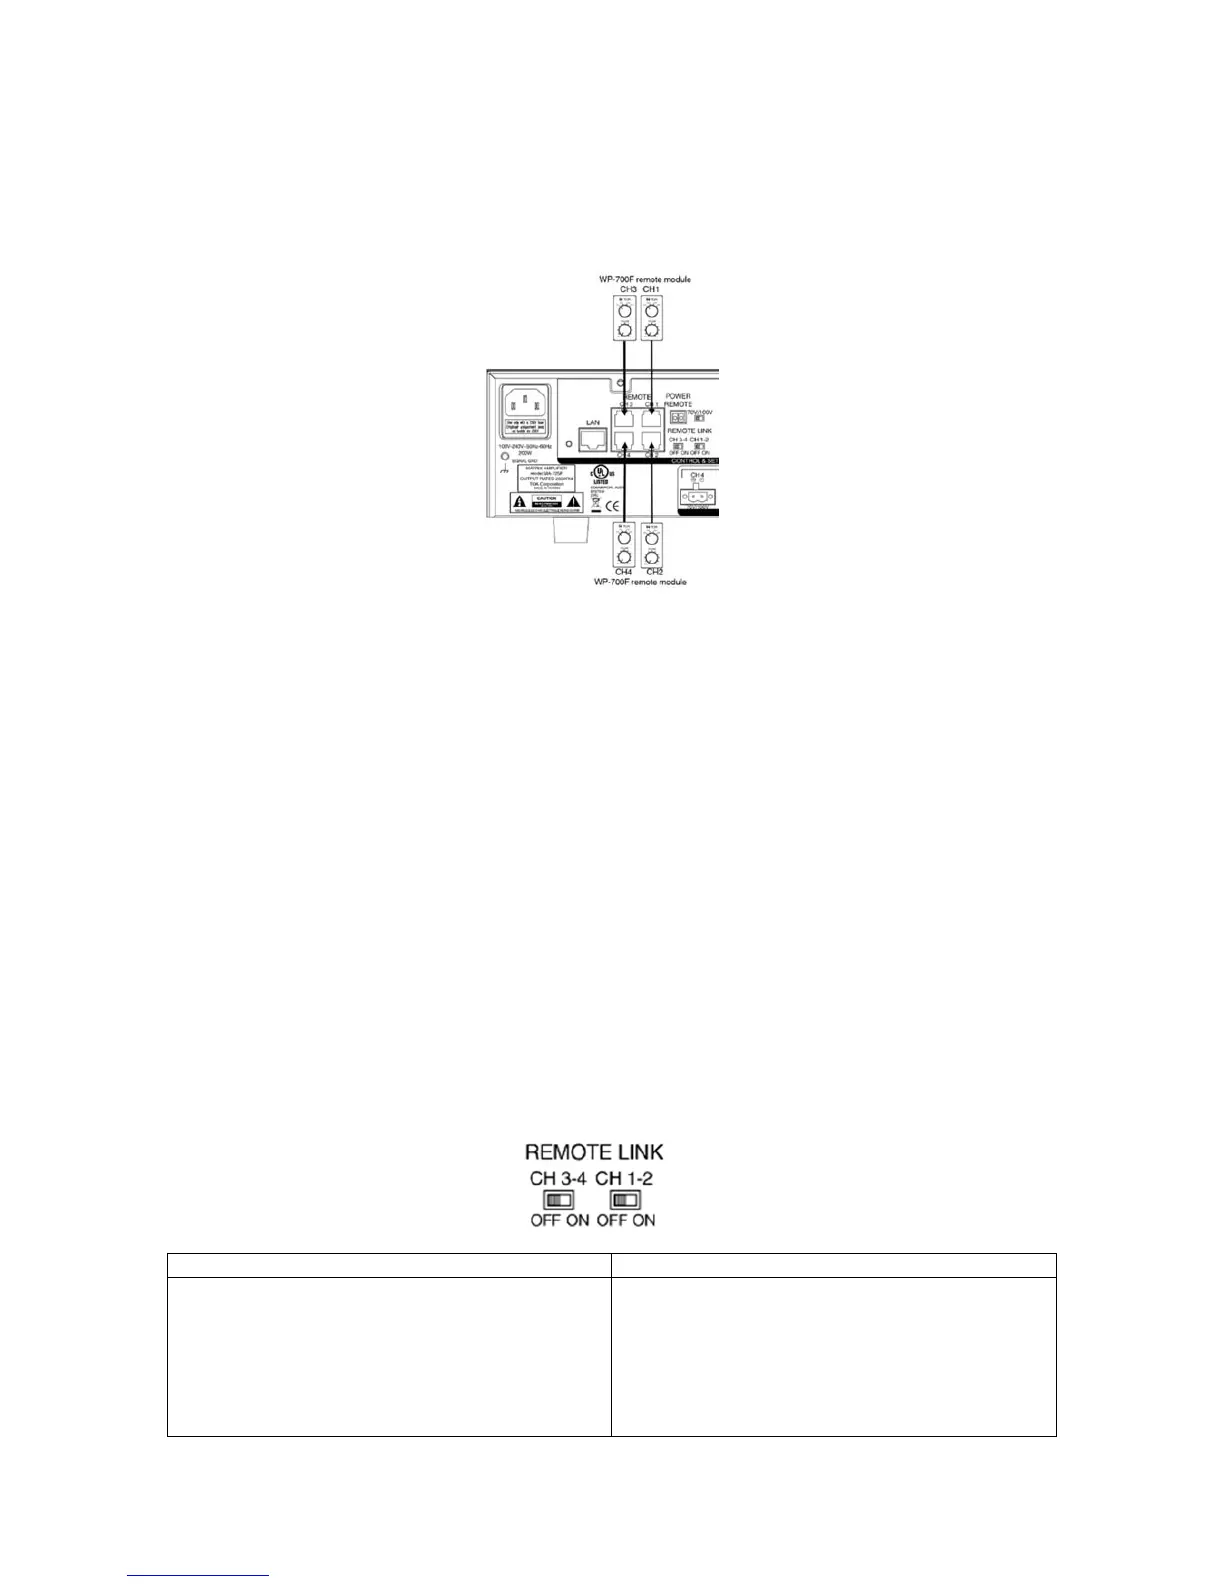
11.3.1 Connecting the WP-700
Connect WP-700 to the REMOTE CH1, CH2, CH3, CH4 RJ-45 port. The front panel REMOTE
indication will light if there is WP-700 connected.
11.3.2 Remote Volume Control and Input Selection
Step 1. Connect the WP-700 to the channel that need to control remotely.
Step 2. When connected, the output volume will override the front panel OUTPUT LEVEL
CONTROL to WP-700’s VOLUME CONTROL. The front panel’s INPUT SELECTION
will be override to WP-700’s INPUT SELECTION setting. The front panels
Step 3. Rotate VOLUME clockwise to increase the output level, counter-clockwise to
decrease the output level.
Step 4. Input selection : same as description on 11.2.2
Note: When WP-700 connected, the front panel’s OUTPUT LEVEL CONTROL and INPUT
SELECTION SWITCH is not functional, it means when adjusting the output level and
input selection, the WP-700 has higher control priority than front panel.
11.3.3 Remote Link
Use to control the output volume and input selection of CH1 and CH2 or CH3 and CH4 at the
same time.
CH1-2:
ON OFF
CH1, CH2 could control the CH1 and CH2’s
volume and input selection by one WP-700 at the
same time. The REMOTE INDICATOR on CH1 and
CH2 will light at the same time.
Note: Only connect to CH1’s REMOTE TERMINAL
to present remote link function
CH1, CH2’s volume is controlled separated by two
WP-700.