22
Donaldson Company, Inc. © 1995
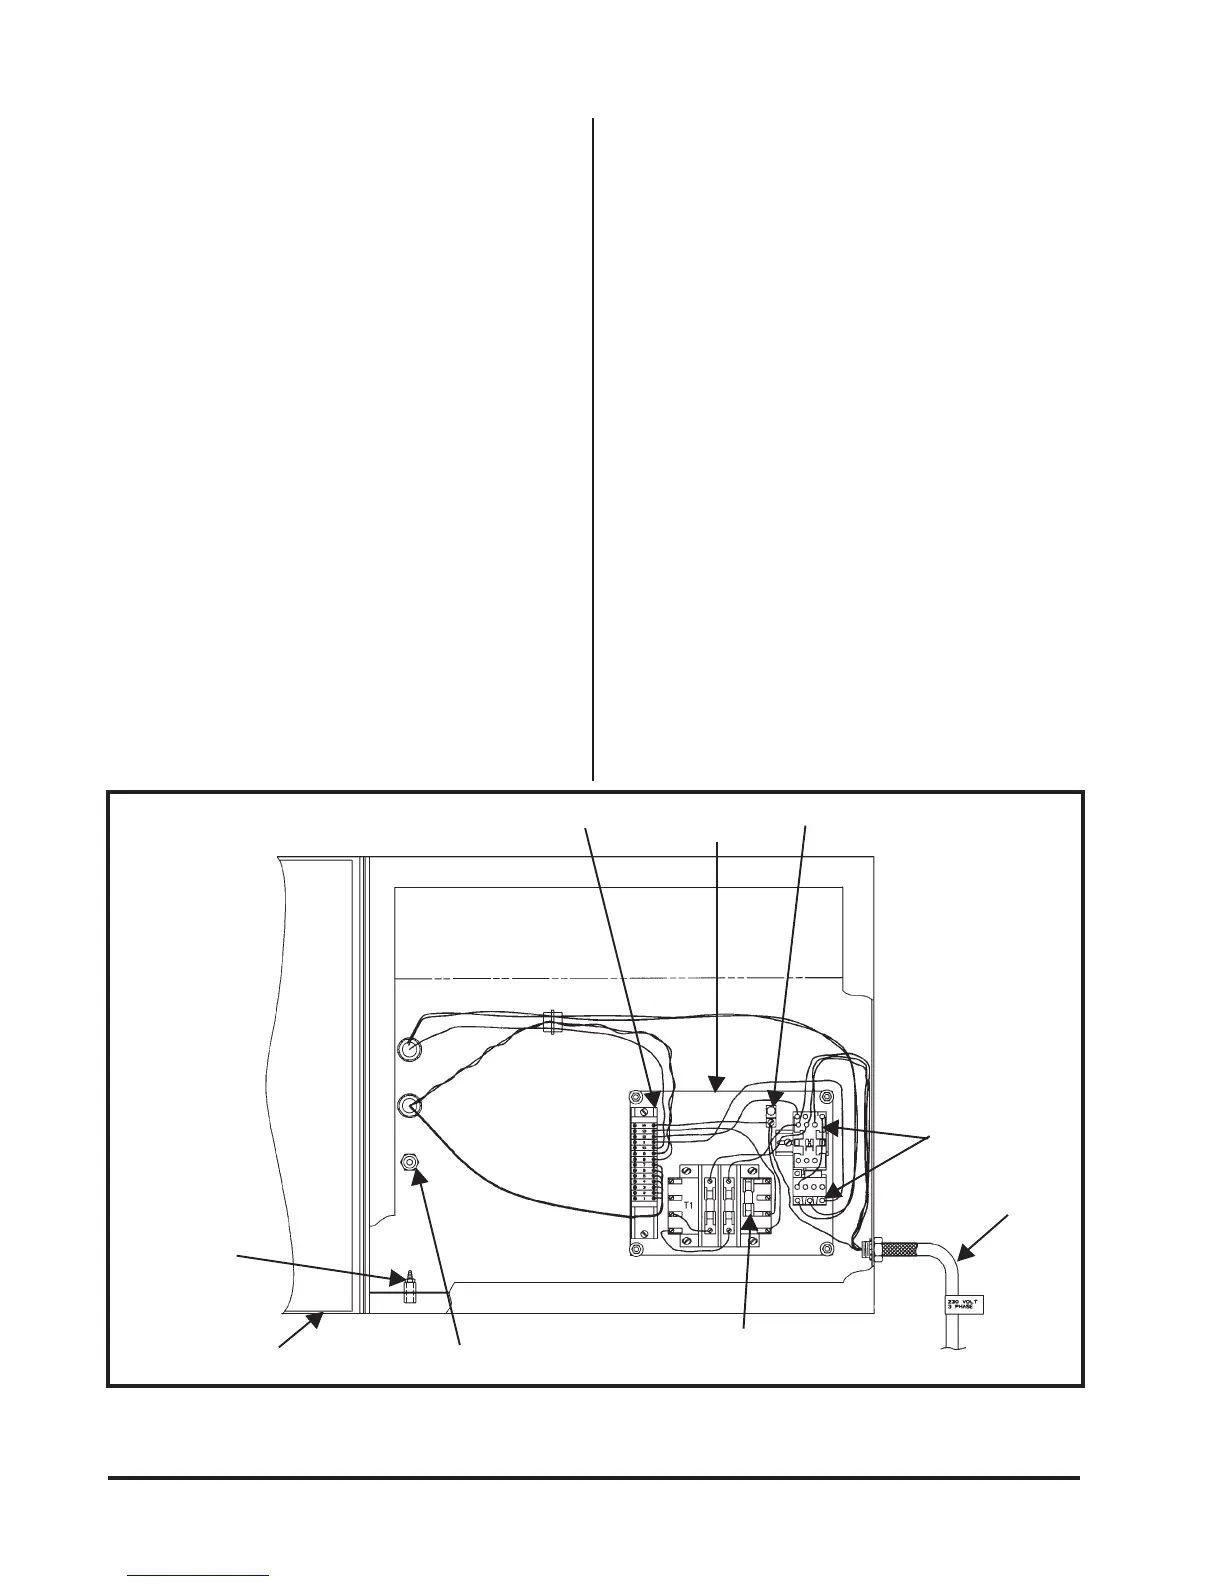
Figure 18
Prewired with Checker Board in Remote Enclosure
Power Cord
Terminal Strip
Mounting
Panel
Ground Lug
Factory Wired
Motor Starter
Door Shown in
Open Position
High Pressure
Fitting
Low Pressure Fitting
Fuse Kits and
Transformer
The pre-wired version with the Checker board
in the remote enclosure should be installed
according to the following steps.
1. Mount the Checker board enclosure in a
location convenient for the machine
operator (see Figure 28 Remote Checker
Board Assembly).
2. Install conduit between the electrical
compartment and the remote enclosure. Use
sealed fittings, making all connections leak
tight.
3. Wire from the terminal strip in the electrical
compartment to the terminal strip in the
remote enclosure (see Wiring Diagrams
Figures 20 through 27).
4. Drill mounting holes in the electrical
compartment to accept the bulkhead
pneumatic fittings shipped with the
collector. Install them on the most
convenient side of the collector, typically
adjacent to the conduit. Connect the 1/8"
ID vinyl tubing from the pressure taps inside
the electrical compartment to the bulkhead
fittings, and then from the bulkhead fittings
to the mating fittings on the Checker board
enclosure. Loosely fasten the vinyl tubing to
the conduit for support, being careful not to
flatten the tubing.
5. The pneumatic fitting located on the vertical
surface of the electrical compartment is the
low pressure fitting, and the fitting on the
horizontal surface is the high pressure
fitting. The Checker board enclosure has the
low pressure fitting closest to the front cover
and the high pressure fitting located closest
to the back of the enclosure.