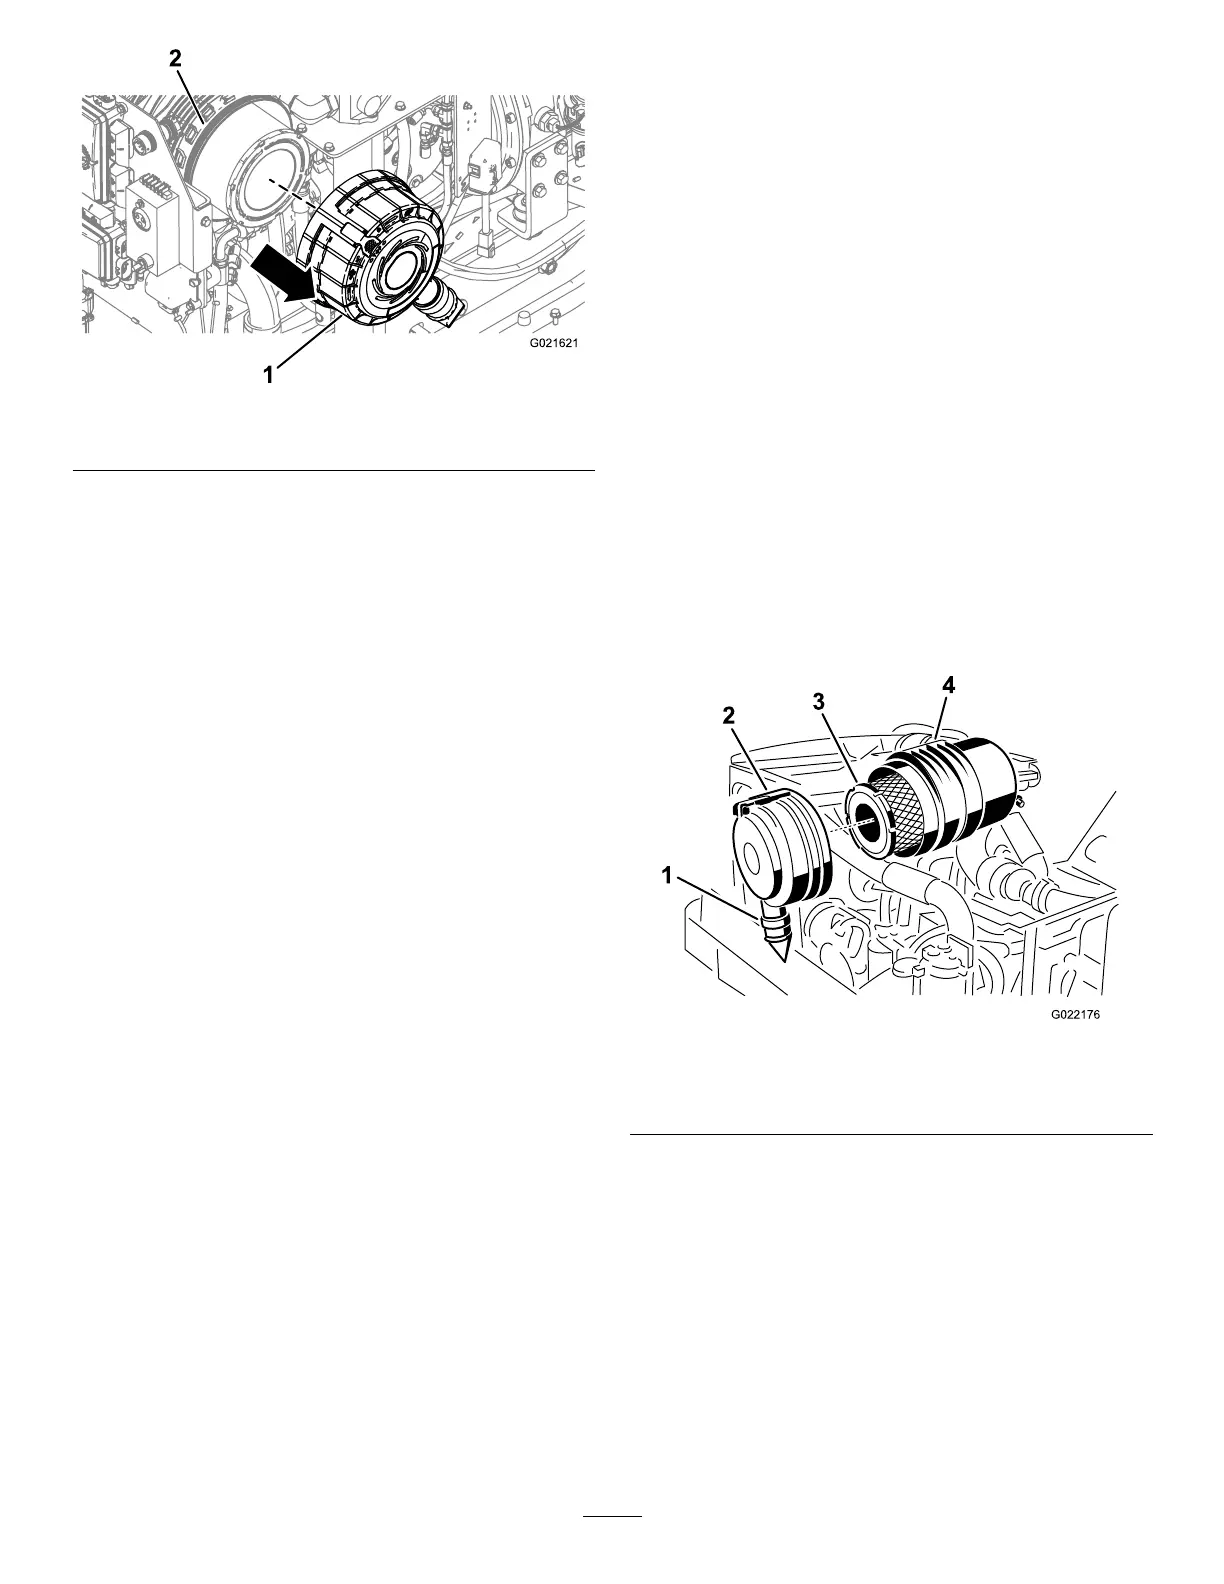
Figure80
1.Air-cleanercover2.Filterhousing
8.Cleananydebrisfrominsidethecover.
Important:If“CheckAirFilter”isnotdisplayed
onthescreen,donotremovetheairlters.
InstallingtheAir-CleanerCover
1.Parkthemachineonalevelsurface,stoptheengine,
andremovetheignitionkey.
2.Alignthedustcapontheaircleanerltercovertothe
5o’clockposition.
3.Aligntheaircleanerltercoverwiththelterhousing
(Figure80).
4.Rotatetheaircleanerltercoverclockwise,sothatthe
dustcapisatthe4o’clockposition(Figure79).
5.Pushthelatchontheaircleanerltercoverinward
untilitisfullyseated(Figure79).
ServicingtheAir-CleanerFilter
ServiceInterval:Every250hours
Replacetheltersonlywhenthe“CheckAirFilter”
indicatorappearsonthedisplayscreen;referto
CheckingtheAir-CleanerIndicator(page64).
Note:ContactyourAuthorizedToroDealertoorder
replacementlters.
1.Parkthemachineonalevelsurface,stoptheengine,
andremovetheignitionkey.
2.Openthefronthood.
3.Beforeremovingthelter,cleanoutalldebrisfrom
theinsideofthelterbodyusinglow-pressureair(40
psi,cleananddry).
Important:Avoidusinghighpressureairwhich
couldforcedirtthroughthelterintotheintake
tract.Thiscleaningprocesspreventsdebrisfrom
migratingintotheintakewhentheprimarylter
isremoved.
4.Removetheprimarylter(Figure81).
Important:Donotcleantheusedlter.
Figure81
1.Rubber-outletvalve
3.Air-cleaner,primarylter
2.Air-cleanerlatch4.Air-cleanerbody
5.Inspectthenewlterforshippingdamage,checking
thesealingendofthelterandthebody.Donotuse
adamagedelement.
Important:Donotcleantheusedsafetylter
(Figure82).Replacethesafetylterwithanew
oneafterevery3primarylterservices,orwhen
indicatedbythe“CheckAirFilter”onthedisplay
screen.Ifyouarenotreplacingit,donotremove
thesafetylter.
65