Figure 92
1. Blade bolt 2. Anti-scalp cup
Inspecting and Sharpening
the Cutter Blade(s)
A w or n or dama ged blade can br eak, and
a piece of the blade could be thr o wn into
the operator’ s or bystander’ s ar ea, r esulting
in serious per sonal injur y or death. T r ying
to r epair a dama ged blade may r esult in
discontin ued safety cer tification of the
pr oduct.
• Inspect the blade periodicall y f or w ear
or dama ge.
• Nev er tr y to straighten a blade that is
bent or w eld a br ok en or crack ed blade.
• R eplace a w or n or dama ged blade.
T w o areas m ust be considered when c hec king and
ser vicing the cutter blade-the sail and the cutting
edg e . Both cutting edg es and the sail, whic h is
the tur ned up por tion opposite the cutting edg e ,
contribute to a g ood quality-of-cut. T he sail is
impor tant because it lifts the g rass up straight,
thereb y producing an ev en cut. Ho w ev er , the sail
will g radually w ear do wn during operation, and
this condition is nor mal. As the sail w ears do wn,
the quality-of-cut will deg rade somewhat, although
the cutting edg es are shar p . T he cutting edg e of
the blade m ust be shar p so that the g rass is cut
rather than tor n. A dull cutting edg e is evident
when the tips of the g rass appear bro wn and
shredded. Shar pen the cutting edg es to cor rect
this condition.
1. P osition the mac hine on a lev el surface . Raise
the cutting unit, eng ag e the parking brak e ,
put the traction pedal in neutral, put the PTO
lev er in the Off position, stop the engine , and
remo v e the ignition k ey .
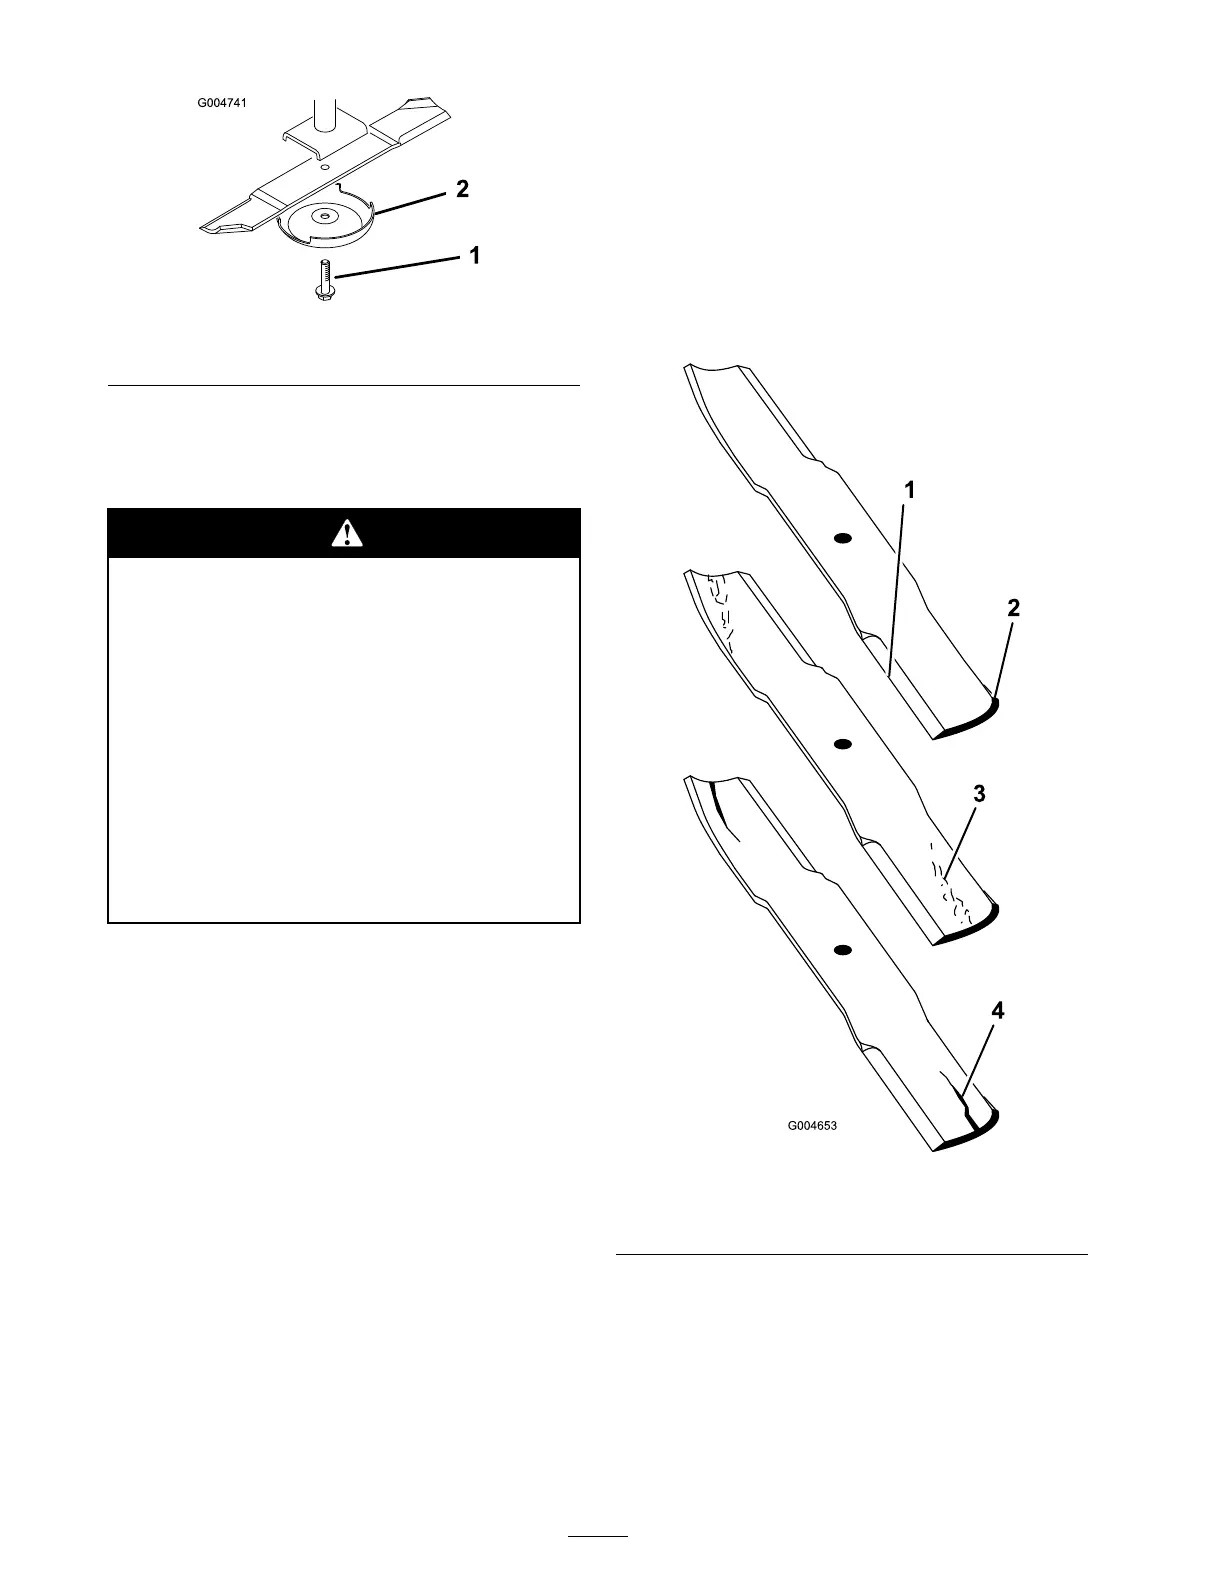
2. Examine the cutting ends of the blade carefully ,
especially where the flat and cur v ed par ts of
the blade meet ( Figure 93 ). Since sand and
abrasi v e material can w ear a w a y the metal that
connects the flat and cur v ed par ts of the blade ,
c hec k the blade before using the mo w er . If
w ear is noticed ( Figure 93 ), re place the blade .
Figure 93
1. Cutting Edge 3. Wear/slot Forming
2. Curved Area 4. Crack
3. Examine the cutting edg es of all of the blades .
Shar pen the cutting edg es if they are dull or
nic k ed. Shar pen only the top of the cutting
edg e and maintain the original cutting angle to
mak e sure of shar pness ( Figure 94 ). T he blade
will remain balanced if the same amount of
metal is remo v ed from both cutting edg es .
56