side.Adjusttheothersidetowithin±2.2mm
(0.090inch)ofthecorrectside.
7.Adjusttherightand/orleftheight-of-cutbrackets
byrepeatingsteps1through4.
8.Securethecarriageboltsandangenuts.
9.Verifythe12,3,and9o’clockheights.
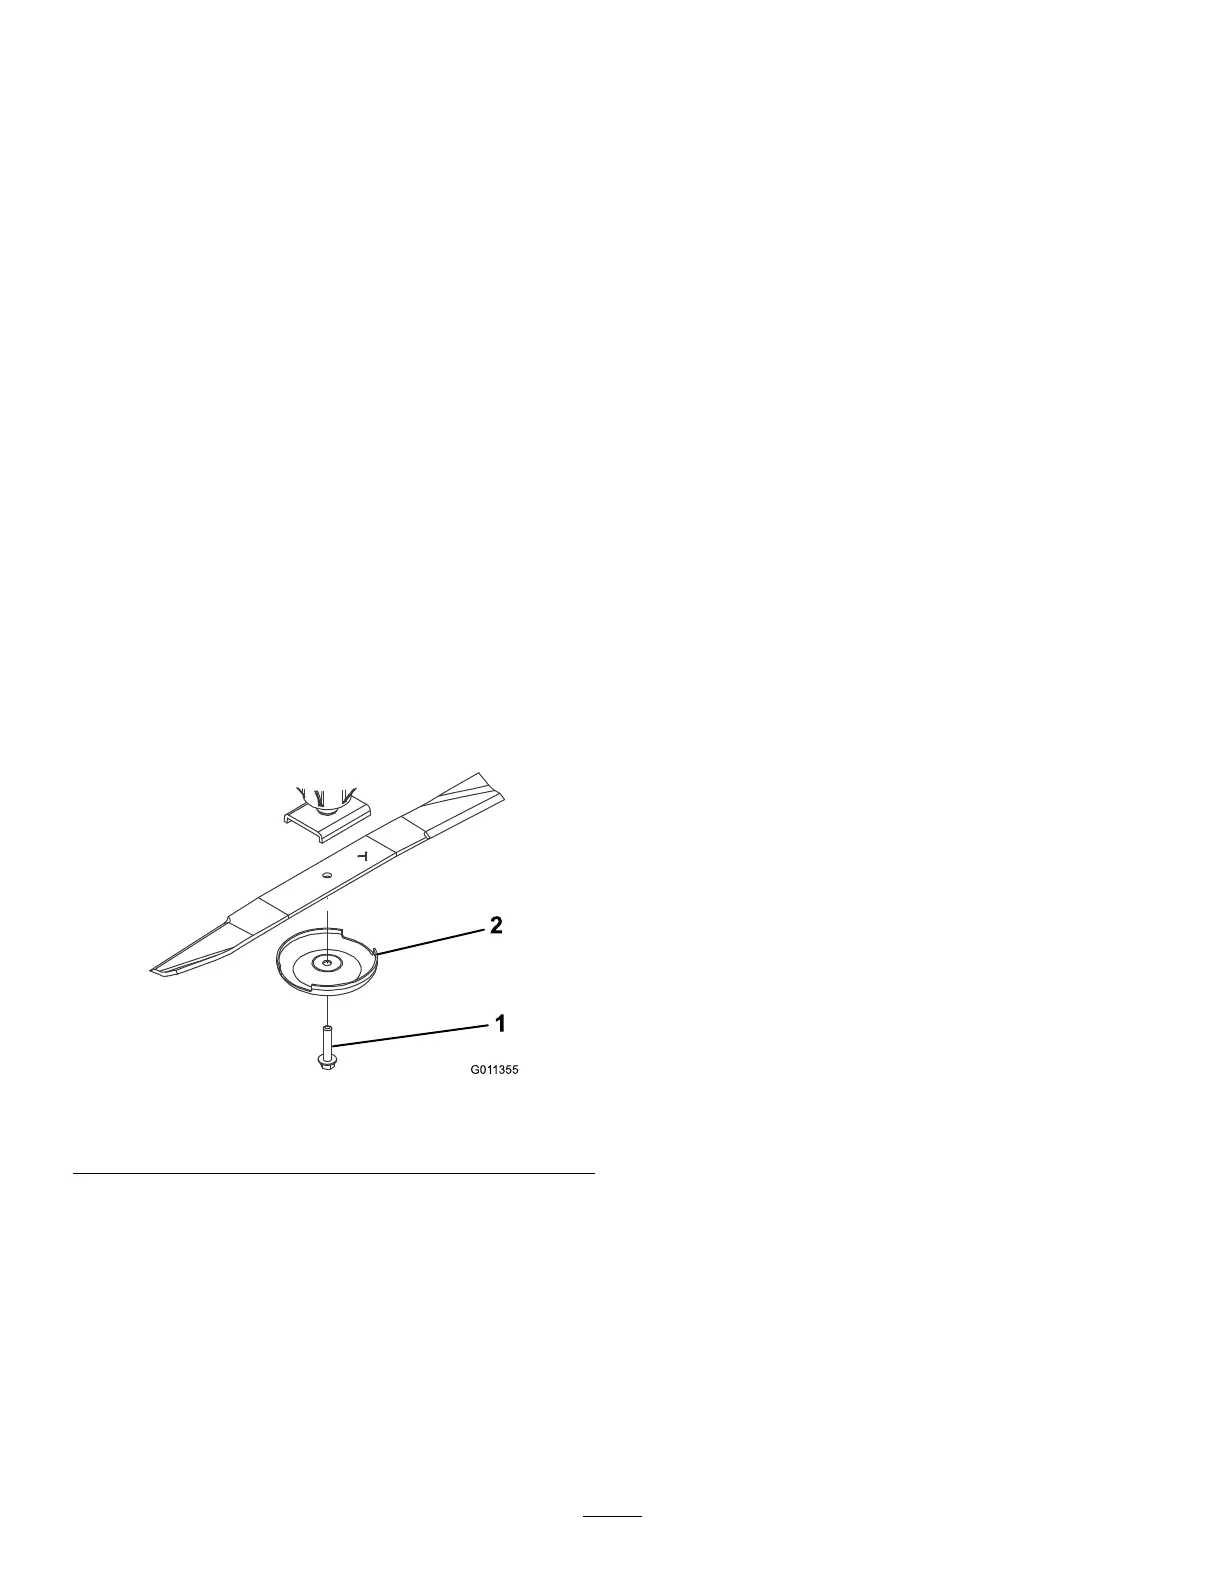
RemovingandInstalling
theCutting-UnitBlade(s)
Replacethebladeifithitsasolidobject,isout
ofbalance,orisbent.AlwaysusegenuineT oro
replacementbladestoensuresafetyandoptimum
performance.
1.Parkthemachineonalevelsurface,raisethe
cuttingunittothetransportposition,engagethe
parkingbrake,shutofftheengine,andremove
thekey.
Note:Blockorlockthecuttingunittopreventit
fromaccidentallyfalling.
2.Grasptheendofthebladeusingaragor
thickly-paddedglove.
3.Removethebladebolt,anti-scalpcup,and
bladefromthespindleshaft(Figure83).
g011355
Figure83
1.Bladebolt2.Anti-scalpcup
4.Installtheblade,anti-scalpcup,andbladebolt
andtightenthebladeboltto115to149N∙m(85
to110ft-lb).
Important:Thecurvedpartoftheblade
mustbepointingtowardtheinsideofthe
cuttingunittoensurepropercutting.
Note:Afterstrikingaforeignobject,torqueall
spindle-pulleynutsto115to149N∙m(85to110
ft-lb).
InspectingandSharpening
theCuttingUnitBlade(s)
Twoareasmustbeconsideredwhencheckingand
servicingthemowerblade—thesailandthecutting
edge.Bothcuttingedgesandthesail,whichis
theturned-upportionoppositeofthecuttingedge,
contributetoagoodqualityofcut.Thesailis
importantbecauseitliftsthegrassupstraight,thereby
producinganevencut.However,thesailgradually
wearsdownduringoperation.Asthesailwears
down,thequalityofcutdegrades,althoughthecutting
edgesaresharp.Thecuttingedgeoftheblademust
besharpsothatthegrassiscutratherthantorn.A
dullcuttingedgeisevidentwhenthetipsofthegrass
appearbrownandshredded.Sharpenthecutting
edgestocorrectthiscondition.
1.Parkthemachineonalevelsurface,raisethe
cuttingunit,engagetheparkingbrake,putthe
tractionpedalinNEUTRAL,putthePTOlever
intheOFFposition,shutofftheengine,and
removethekeyfromtheignition.
2.Examinethecuttingendsofthebladecarefully,
especiallywheretheatandcurvedpartsofthe
blademeet(Figure84).
Note:Becausesandandabrasivematerial
canwearawaythemetalthatconnectsthe
atandcurvedpartsoftheblade,checkthe
bladebeforeusingthemower.Ifwearisnoticed
(Figure84),replacetheblade.
66