BeltMaintenance
CheckingtheBelts
ServiceInterval:Every50hours/Monthly(whichever
comesrst)—Checkthebelts.
Checkthebeltsforcracks,frayededges,burnmarks,wear,
signsofoverheating,oranyotherdamage.Replaceany
damagedbelts.
ReplacingtheMowerBelt
Important:Thebrakeneedstobeadjustedwhenthe
belttensionorthebrakelinkageisadjusted.
1.Disengagetheblade-control(PTO)leverandsetthe
parkingbrakes.
2.Stoptheengineandwaitforallmovingpartstostop
beforeleavingtheoperatingposition.
3.Removetheknobsandthebeltcoveronthemower.
4.Removetheidlerpulleyandthewornbelt.
5.Installthenewmowerbelt.
6.Installtheidlerpulley.
7.Engagetheblade-control(PTO)leverandcheck
thebelttension.RefertoAdjustingtheMowerBelt
Tension.
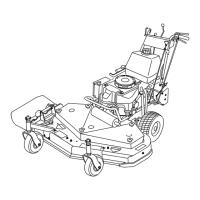
Note:Thepropermowerbelttensionis44to67N-m
(10to15ft-lb)withthebeltdeected13mm(1/2inch)
halfwaybetweenthepulleys(
Figure50orFigure51).
8.Engagetheblade-control(PTO)lever.
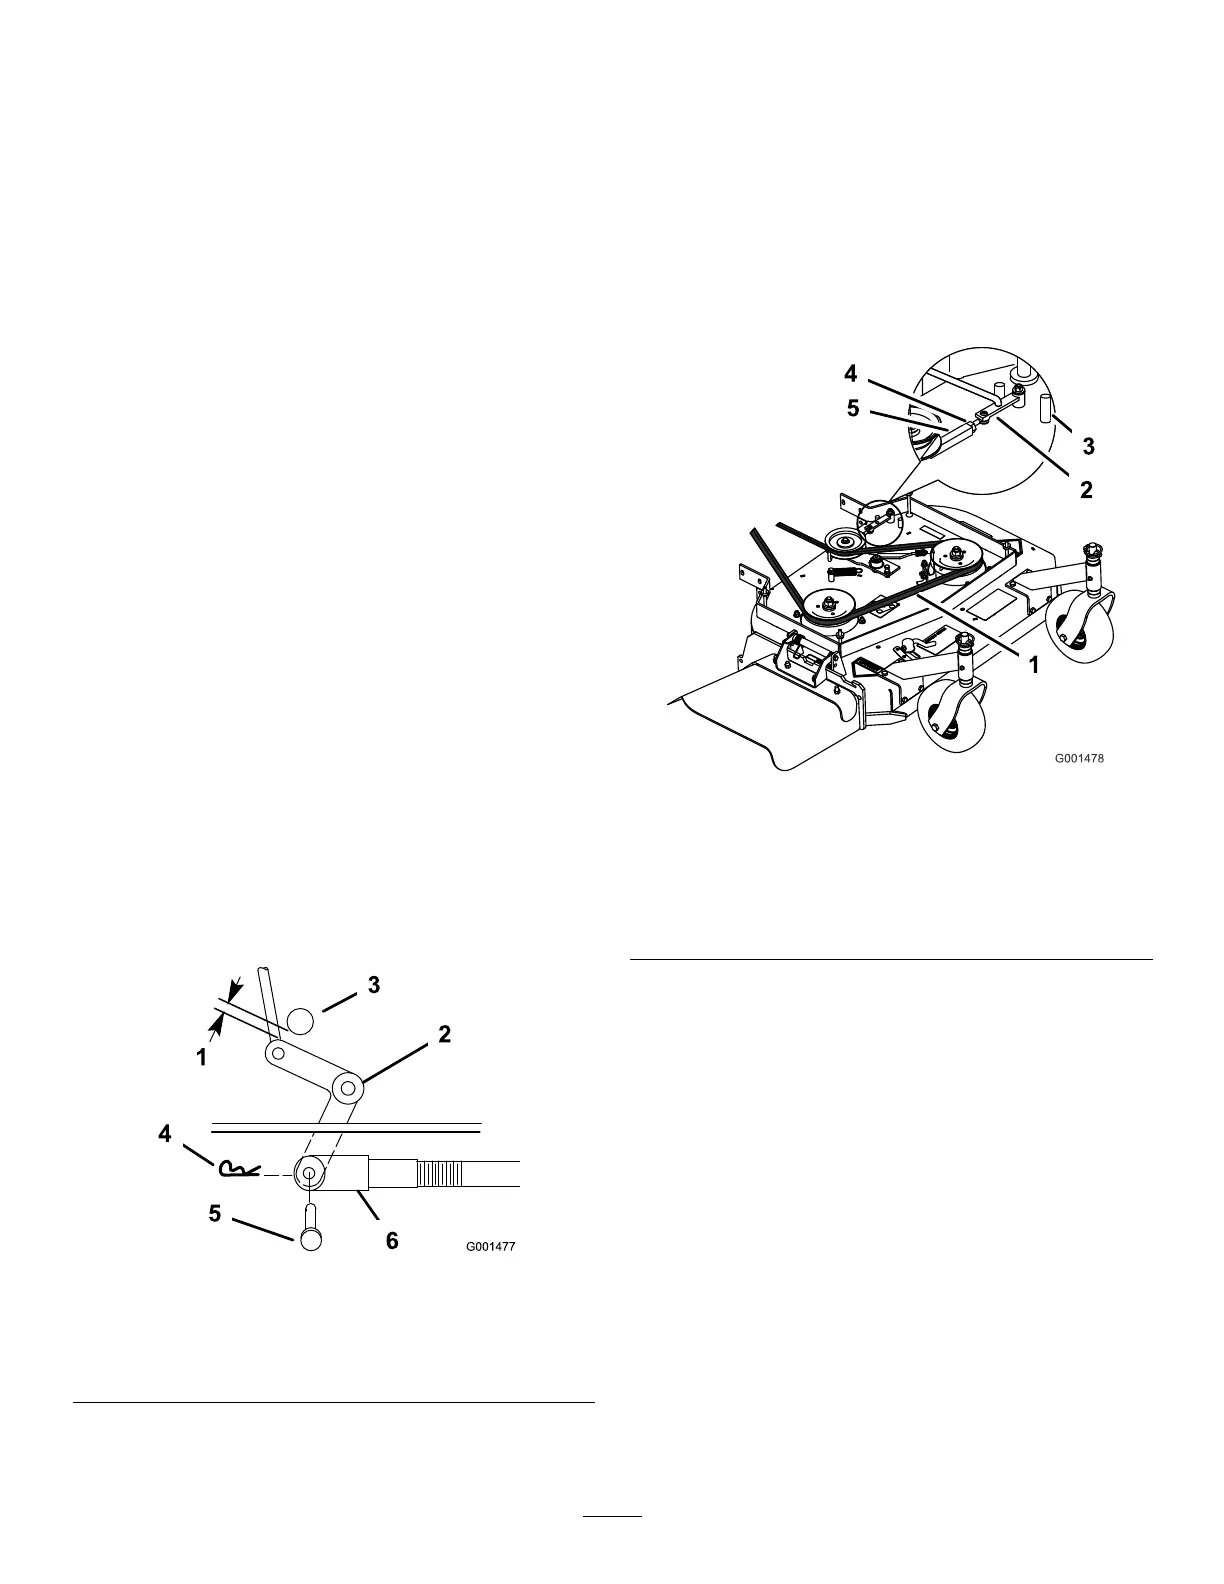
9.Checktheclearancebetweenthebellcrankandthe
transmissionoutputshaft(Figure49).
Figure49
1.2to3mm(1/16to1/8inch)
4.Hairpincotter
2.Bellcrank
5.Clevispin
3.Transmissionoutputshaft6.Clevis
Note:Theclearanceshouldbe2to3mm(1/16to
1/8inch).
10.Removethehairpincotterpinandtheclevispinfrom
thebellcrank.
11.Rotatetheclevisclockwiseontherodtoincreasethe
clearance;rotateitcounterclockwisetodecreaseit
(Figure49).
12.Disengagetheblade-control(PTO)lever.
Note:Iftheassistarmdoesnotcontactthefrontstop
onthemowerdeck(Figure50orFigure51),adjustthe
clevistobringthebellcrankclosertothetransmission
outputshaft(Figure49).
Figure50
36-inchmowerdeck
1.13mm(1/2inch)deection
here
4.Locknut
2.Assistarm5.Turnbuckle
3.Frontstop
37