Groundsmaster 4300--D Hydraulic SystemPage 4 -- 95
5. Putcapsorplugsondisconnectedhosesandfittings
to prevent contamination.
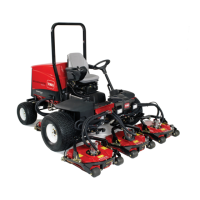
6. Remove two (2) socket head screws and flat wash-
ers that secure hydraulic motorto the cutting deck (Fig.
84). Remove hydraulic motor and O--ring from deck.
7. Cover top of spindle to prevent debris from entering
spindle. A spindle plug (see Special Tools in this chap-
ter) can be used to cover spindle.
8. If hydraulic fittings are to be removed from motor,
mark fitting orientation to allow correct assembly. Re-
move fittings from motor and discard O--rings.
Installation (Fig. 82)
1. If hydraulic fittings were removed from motor, lubri-
catenewO--rings, positionO--ringstofittings andinstall
fittingsintomotorports(seeHydraulicFittingInstallation
intheGeneralInformationsectionofthischapter).Make
sure that fittings are orientated correctly.
2. Removecoverfromtopofspindlethatwasplacedto
prevent debris from entering spindle.
3. Make sure thatO--ring is positionedtotop ofspindle
housing.Securehydraulicmotortothecuttingdeckwith
two (2) socket head screws and flat washers (Fig. 84).
4. Remove caps or plugs from fittings and hoses.
IMPORTANT: When installing the hydraulic hoses,
makesurethathydraulichosesarestraight(nottwisted)
before tightening the hoses to the motor fittings.
5. Lubricate and install new O--rings on motor fittings.
Correctlyconnecthydraulichosestothemotorusingla-
bels placed during removal procedure (see Hydraulic
Hose and Tube Installation in the General Information
section of this chapter).
6. Checkoillevel inhydraulicreservoirandaddcorrect
oil if necessary.
7. Follow Hydraulic System Start--up procedures (see
Hydraulic System Start--up in this section).
Figure 83
FRONT
#4 #1 #5
#3#2
GROUNDSMASTER
4300--D CUTTING
DECK LOCATIONS
1. Socket head screw
2. Flat washer
3. Hydraulic motor
4. Cutting deck
Figure 84
2
3
1
4
1. Flow IN
2. Flow OUT
3. Case drain
Figure 85
ROTATION
2
1
DIRECTION
3
Hydraulic
System
 Loading...


