g258146
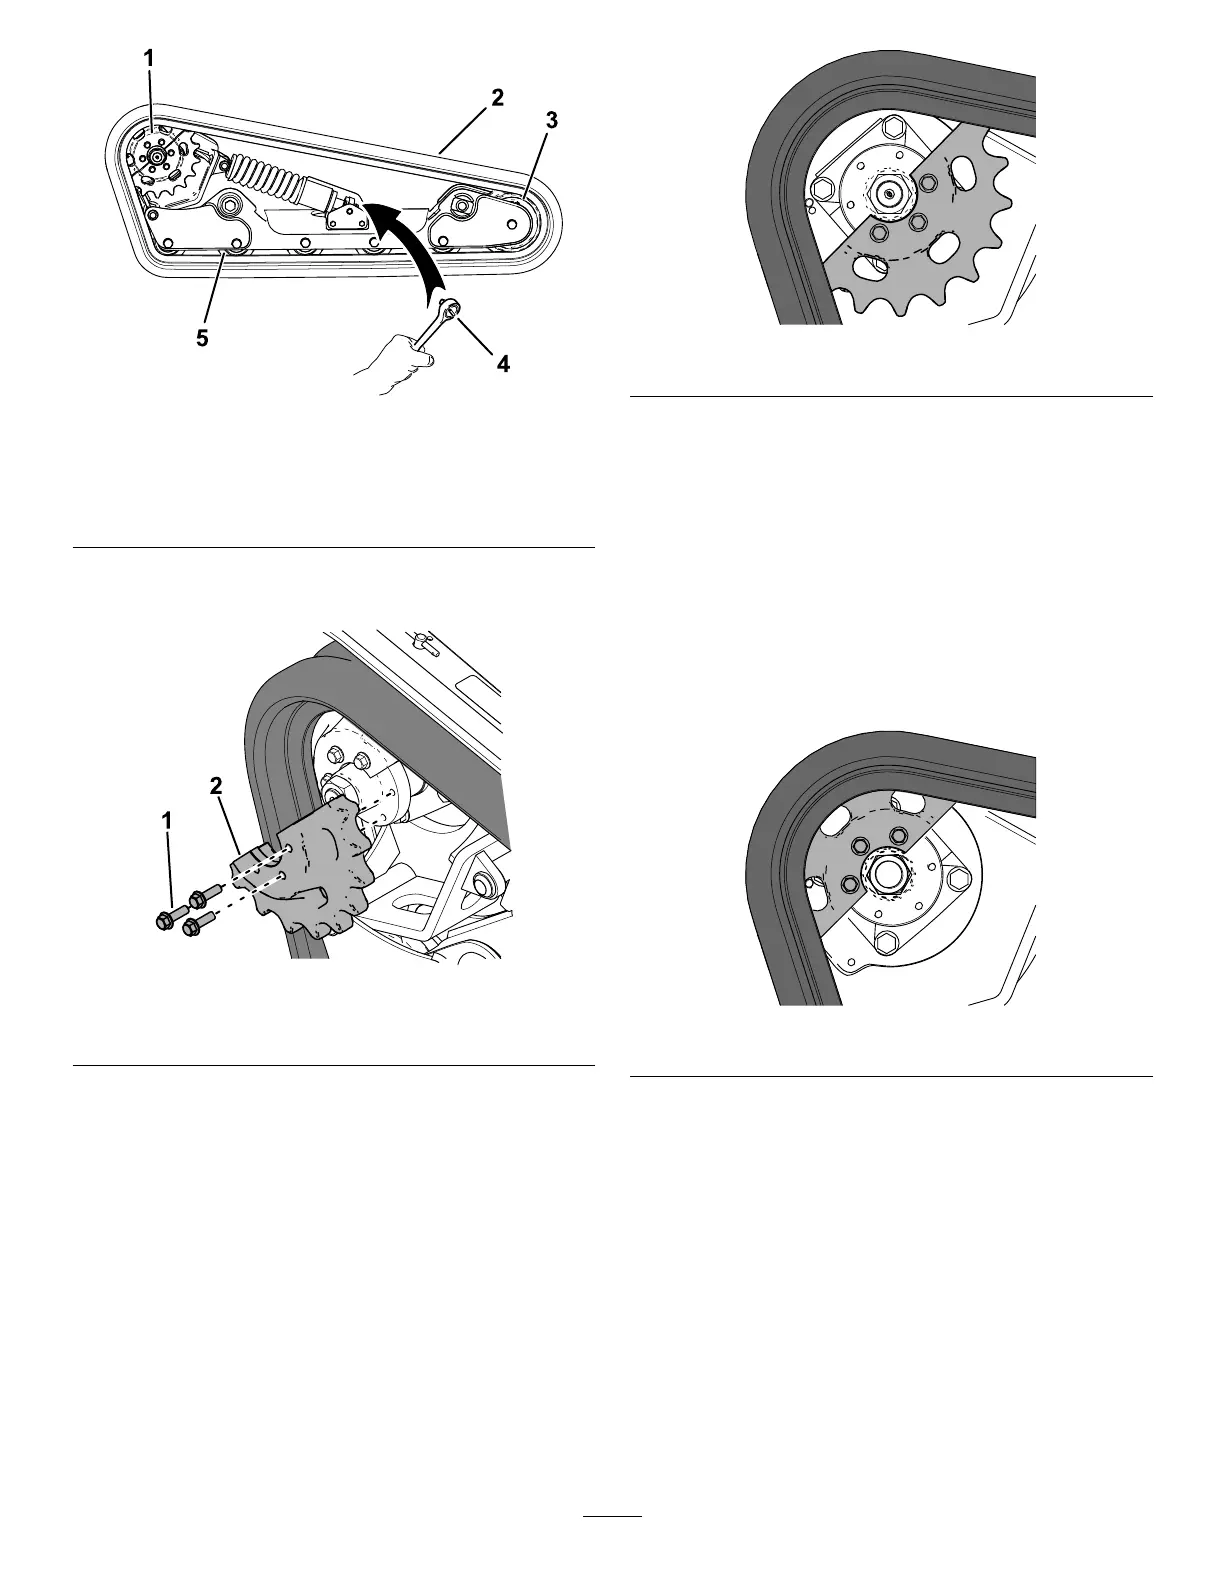
Figure61
1.Sprocket4.Ratchet(1/2inch)
2.Track
5.Roadwheel(5)
3.Frontwheel
9.Removethe3boltssecuringthesprockethalf
thatisnotengagedwiththetrack(Figure61).
g257925
Figure62
1.Bolt(3)2.Sprockethalf
10.Startthemachineanddisengagetheparking
brake.
11.Movethetractioncontrolforwarduntiltheother
halfofthedrivesprocketisnotengagedwith
thetrack(Figure63).
g259736
Figure63
12.Engagetheparkingbrake,shutofftheengine,
andremovethekey.
13.Removethetrackfromthetrackframe.
14.Wrapthenewtrackaroundthefrontwheel
(Figure61).
15.Pushthetrackunderandbetweentheroad
wheelsandwrapitaroundtheframe(Figure61).
16.Starttheengineanddisengagetheparking
brake.
17.Movethetractioncontrolforwarduntilthedrive
sprockethalfengageswiththetrack(Figure64).
g259737
Figure64
18.Engagetheparkingbrake,shutofftheengine,
andremovethekey.
19.Applythread-lockingcompoundtotheboltsof
thedrivesprockethalfthatyouremovedand
installthesprockethalf(Figure62).Torquethe
boltsto95to115N∙m(70to85ft-lb).
20.Usinga1/2inchdriveratchet,turnthetensioning
screwcounter-clockwiseuntilthetrackdeection
is12.7mm(1/2inch)asshowninFigure56.
21.Aligntheclosestnotchinthetensionscrewto
thelockingboltholeandsecurethescrewwith
thelockingbolt,spacer,andnut.
22.Lowerthemachinetotheground.
23.Repeattheproceduretoreplacetheothertrack.
41