24.Drivethemachine,thenparkthemachineona
levelsurface,engagetheparkingbrake,shutoff
theengine,andremovethekey.
25.Verifythatthetrackdeectionis12.7mm(1/2
inch)asshowninFigure56.
MachineswithWide-WidthTracks
Replacethetrackswhentheyarebadlyworn.
1.Parkthemachineonalevelsurface,engagethe
parkingbrake,andlowertheloaderarms.
2.Shutofftheengineandremovethekey.
3.Lift/supportthesideoftheunittobeworkedon
sothatthetrackis7.6to10cm(3to4inches)
offtheground.
4.Removethelockingboltandnut(Figure59).
5.Usinga1/2-inchdriveratchet,releasethe
drivetensionbyturningthetensioningscrew
clockwise(Figure59andFigure65).
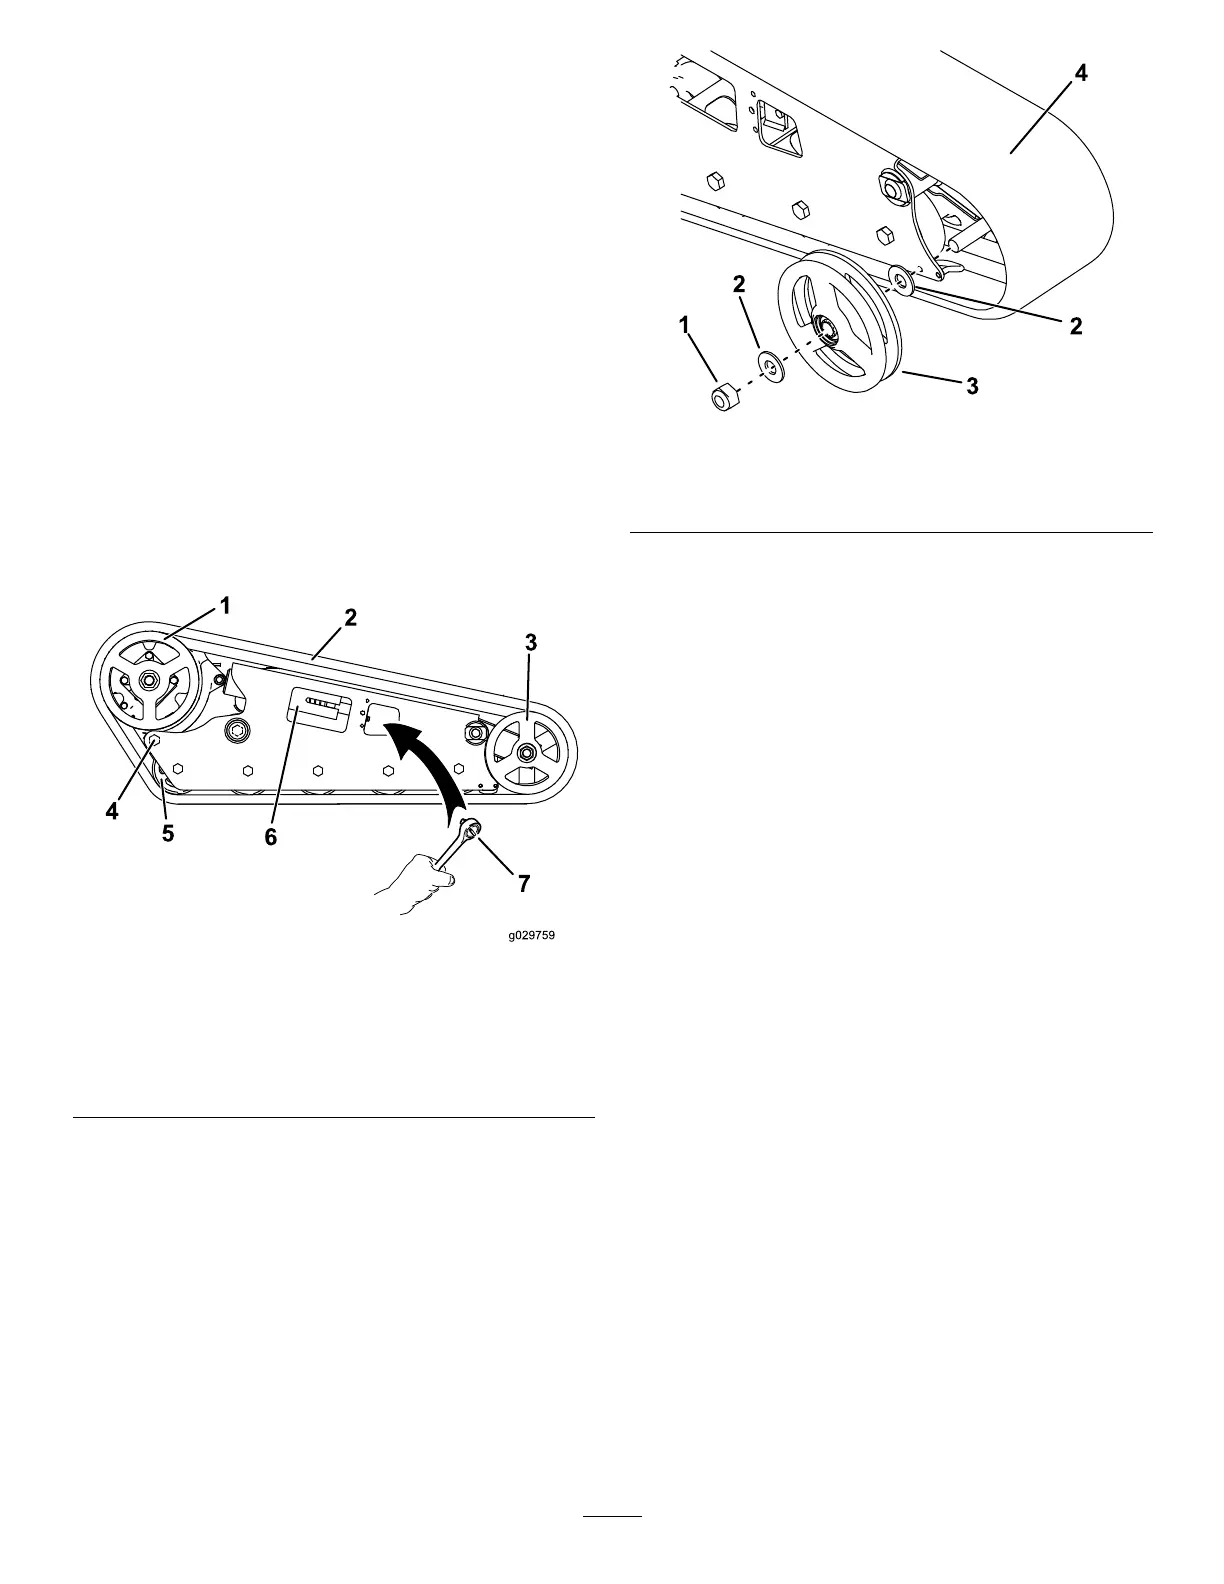
g029759
Figure65
1.Drivesprocket5.Roadwheel
2.Track6.Pivottensioner
3.Frontwheel
7.Ratchet(1/2inch)
4.Rearbolt
6.Loosentherearbolt,nearthedrivewheel
(Figure65).
7.Removethenutsecuringtheouterfrontwheel
andremovethewheel(Figure66).
g217640
Figure66
1.Nut
3.Outerfrontwheel
2.Washer4.Track
8.Removethetrack(Figure66).
9.Pullthe2largewashersoutoftheouterwheels,
1oneachsideofeachwheel(Figure66).
10.Cleantheoldgreaseanddirtoutofthearea
betweenwherethewasherswereinstalledand
thebearingsinsidethewheels,thenllthisarea
oneachsideofeachwheelwithgrease.
11.Installthelargewashersonthewheelsoverthe
grease.
12.Installthenewtrack.(Figure66).
Note:Ensurethatthelugsinthetrackt
betweenthespacersinthemiddleofthedrive
sprocket.
13.Installtheouterfrontwheelandsecureitwith
thenutremovedpreviously(Figure66).
14.Torquethenutto300ft-lb(407N∙m).
15.Turnthetensioningscrewcounter-clockwise
untilthetensioningscrewbottomsout(Figure
67).
42