32
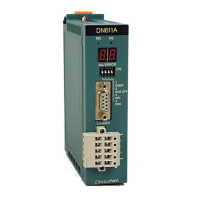
model 2000 DeviceNet Module Manual (DN611/DN611A)
Chapter 3 Preparations for Operation (Hardware)
3
3.4.1 Connecting DeviceNet cables to network connector
(1) Preparing DeviceNet Cables
Prepare the DeviceNet cables to be connected to the network connector for the
DN611 so their ends will be an open type (2 power cables, 2 signal cables, and 1
drain cable are discrete, that is, separated at the end). If not, purchase cables
processed to have the open end described above.
Figure 3-5 Processing DeviceNet Cable Ends
(2) Connecting DeviceNet cables to the network connector
This section describes how to connect DeviceNet cables to the network connector
shown at left in Figure 3-4 (upper and lower rows of holes for inserting cables). As
shown in Figure 3-6, loosen the cable clamp screws in advance.
Be careful of the colors of the cable sheaths in inserting the cables into the network
connector of the matching colors. Then, tighten the cable clamp screws.
Figure 3-6 Connecting Cables to Network Connector
Cable sheath color Description
Black Network power line (V-)
Blue Signal line (CAN_L)
- Shield/drain
White Signal line (CAN_H)
Red Network power line(V+)
5
~
7mm
About 30 mm
ケーブル固定用ネジ
下の段の穴のケーブル固定
ネジはこちら側にあります
色表示
黒
青
シールド/ドレイン
白
赤
Colors printed
Cable clamp screws
Black
Blue
Shield/drain
White
Red
Cable clamp screws for the lowe
row at the bottom
 Loading...