34
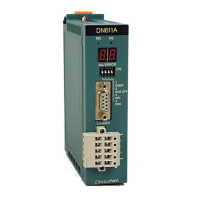
model 2000 DeviceNet Module Manual (DN611/DN611A)
Chapter 3 Preparations for Operation (Hardware)
3
Usage Recommendations
1. Loosen the cable clamp screws on the connector before inserting cables into the network
connector. The cables cannot be fixed when the screws are kept tightened.
2. The colors corresponding to cable colors are printed on the device connector of the DN611.
Match the cable colors with the printed colors to ensure the correct wiring.
3. The DN611 and DN311 (DeviceNet module for T3/T3H) are different from each other in the
direction in which the network connector is attached.
4. DeviceNet cables, power taps, and device taps (for connecting the trunk cables and drop
cables) are necessary when constructing a DeviceNet system. Refer to 3.6 Network Com-
ponents for details.
Some of the network components may have to be procured by the user.
5. If the network connector having two rows, top and bottom, of cable insertion holes (shown at
left in figure 3-4) is mounted in the DN611, it projects about 5 mm on the left of the DN611.
When removing or installing the left DN611 module, therefore, remove the network connec-
tor in advance.
 Loading...