Chapter 2 Installation and Wiring
6F8C1259
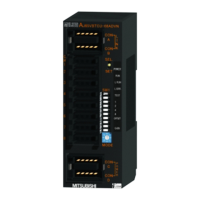
2.5 Replacing the Module
The PA912 module can be replaced while the system is not energized.
Turn off the DC24V power supply to the PA912 module.
Set the maintenance switch of the I/O base unit BU90A to the up (MAINT)
position.
Remove the TC-net I/O loop optical transmission cables and PROFIBUS
transmission cables (twisted pair cables) that are connected to PA912 from the
module.
Loosen the fixing screw on the top of the module, and rotate the module
downward to pull it off.
Remove the cables of the DC24V power supply that connected to the power
terminal of the I/O base unit BU90A.
Upon replacement, note the following.
• Make sure that the replaced module is the same model.
• Confirm that the cable connection of the DC24V power supply is correct
after the replacement.
• Set the hexadecimal rotary switch and 4-bit dip switch of the I/O base unit
BU90A to the same setting as the I/O base unit before replacement.
• After installing the module and connecting the TC-net I/O loop optical
transmission cable and PROFIBUS transmission cable, set the maintenance
switch to the down (RUN) position.
• After completing the module replacement, switch settings and cable
connection, turn the DC24V power on.
CAUTION
Before touching the module or inserting
or removing the transmission cable, wear
a wrist strap and white cotton gloves.
Ground the wrist strap to remove static
electricity.
Otherwise, it may cause damage or failure of
the module.
Mandatory
CAUTION
When placing the module during
replacement, use a conductive mat.
Ground the conductive mat.
Otherwise, it may cause damage or failure of
the module.
Mandatory
 Loading...