Chapter 3 Setting
6F8C1259
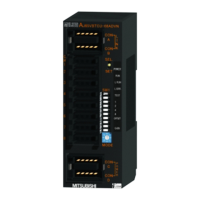
3.1.2 Operation mode setting switch (MODE)
PA912 module has the 4-bit dip switches to determine the operation mode.
Remark
•
For setting, use a small slotted screwdriver.
When the switch lever of each bit of the dip switch is turned to right (to the ON
side), it is set to ON; when it is turned to left, it is set to OFF.
Table 3-2 shows the descriptions of the switches.
Figure 3-2 Operation mode setting switch configuration
Table 3-2 Operation mode setting table
Settings Remarks
1 For Toshiba’s maintenance
Normally OFF is set as a default for all
switches.
OFF is set as a factory default for all switches.
Byte-swap mode is needed to be the Switch
number 3 ON and Use the nV-Tool V4.8.3 later.
2 For Toshiba’s maintenance
3 For Byte-swap mode
4 Spare
Note
•
The loop address setting switch and operation mode setting switch in the front of the
module capture values when the power is turned on. When the switch setting is changed,
turn on the power again.
Note
•
To enable Byte-swap mode, it is necessary to set the Operation mode switch 3 ON. Confirm
the PA912 Firmware version V2.2x or later and nV-Tool V4.8.3 later, before you enable the
switch No.3 ON.(more information about how to use the byte-swap mode, refer 3.3.2)
•
After you set the switch No.3 ON for enabling the Byte-swap mode, Do not forget the restart
PA912 with the Maintenance switch.
•
While Byte-swap mode ON, the performance of exchanging Input data and output data
between TC-net I/O Loop and PROFIBUS Slave I/Os will get worsen about 20persent at
worst case, compared Byte-swap mode OFF.
•
If the Byte-swap mode OFF with switch No.3 OFF, factory default settings, PA912 ignore the
Byte-swap command from nV-tool.
•
Specification of Byte-swap mode is identified at Appendix A.6.
Important
•
Never operate the switches for maintenance and for spare.
MODE
2
3
4
ON
 Loading...