IF08CZ10 April, 2019 - 85 -
DRIVE INSTALLATION DRAWINGS (cont’d)
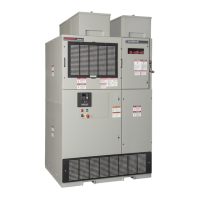
Frame B2 2400V module lifting and installation Type 1
Disconnect power and wait 15
minutes to ensure capacitors are
discharged before performing
inspection or maintenance.
Power Module Removal
1. Lift latch and lower shelf to
service position.
2. Disconnect ACL power
cable.
3. Disconnect control plug.
4. Disconnect P, C & N bus
bars by removing hardware
"A".
5. Remove bolt "B".
6. Slide module out of comp-
artment and onto shelf.
7. Disconnect four (4) fiber
optic cables from module.
8. Using module lifting
attachment and lifter, lift
module from shelf.
Power Module Installation
1. Lower shelf to service
position.
2. Using module lifting
attachment and lifter, place
module on shelf.
3. Reconnect four (4) fiber
optic cables to module.
4. Align module and push into
compartment until it stops.
5. Reinstall bolt "B".
6. Install previously removed
hardware "A" to connect
P, C & N bus bars.
7. Reconnect control plug.
8. Reconnect ACL power
cable.
9. Torque P, C, N & ACL
connections (5/16-18 hdwr)
to 10-15 ft-lbs.
10. Push shelf back up and
latch in stowed position.
LIFT HERE
LATCH TO HOLD SHELF
IN STOWED POSITION
SHELF IN LOWERED
(SERVICE) POSITION
ACL
CONTROL
PLUG
A
A
A
N
C
P
LIFTING ATTACHMENT
GCI673BG055
B
FIBER OPTIC
CONNECTORS
(2 - FRONT)
FIBER OPTIC
CONNECTORS
(2 - REAR)
Improper handling of the fiber
optic cables and connectors may
cause drive failure due to
problems transmitting signals.
Take care when handling fiber
optic cables.
Use module lifting attachment
GCI673BG055 and a lifting
device rated 125 lbs minimum
for removal and installation of
modules.
WARNINGS

 Loading...