IF08CZ10 April, 2019 - 112 -
DRIVE INSTALLATION DRAWINGS (cont’d)
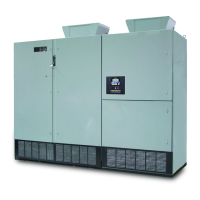
Frame MTX2-15 module lifting and installation
WARNINGS
Disconnect power and wait 15
minutes to ensure capacitors
are discharged before performing
inspection or maintenance.
Improper handling of the fiber
optic cables and connectors may
cause drive failure due to
problems transmitting signals.
Take care not to disturb fiber
optic cables when handling
power module.
Power Module Disconnection
1. Remove front barrier
(four bolts).
2. Disconnect six AC input
cables and AC ouput cable.
3. Remove AC neutral bus
(three bolts)
4. Remove control wiring
cover (two bolts).
5. Disconnect control signal
cable and 120VAC supply cable
from power module. Insert
cables inside the wireway
tray to avoid damage.
Power Module Removal
1. Release locking levers then slide power
module forward until slides lock.
2. Remove six power module mounting nuts.
3. Attach lifting attachment (GCI6825G054)
on module with 4 bolts.
4. If present use overhead lifting attachment
with provided trolley, hoist & chain bucket,
or use appropriate lifting device.
Note: Lifting attachment, trolley, hoist &
chain bucket are stored in Utility box located
in rear LH side of inverter cubicle.
Power Module Reinstallation
1. Reverse the procedure
followed during
disconnection and removal
of power module.
2. Ensure that control signal
cable and 120VAC supply
cable are properly
reconnected.
3. Reinstall all hardware
previously removed.
4. Torque all electrical
connections (5/16-18 hdwr)
to 10-15 ft-lbs.
Front Barrier Bolt
Locations
Control Signal Cable
Connection
120VAC Supply Cable
Connection
Control Wiring
Cover
AC Input Cable
Connections
AC Neutral Bus
AC Output Cable
Connection
Lifting Attachment
(GCI6825G054)
REAR PARTIAL VIEW
INVERTER
Power Module
Mounting Nut Location
Optional Utility Box
Location
Optional Overhead,
Trolley and Hoist
Levers
Chain Bucket
Wireway Tray
 Loading...