IF08CZ10 April, 2019 - 69 -
DRIVE INSTALLATION DRAWINGS (cont’d)
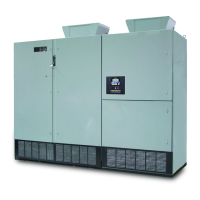
Frame 3 4160V module installation
ACN P C N ACL
D
C
B
A
E
F
WIREWAY
FRONT VIEW
R.H. SIDE VIEW
Power Module Removal
1. After capacitor discharge, open upper Power Module
cover.
2. Disconnect Control Cable from PCB 'A' and lay in
wireway above Power Module.
3. Disconnect Control Power Cable 'B', lay in wireway
above Power Module.
4. Remove (5) bolts 'C' from bus stabs ACN, P, C, N & ACL
5. Remove (1) bolt 'D' from back of Power Module
cableway.
6. Lock Truck GCI6723G055 to enclosure, insert truck pins
into holes in front edge of lower pan 'E'. Set truck brake.
7. Withdraw Power Module by handles onto truck until
latch engages 'F'. Unlock truck.
WARNINGS
Disconnect power and
wait 15 minutes to
ensure capacitors are
discharged before
performing inspection
or maintenance.
Improper handling of
the fiber optic cables
and connectors may
cause drive failure due
to problems
transmitting signals.
Take care not to
disturb fiber optic
cables when handling
power module.
Use Truck
GCI6723G055 for
removal & installation
of modules.
Power Module Installation
1. Load Power Module onto Truck. Engage truck latch 'F'.
2. Lock Truck GCI6723G055 to front of enclosure, inserting
truck pins into holes in front edge of lower pan 'E'.
3. Unlatch Power Module 'F'. Roll Power Module by handles
from truck onto enclosure rail until enclosure and Power
Module bus stabs touch.
4. Install (1) bolt 'D' at back of cableway. Unlock, remove truck.
5. Install (5) bolts 'C' through bus stabs ACN, P, C, N & ACL.
Torque all power connections (5/16-18 hdwr) to 10-15 ft-lbs.
6. Connect Control Power Cable from wireway as shown at 'B'.
7. Connect Control Cable from wireway to PCB as shown at 'A'.
8. Close upper Power Module cover. Secure with 2 bolts.
9. Replace outside filter cover.
PC94060P092
PM CABLEWAY
TRUCK BRAKE
 Loading...