27/68
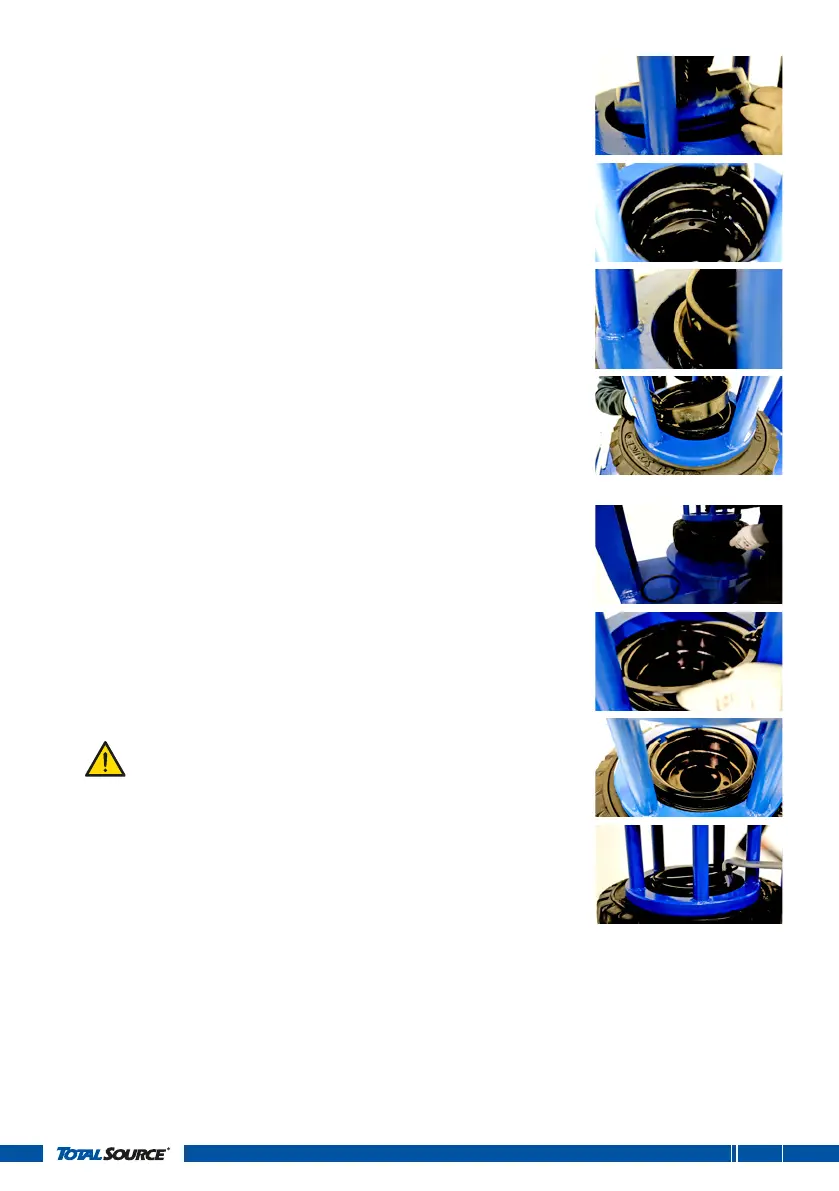
12. Remove the cone but leave the cage.
13. Place the advance band.
14. Press down further to create the needed space.
15. Fit the advance band.
16. Press the UP button to release pressure.
17. Position the side ring on top of the advance band.
18. Place the locking ring on top of the side ring.
19. Push the DOWN button again.
It is important that the flange plate pushes on the side
ring!
20. Secure the locking ring.
21. Press the UP button to release the pressure. Make sure the
flange plate is in its starting position.
22. Lift the tyre with two people. Your tyre is ready for use.