- 80 -
Edit - Here you can edit or delete an existing rule.
Add New - Click the Add New button to add a new rule entry.
Enable Selected - Click the Enable Selected button to enable selected rules in the list.
Disable Selected - Click the Disable Selected button to disable selected rules in the list.
Delete Selected - Click the Delete Selected button to delete selected entries in the table.
How to add a new rule:
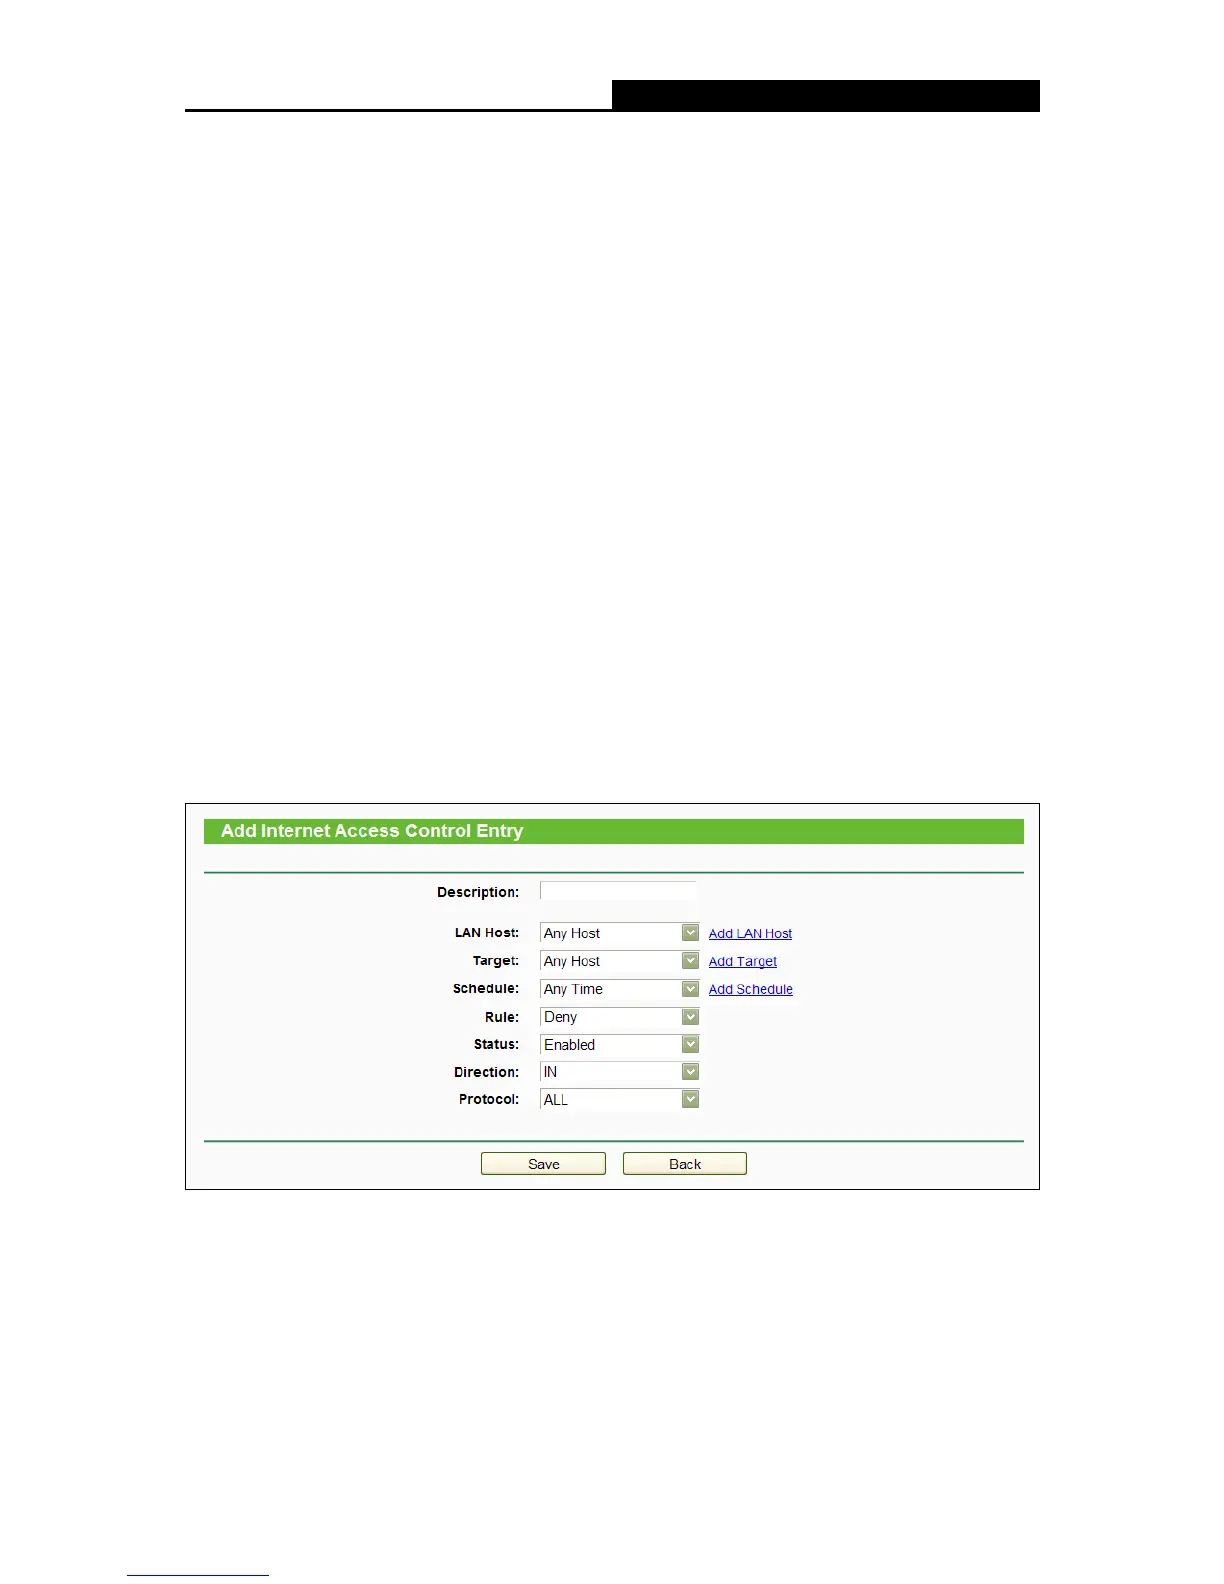
1. Click the Add New button and the next screen will pop up as shown in the following figure.
2. Give a name (e.g. Rule_1) for the rule in the Description field.
3. Select a host from the LAN Host drop-down list or click “Add LAN Host”.
4. Select a target from the Target drop-sown list or click “Add Target”.
5. Select a schedule from the Schedule drop-down list or click “Add Schedule”.
6. In the Status field, select Enabled or Disabled to enable or disable your entry.
7. In the Direction field, select IN or OUT.
8. Select a schedule from the Protocol drop-down list.
9. Click the Save button.
For example: If you desire to allow the host with MAC address 00 : 11 : 22 : 33 : 44 : AA to access
www.tp-link.com only from 18:00 to 20:00 on Saturday and Sunday, and forbid other hosts in the
LAN to access the Internet, you should follow the settings below:
1. Click the submenu Rule of Access Control in the left to return to the Rule List page. Select
Enable Internet Access Control and choose "Allow the packets specified by any
enabled access control policy to pass through the router".