S9V2-SVX001-1B-EN
81
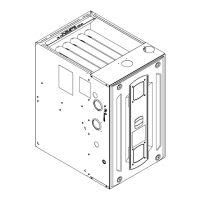
3. Remove drain tubing from bottom of inducer
housing.
4. Remove rain gutter tubing from inducer outlet.
5. Remove tubing from condensate pressure switch.
6. Remove the screws that hold the condensate trap
bracket. The condensate trap should not be
removed from the condensate trap bracket.
Remove assembly and retain for later installation.
NNoottee:: There is a plastic adapter with O-rings located
inside the cold header that is held in place by the
condensate trap bracket. Do not lose this adapter.
This adapter needs to be in place when the
condensate trap bracket is reattached.
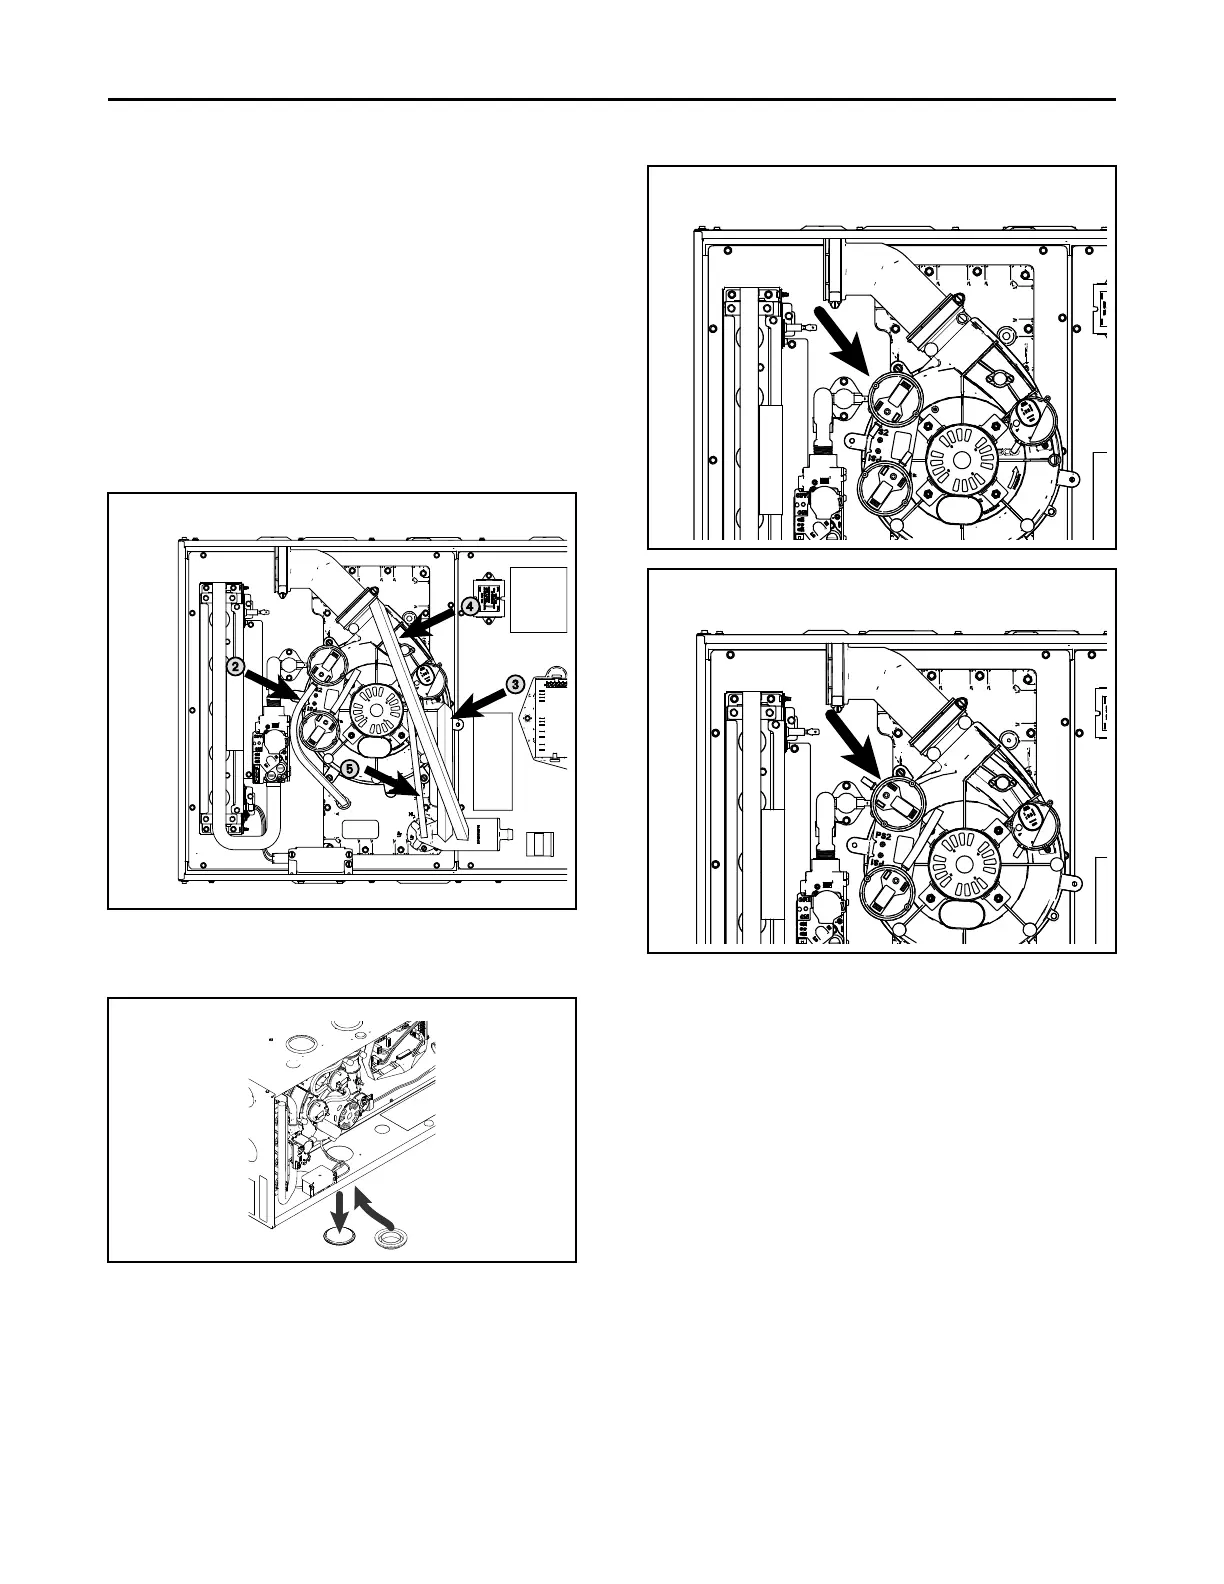
7. Remove plug from 3” hole.
8. Install condensate trap grommet.
9. Remove the pressure switch bracket assembly.
10. Remove the screw that holds PS2, rotate 90 degrees
clockwise, and reattach.
11. Reattach the pressure switch bracket assembly.
12. Attach the vent outlet gasket to the vent outlet.
13. Install vent outlet to top of cabinet using 2 screws
supplied in the doc pack.
14. Install vent inlet gasket and vent inlet using 4
screws supplied in the doc pack.
FFuurrnnaaccee CCoommbbuussttiioonn AAiirr EExxhhaauusstt OOppttiioonnss
 Loading...