RCDA-SVN002C-EN 11
Installation
Check the Configuration and
Setpoints in the DynaView™
Display/Controller
1. Check the current configuration of the DynaView™ and
confirm that all settings are correct. Make any
necessary changes.
2. Check the current chiller se
t-point
s programmed into
the DynaView and confirm that they are all correct for
the unit. Make any necessary changes.
Export the DynaView™
Configuration and Setpoints
Configuration and setpoint values are required to be saved
from the DynaView™ control in order to successfully
configure the upgraded UC800 controller. Using
KestrelView™ on a PC or laptop computer:
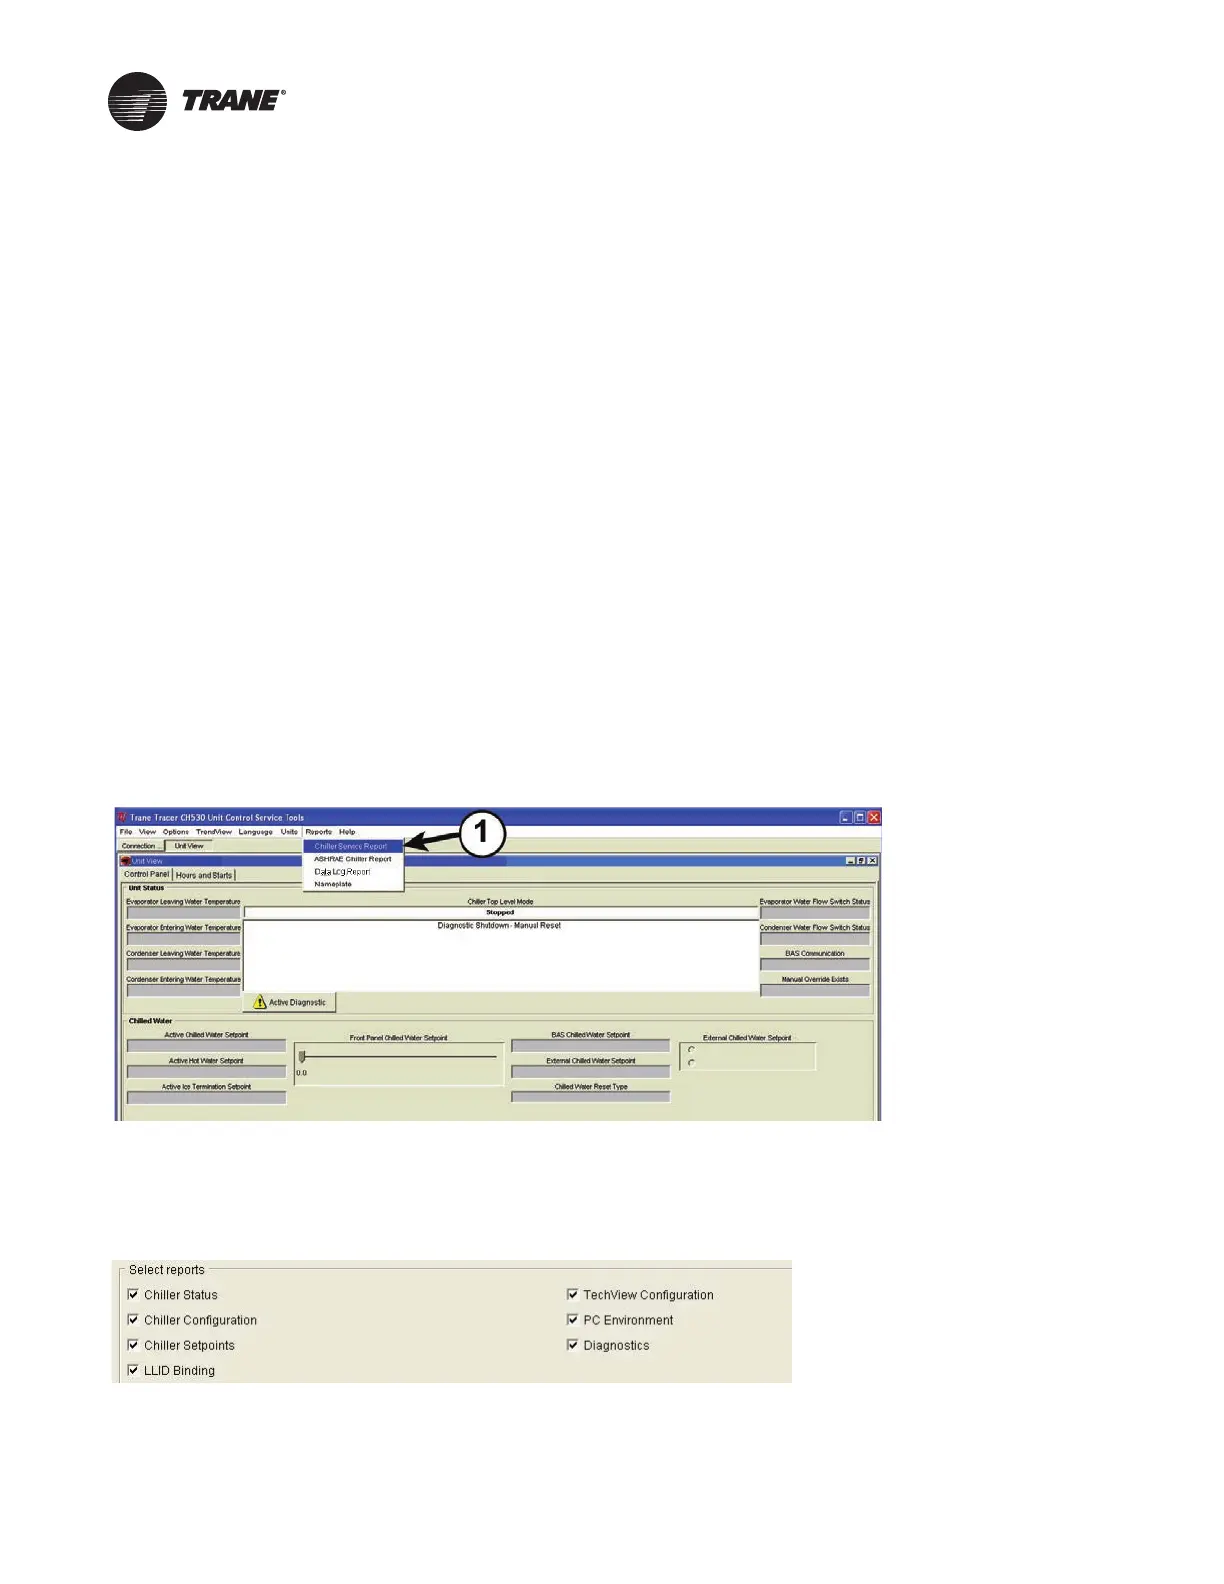
1. Generate a Chiller Service report from the DynaView
with
Level 4 activ
e. To do this, click on Reports Menu
and select Chiller Service Report.
Figure 2. KestrelView screenshot—accessing Chiller Service report
2. Select all reports to ensure that you get a complete
report a
nd convert the report to PDF. The PDF file will
be required to manually copy configuration and
setpoint values with Tracer
®
TU once the Tracer
®
AdaptiView™ display and UC800 are installed.
3. Verify that the PDF report was printed. The PDF report
will be used when configuring the upgraded UC800
controller within Tracer TU.
 Loading...


