48 UNT-SVX07B-EN
Installation—General
Installing the Unit
Follow the procedures below to install the unit properly. Refer to “Dimensions and Weights,” p. 14
for specific unit dimensions and mounting hole locations.
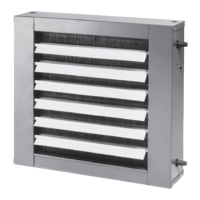
Vertical Units
NOTICE
Electrical Wiring!
Do not allow electrical wire to fall between the unit and installation surface. Failure to comply
may result in electrical shorts or difficulty accessing wires.
Install vertical units in an upright position using the 5/8-inch diameter double key slot hanger holes,
located on the back of unit. The hanger holes allow a maximum shank size of 5/16-inch diameter
threaded rods or lag screws (installer provides).
1. Prepare wall openings for recessed units. Reference unit submittal for each unit size
dimensions. When installing vertical units, consideration should be given for units with an
outside air intake.
2. If the unit has leveling legs, adjust them correctly to level unit.
3. Mark the position of the keyslot hanger holes on the wall according to the dimensions given
in
“Dimensions and Weights,” p. 14 for each unit model and size. Align the hole locations
evenly.
4. Insert the threaded rods or lag screws in the wall before setting the unit in place.
5. Remove the front panel (cabinet unit only) by lifting it upward.
6. Position the hanger holes, located on the back of the unit, over the rod or lag screw heads,
pu
shing the unit downward to properly position.
7. Complete piping and wiring connections, in addition to any necessary ductwork to the unit as
i
nstructed in the following sections. Ensure that the auxiliary drain pan is in position on fan-coil
units.
8. Install the front panel before starting the unit.
On cabinet units, replace the front panel
by aligning the bottom tabs on the unit with the respective
slots on the panel bottom. Slide the front panel down onto the tabs while holding the panel close
as possible to the cabinet. While the bottom tabs are engaged, slide the front panel upward enough
to allow the top engaging edge of the front panel to lap over the engaging edge of the unit. This
should allow the panel to drop down and lock into position.
On recessed units, install the front panel by aligning and locking together the interlocking support
channel of the panel and unit. While holding the panel against the unit, tighten the screws at the
top of the panel until it fits tight against the unit’s front. Do not over tighten the screws.
NOTICE
Motor Overload!
All unit panels and filters must be in place prior to unit startup. Failure to have panels and filters
in place may cause motor overload.
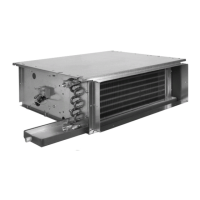
Horizontal Units
Install horizontal units suspended from the ceiling using the four 5/8-inch diameter double key slot
hanger holes, located on the top of the unit. The hanger holes allow a maximum shank size of
5/16-inch diameter threaded rods or lag screws (installer provided). Follow the installation
procedure below.