47
(5) After the fitting of front axle, it requires to run the front central drive gear shaft by hand. If it running
handy and producing equal speeds between the right and the left front drive shafts. It means well-fitting,
otherwise you should fit it again.
5.12 The Structure, installation and Disassembly of Transmission Shaft and Transfer Case
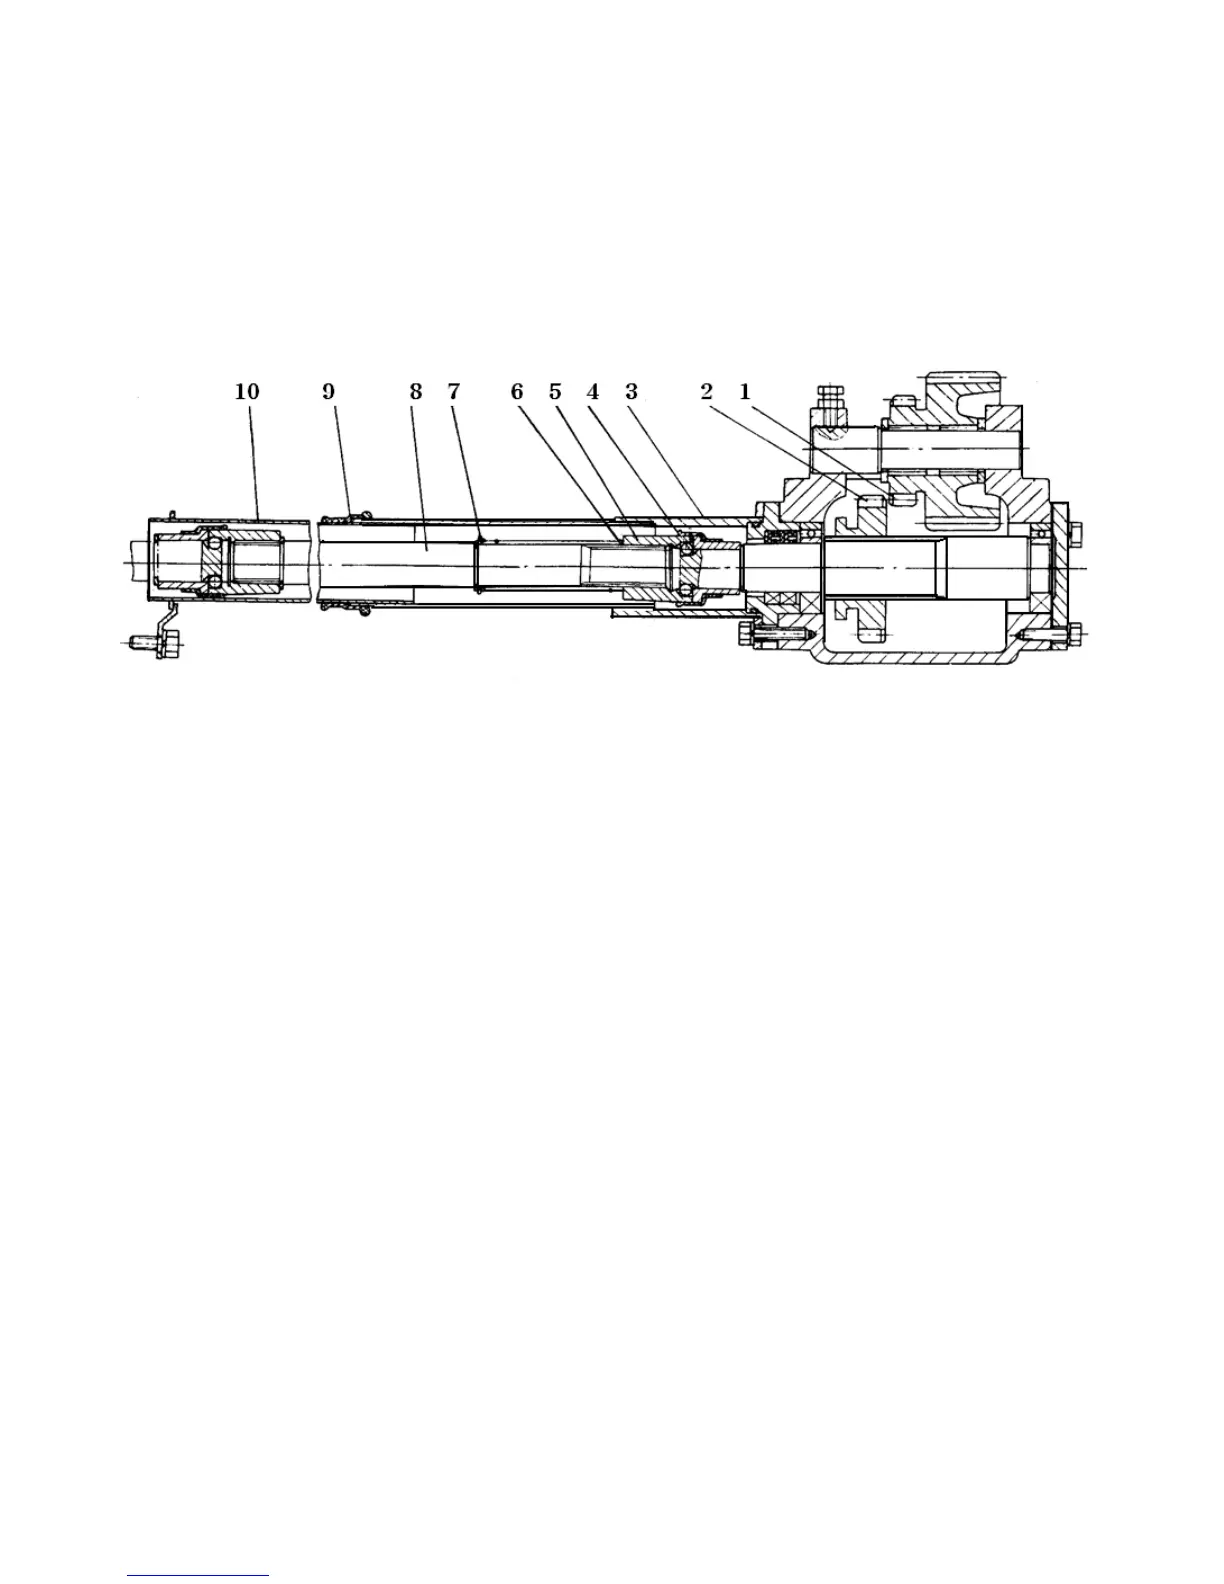
Fig. 5-18 Transfer case and transmission shaft assy
1. Intermediate gear 2. Sliding gear 3. Rear sleeve assy 4. Steel ball 5. Ball joint sleeve
6. Spring 7. Snap ring 8. Transmission shaft 9. Protection shield 10. Front sleeve assy
When disassembling the transmission shaft, first you should take apart the 3 bolts (M8X25) from the
rear sleeve assy, secondly slide forward the rear sleeve assy until the axial snap ring is shown, then
loosen the snap ring and move the ball joint sleeve toward the front central drive housing until it stops
moving forward again. Now you can easily disassembly the drive shaft. Here pay attention to the losses
of steel balls and their mixture with those steel balls which should be installed on the shift fork shaft of
the transmission housing.
5.13 Connection and Adjustment of Front Axle and Its Bracket
The front axle and the bracket are connected by the front & rear supports. When the tractor travels on
the zigzag path, the front axle can swing around to reach ±11° swing angles. Since the frequent
swinging wearing, one of its adjusting ring on the rear support is easy to be worn out, thus you should
give it an instant help by adjusting the bolt on the front support (in clockwise direction and lock the nut.)
The adjusting ring should be changed a new one after using for some time.