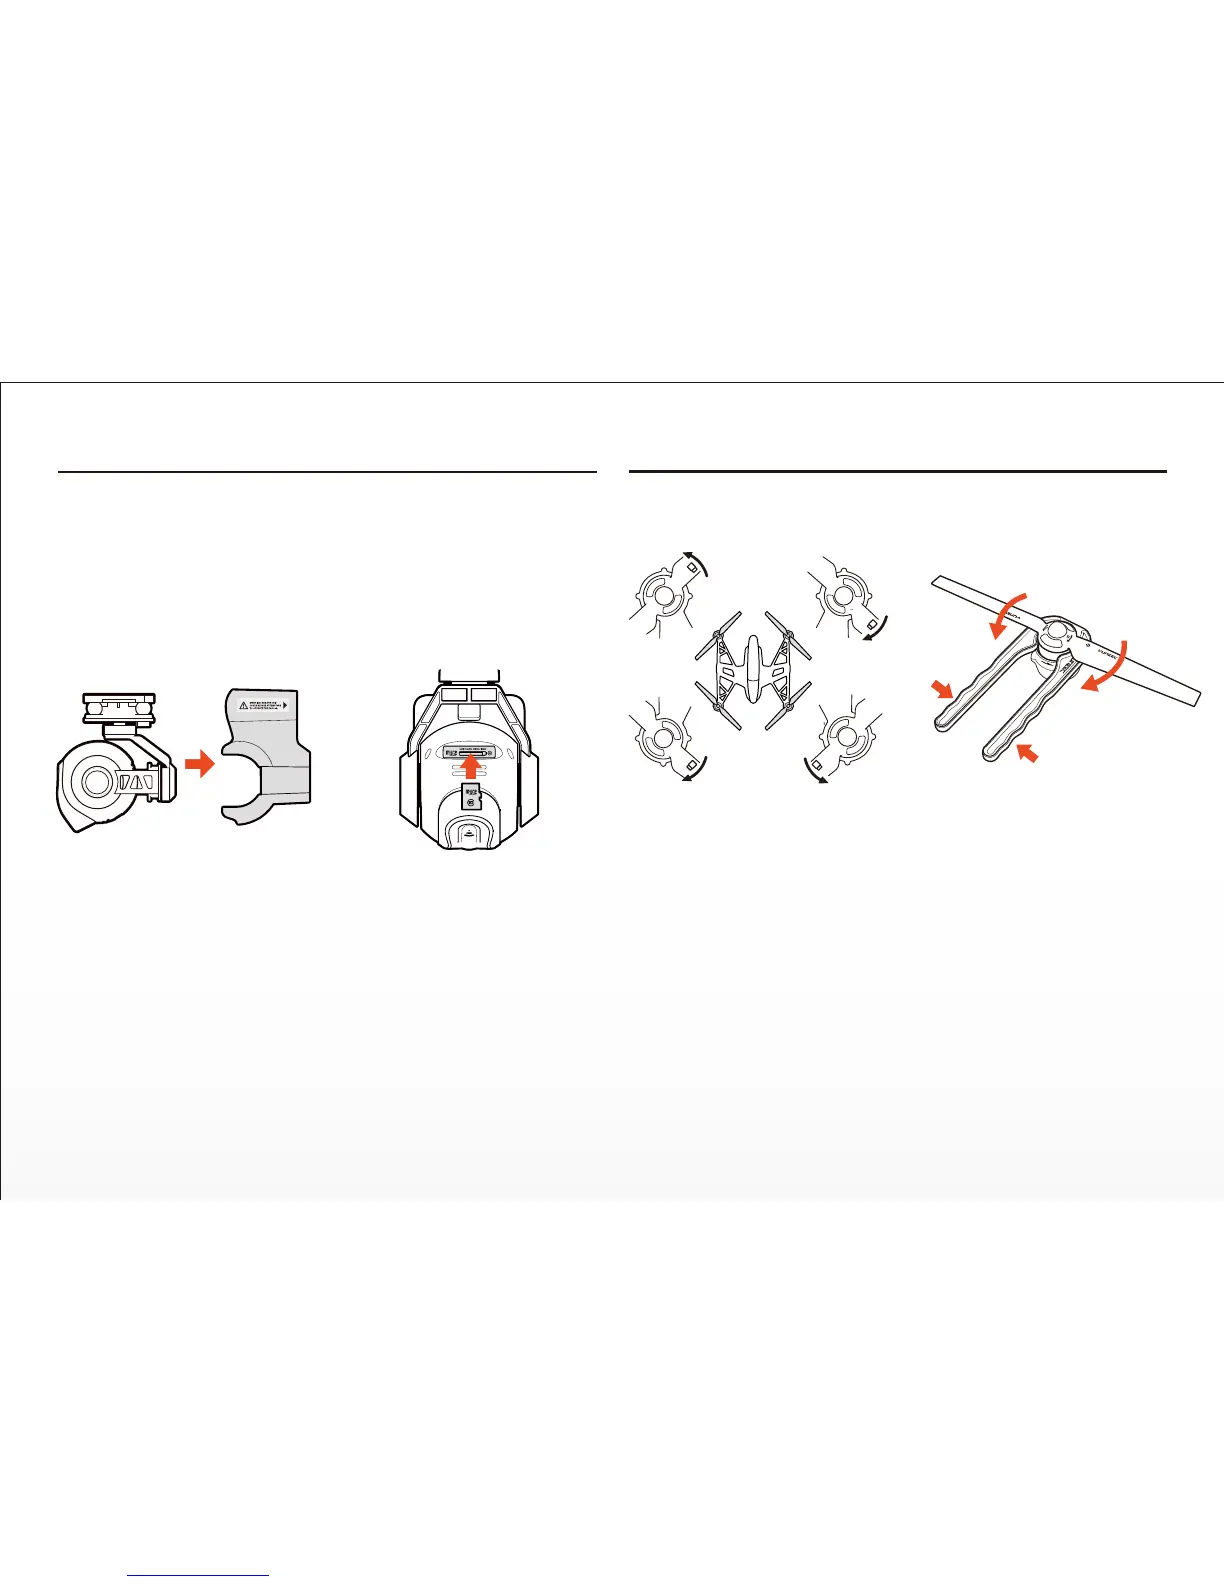
Preparing The CGO2+
WARNING: Before installing the flight baery and powering on TYPHOON
you MUST remove the cover/lock from the rear of the CGO2+ by carefully
sliding it backward. Failure to remove the cover/lock can result in damage
to TYPHOON and the CGO2+!
QUICK TIP: It’s a good idea to re-install the cover/lock aer each flying
session and while transporng/storing TYPHOON (just remember to
remove the cover/lock before powering on TYPHOON and CGO2+!).
Step 1) Remove the cover/lock from the rear of the CGO2+ by carefully
sliding it backward.
Step 2) Slide the microSD card into the corresponding slot on the boom of
the CGO2+. You can use the included 8GB card or any Class 10 microSD
card up to 128GB.
Step 3) Carefully remove the protecve material from the camera lens.
Installing The Propellers
WARNING: We recommend wearing gloves and using extreme care when
installing the propellers/rotor blades.
Each motor and propeller are marked with an ‘A’ or ‘B’ to ensure easy
installaon in the correct posions (for example: install propellers marked
with ‘A’ on motors marked with ‘A’).
IMPORTANT NOTE: It is NOT possible to install a propeller marked with
‘A’ on a motor marked with ‘B’. The threads go in different direcons for
the ‘A’ and ‘B’ motors/propellers.
Step 1) Use the special tool (included) to hold the motor so it cannot spin.
CAUTION: Do not over-ghten the propellers when using the tool.
Step 2) Install the corresponding propeller by rotang it trialing edge first
unl it‘s secure against the o-ring located at the boom of the motor sha.
Step 3) Repeat steps 1 and 2 to install the three remaining propellers
securely.
A
A
B
B
9